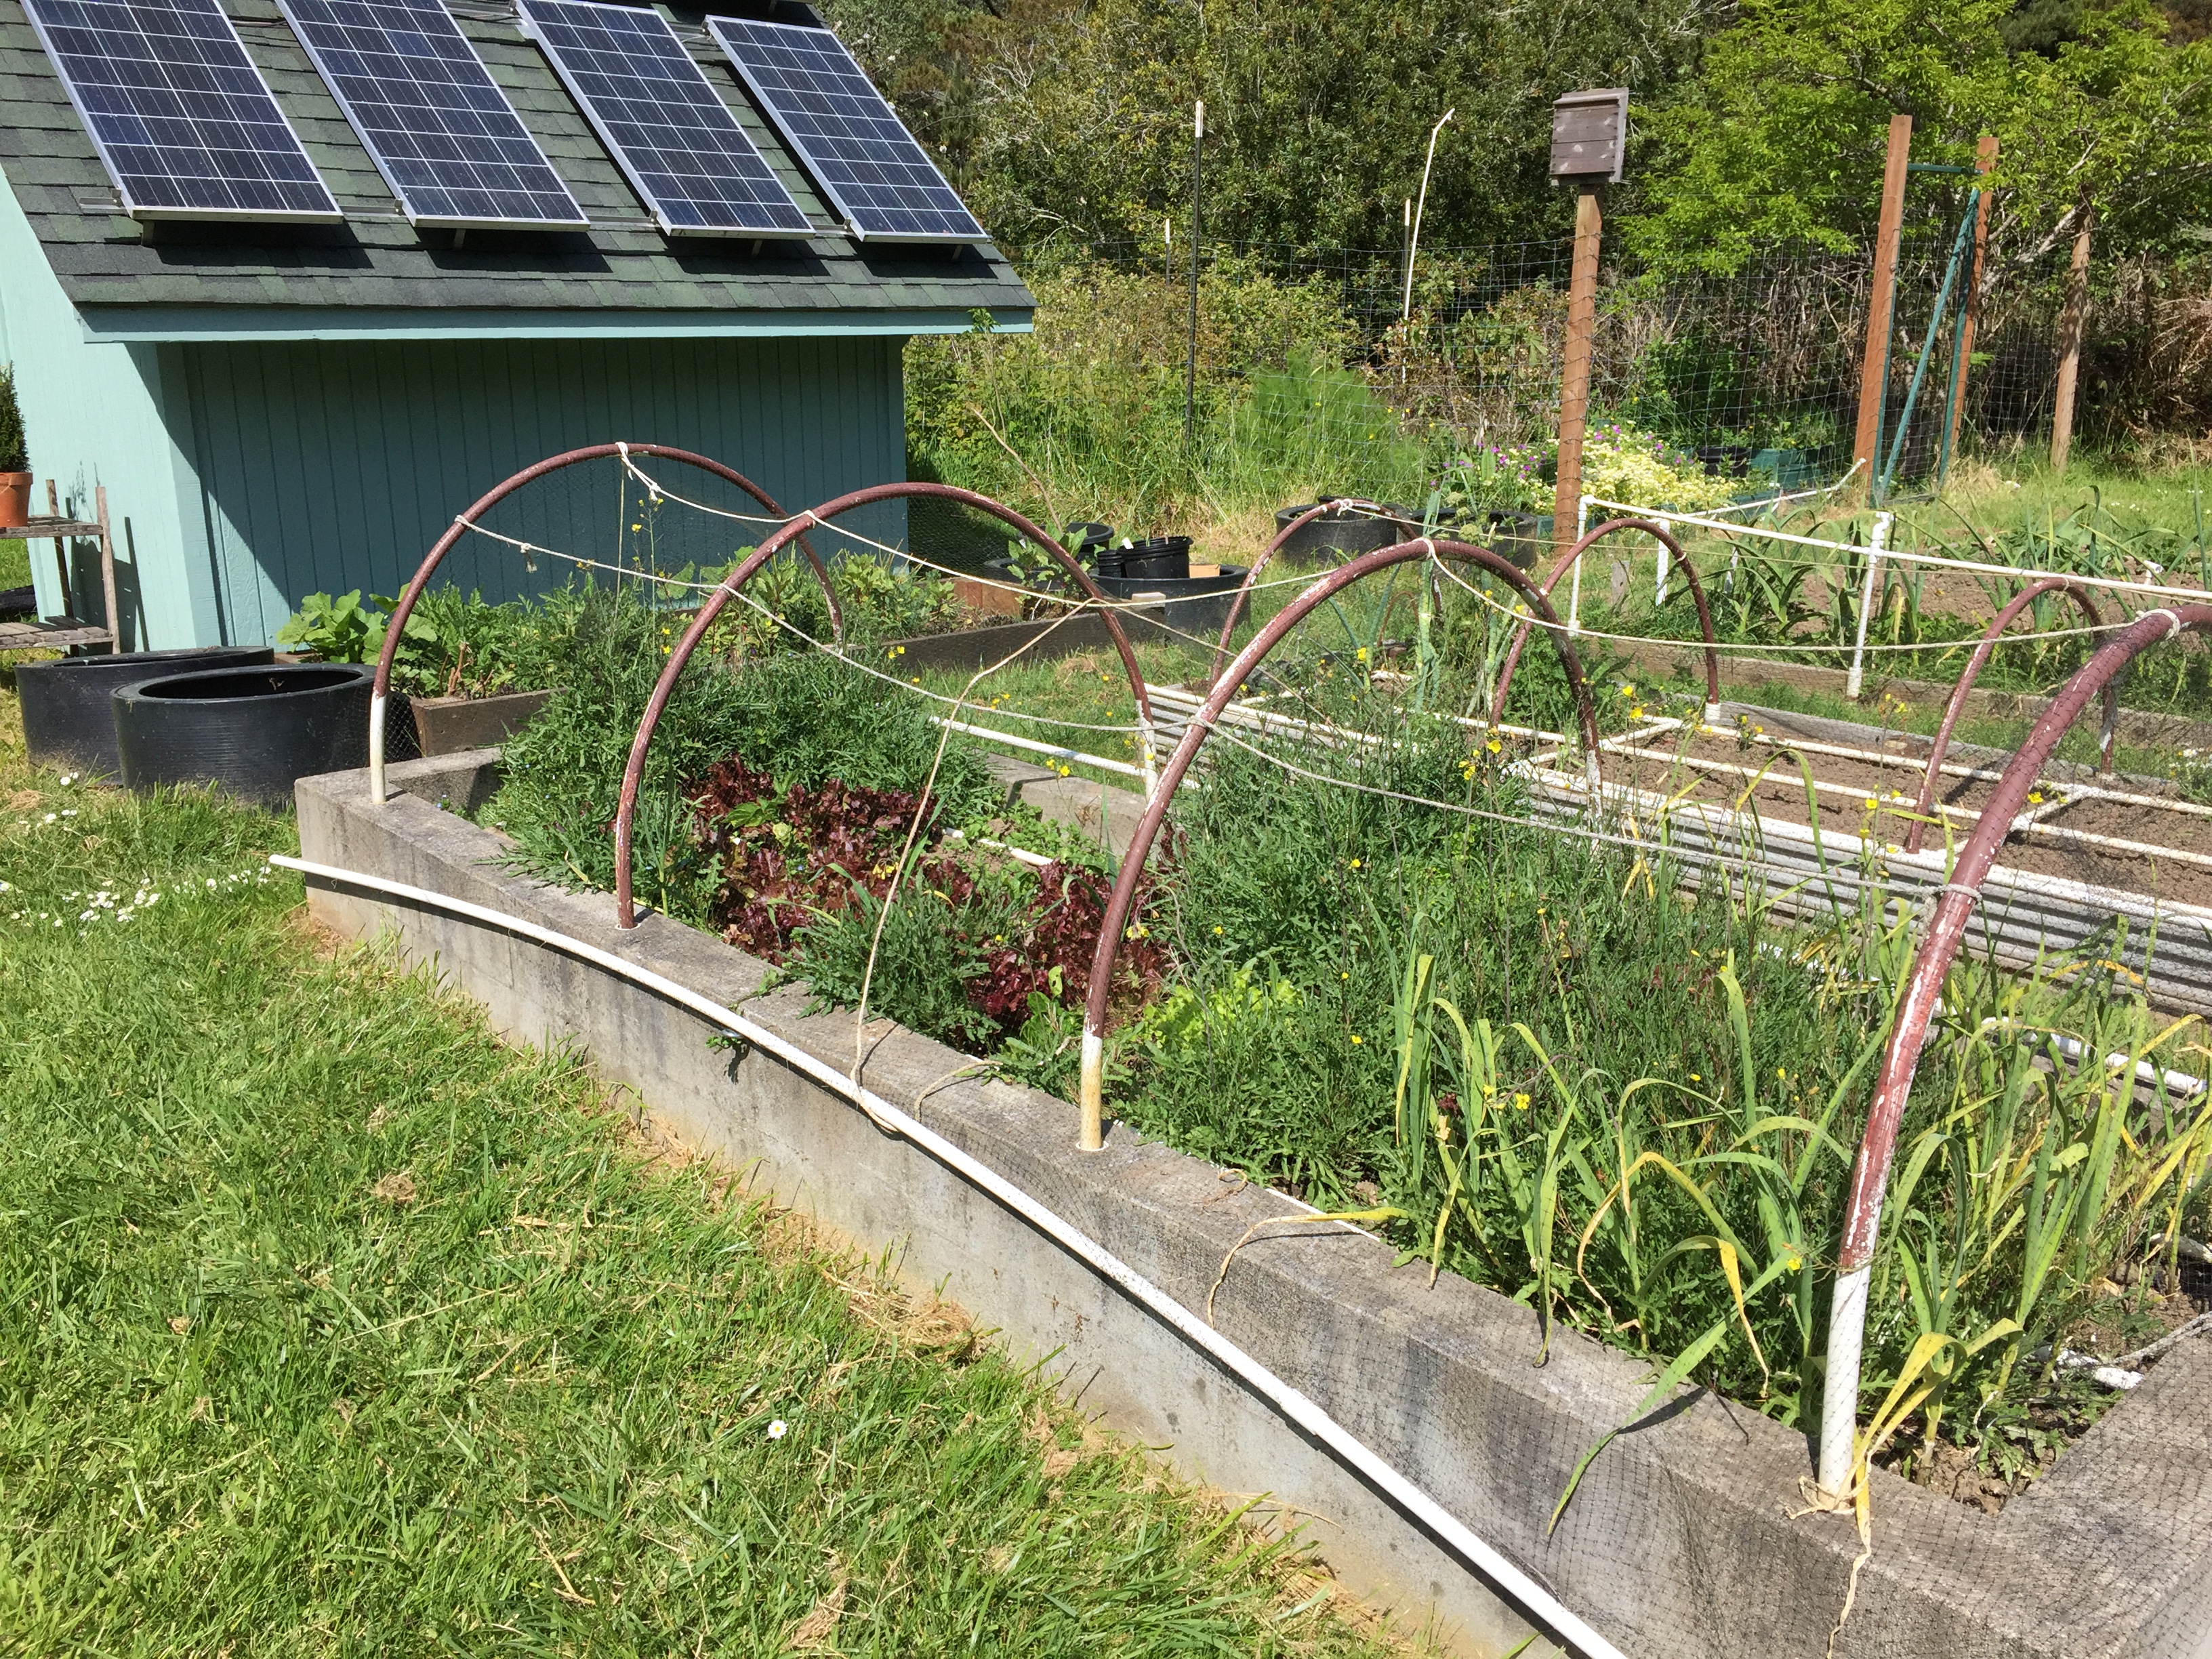
June 22…I mowed half the mustard flowers down and spaded them into the soil. Those lengths of white pvc were supposed to hold the deer netting over the clover, but the clover experienced a freeze at a delicate stage and died out. All this mustard is volunteer courtesy of our compost bin. Clearly, it doesn’t get hot enough in the bin to kill the seeds.
Two years ago we planted turnip seeds in July and had the happy surprise of turnip flowers in January. The bees appreciated having a nectar/pollen source in the middle of winter.
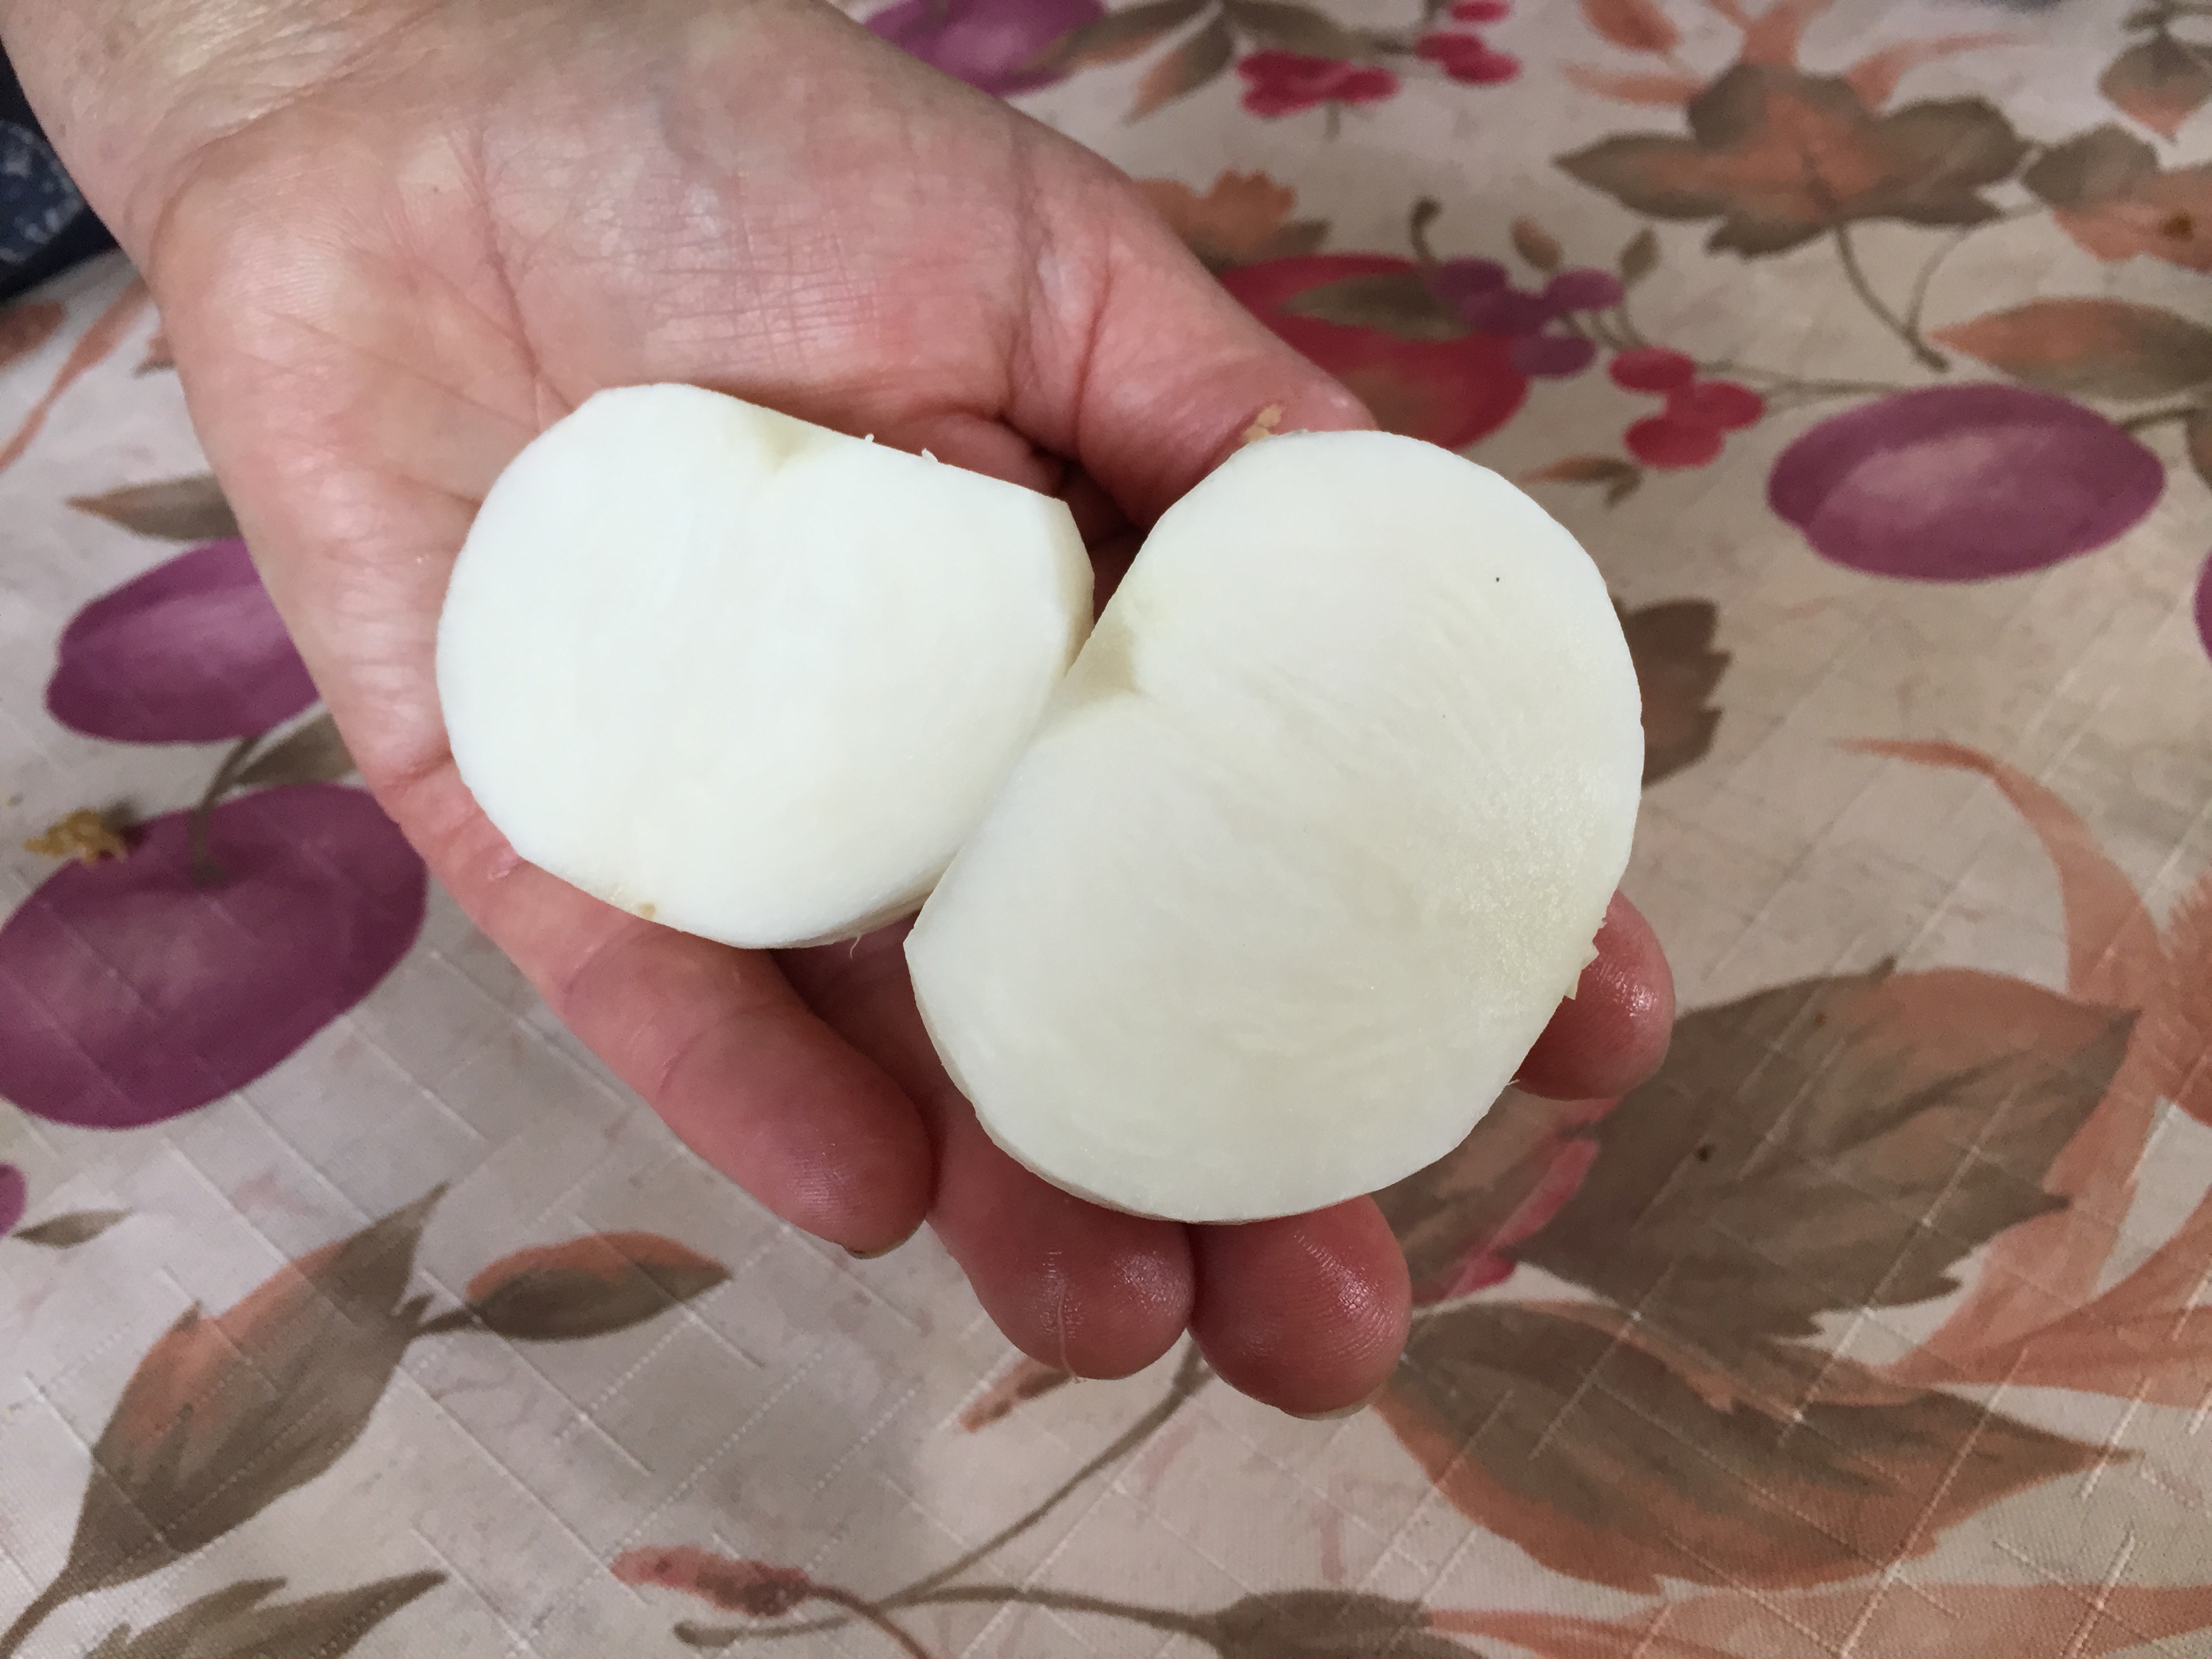
Last year we tried growing turnips for the bees again, but for some unknown reason, most of them didn’t germinate…only a few in the middle row. We were looking for a place to bury crab shell and dug it in on both sides of the few turnips. They must have liked it because they grew HUGE. Since there were so few and since my wife makes a delicious turnip soup, those turnips never got to go to seed.
This year we’d like to try it again…with lots of crab shell, and lots of turnips. This is our attempt to ‘grow for the bees.’
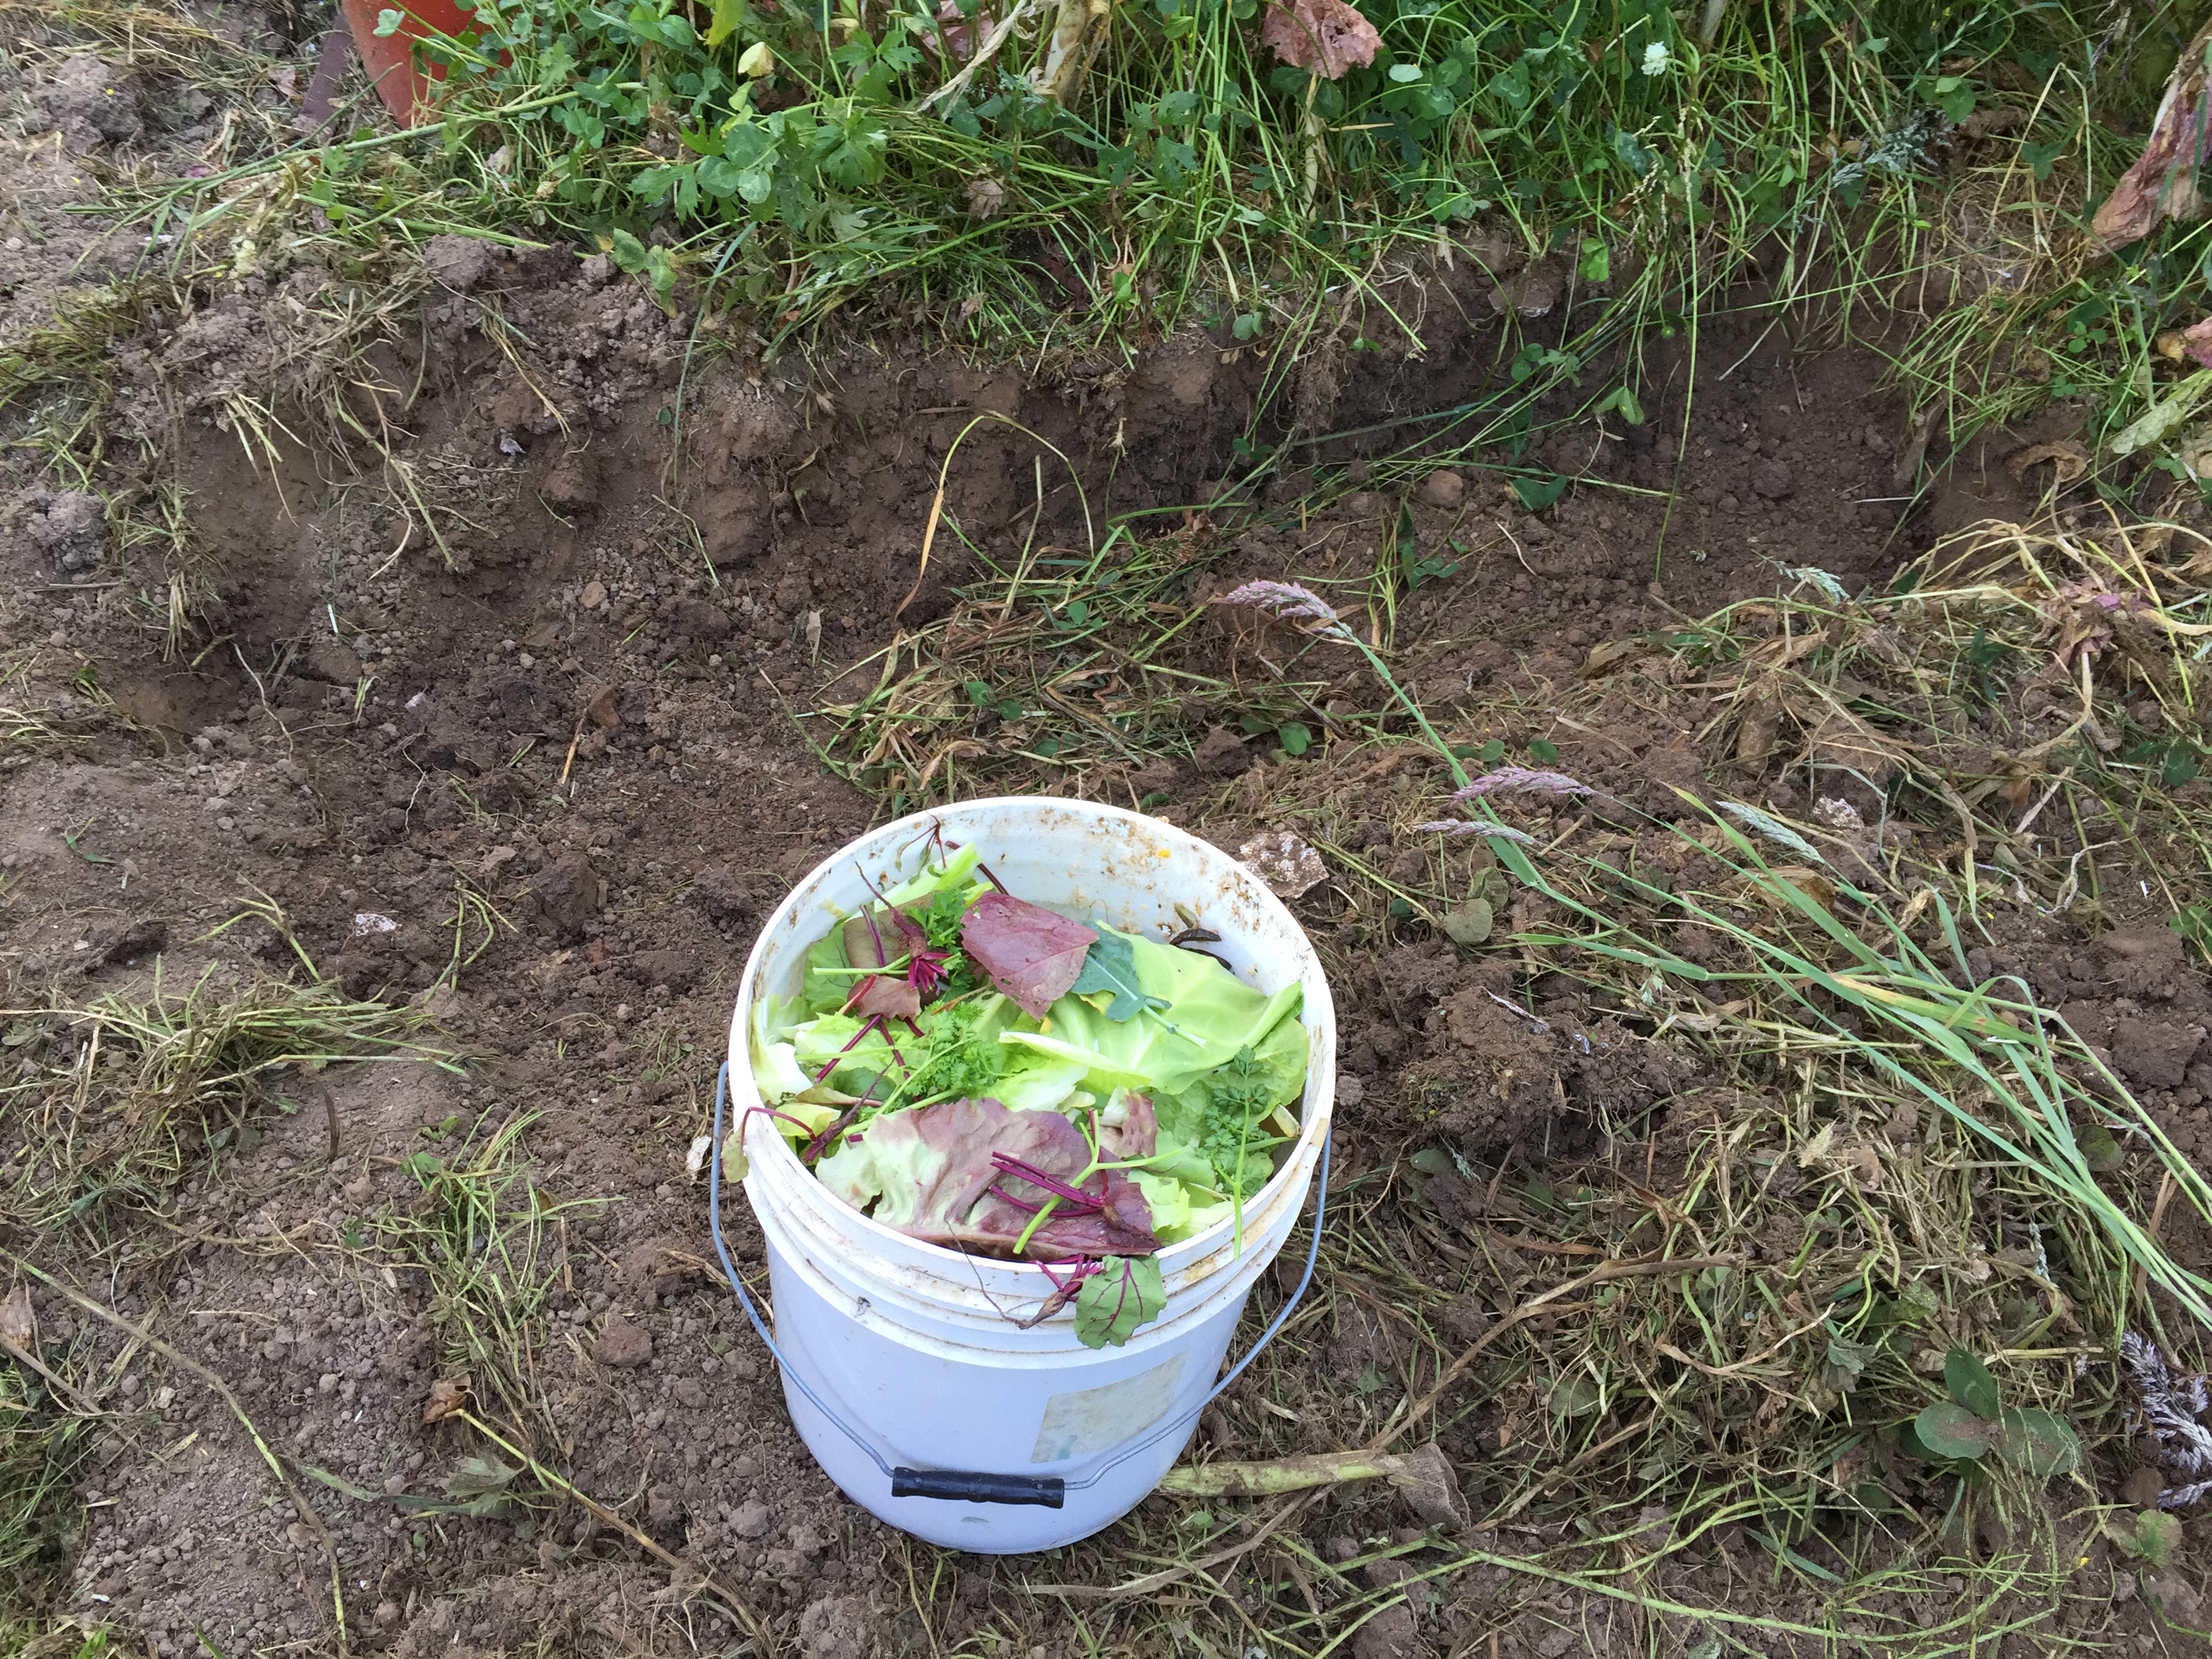
I had to get the trench dug and bury the crab shell before work. Crab shell doesn’t keep very long before getting really rank. It’s in the bin in the wheelbarrow. A tire is weighing down the lid to keep the raccoons out of it. You don’t want raccoons to make a mess of things. Uh, they will if it’s not protected.
A bucket of kitchen garbage…
…and a bin of crab shell…
…go into the trench.
This is what crab shell looks like after being buried for 8 months.
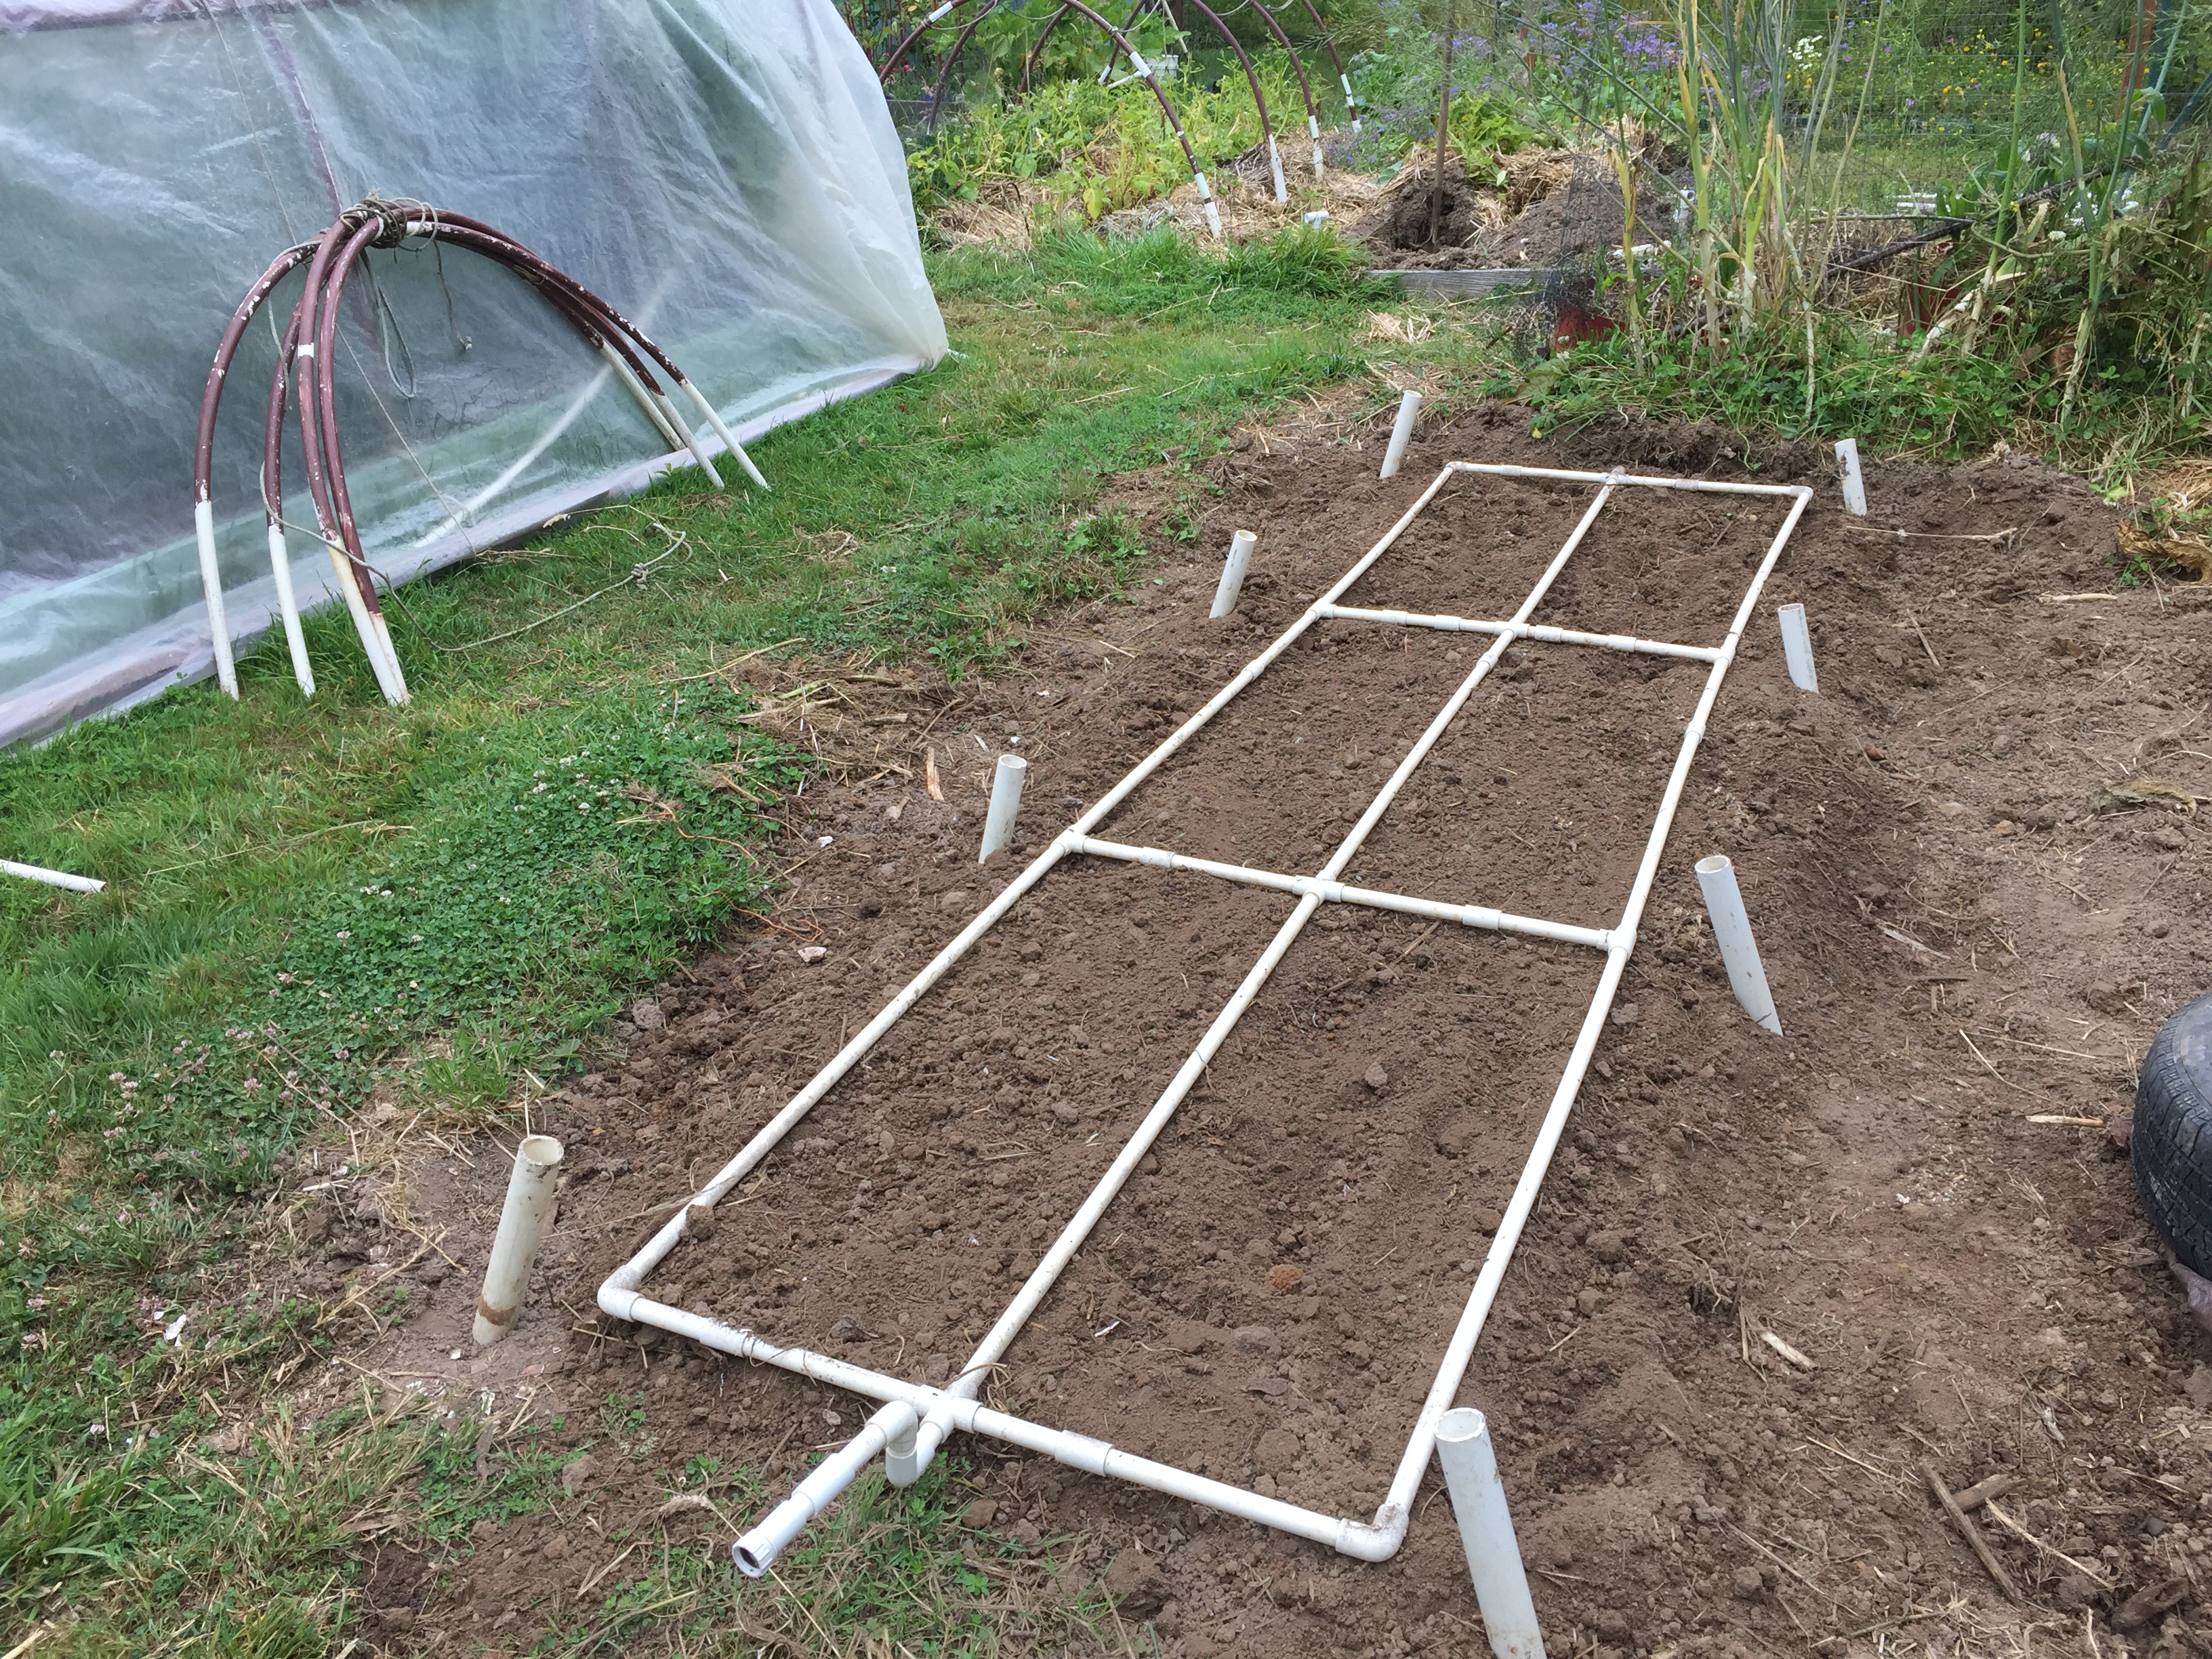
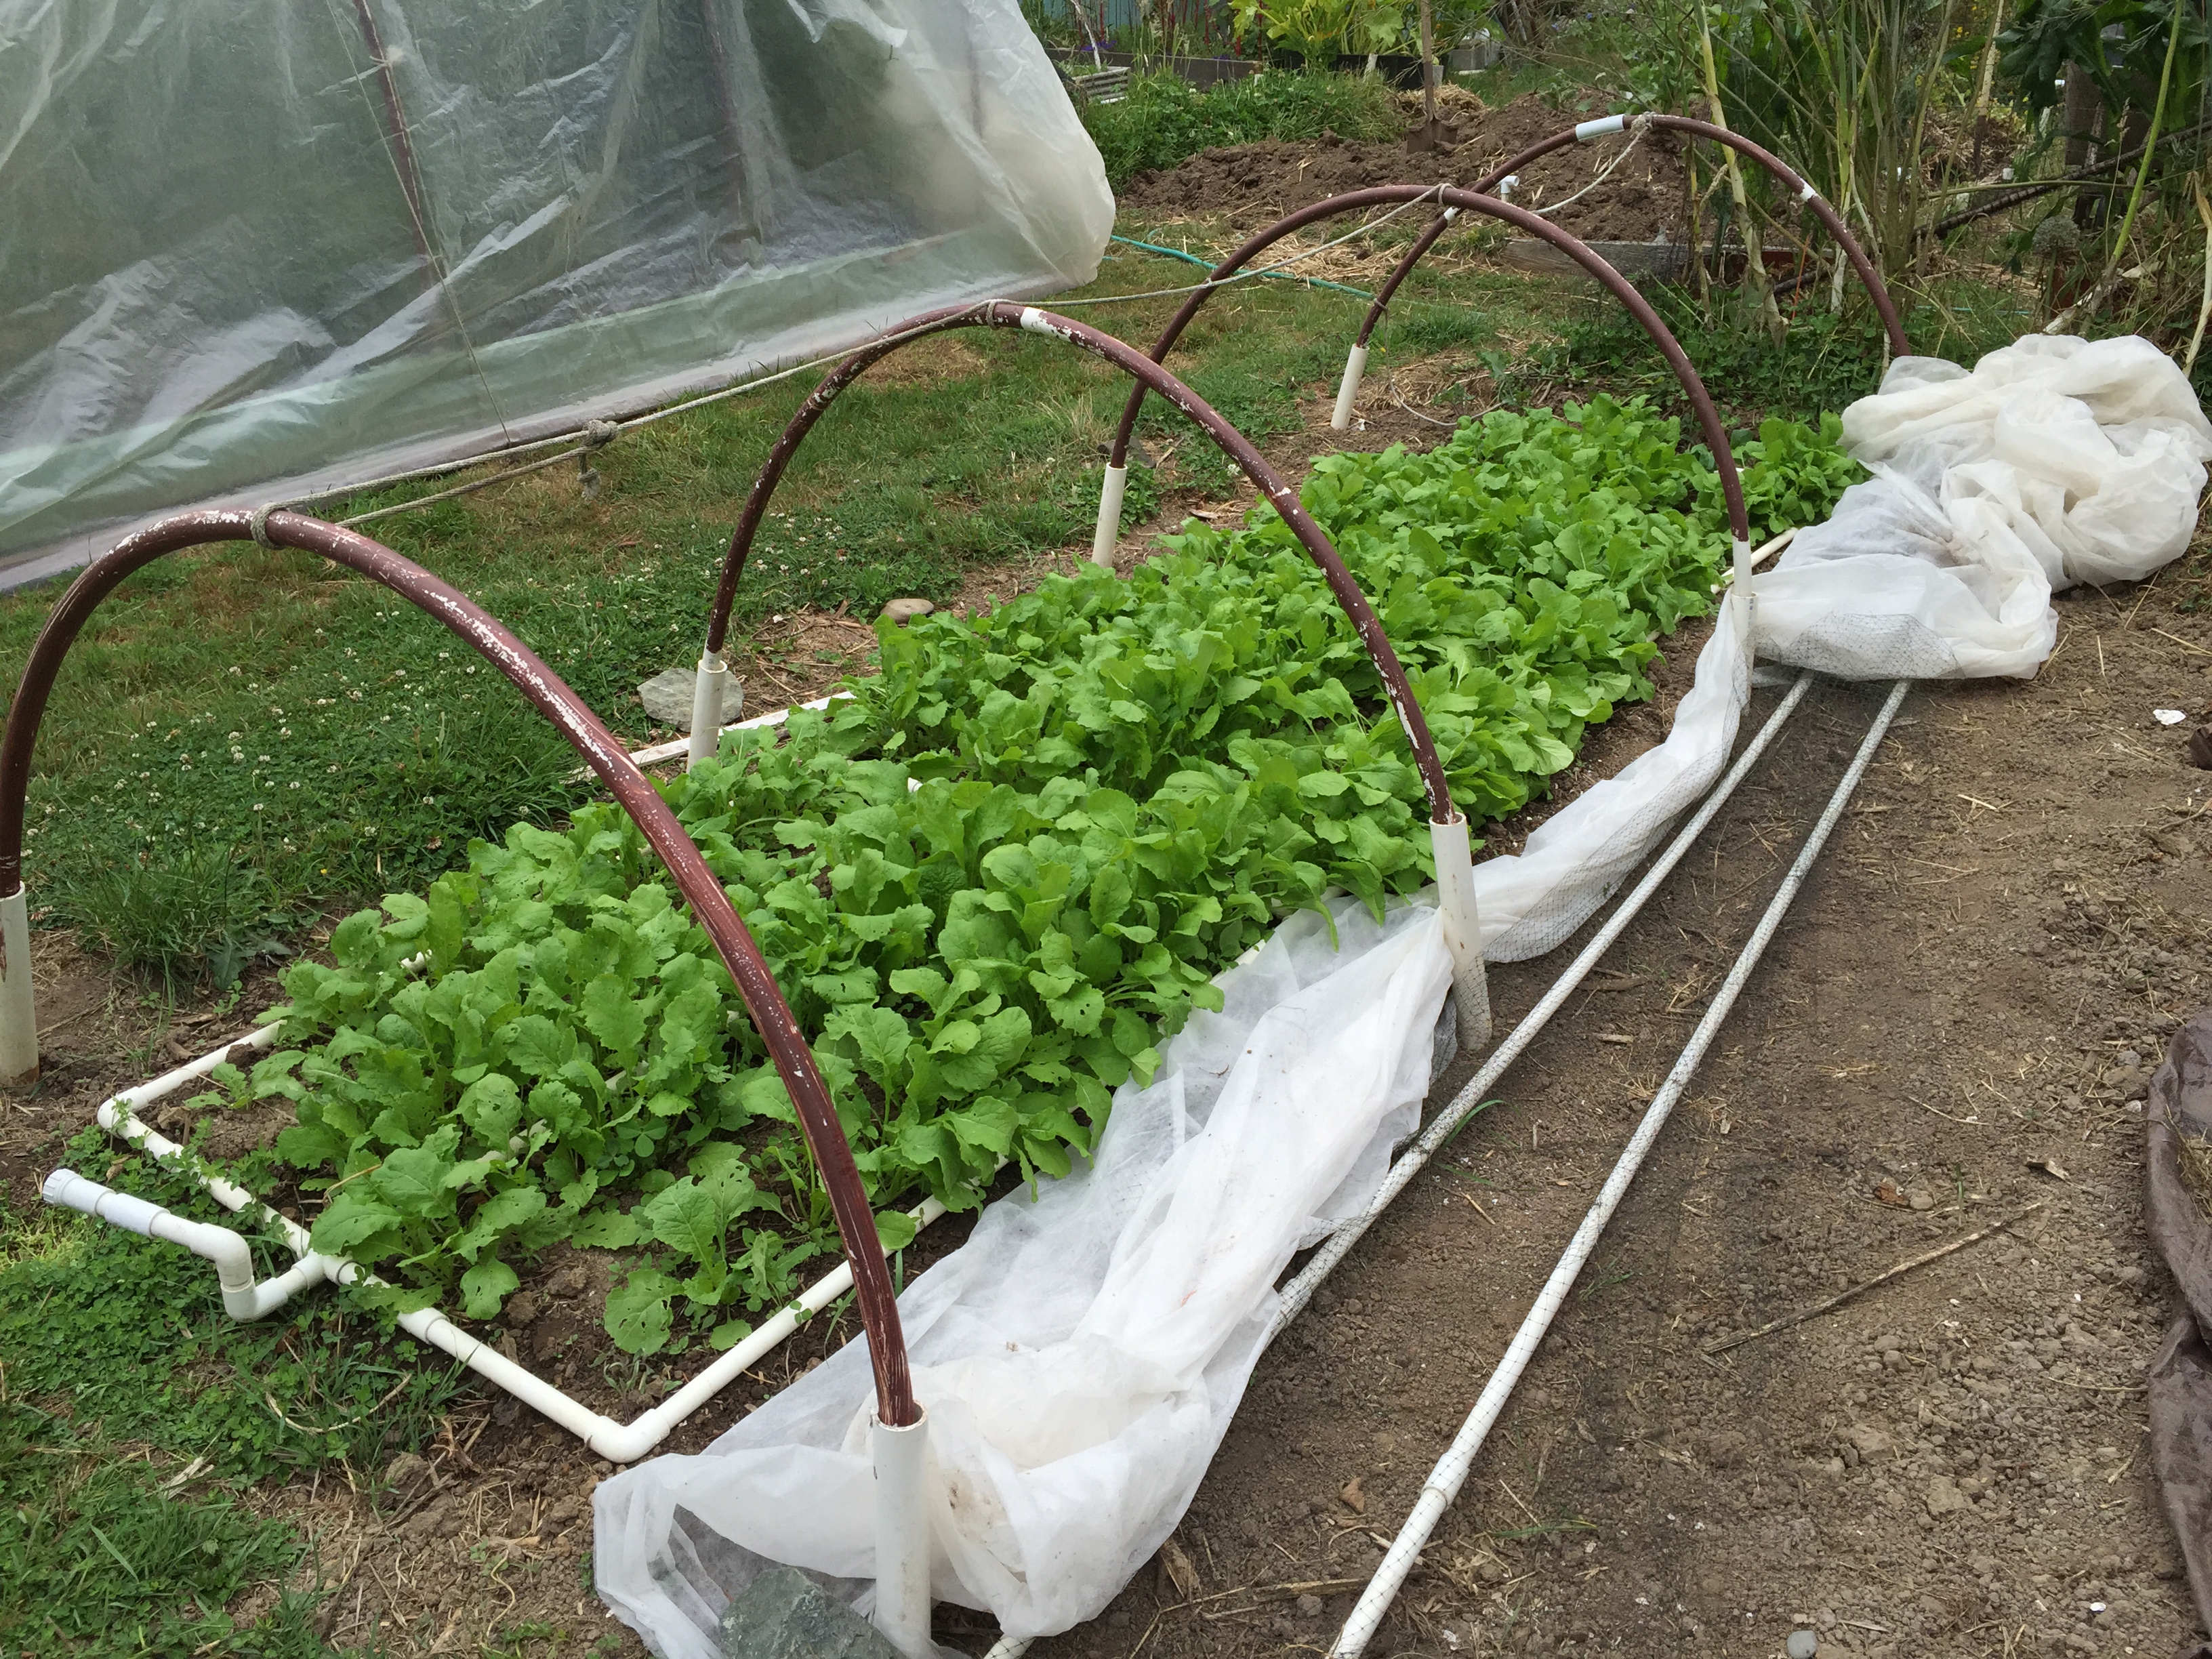
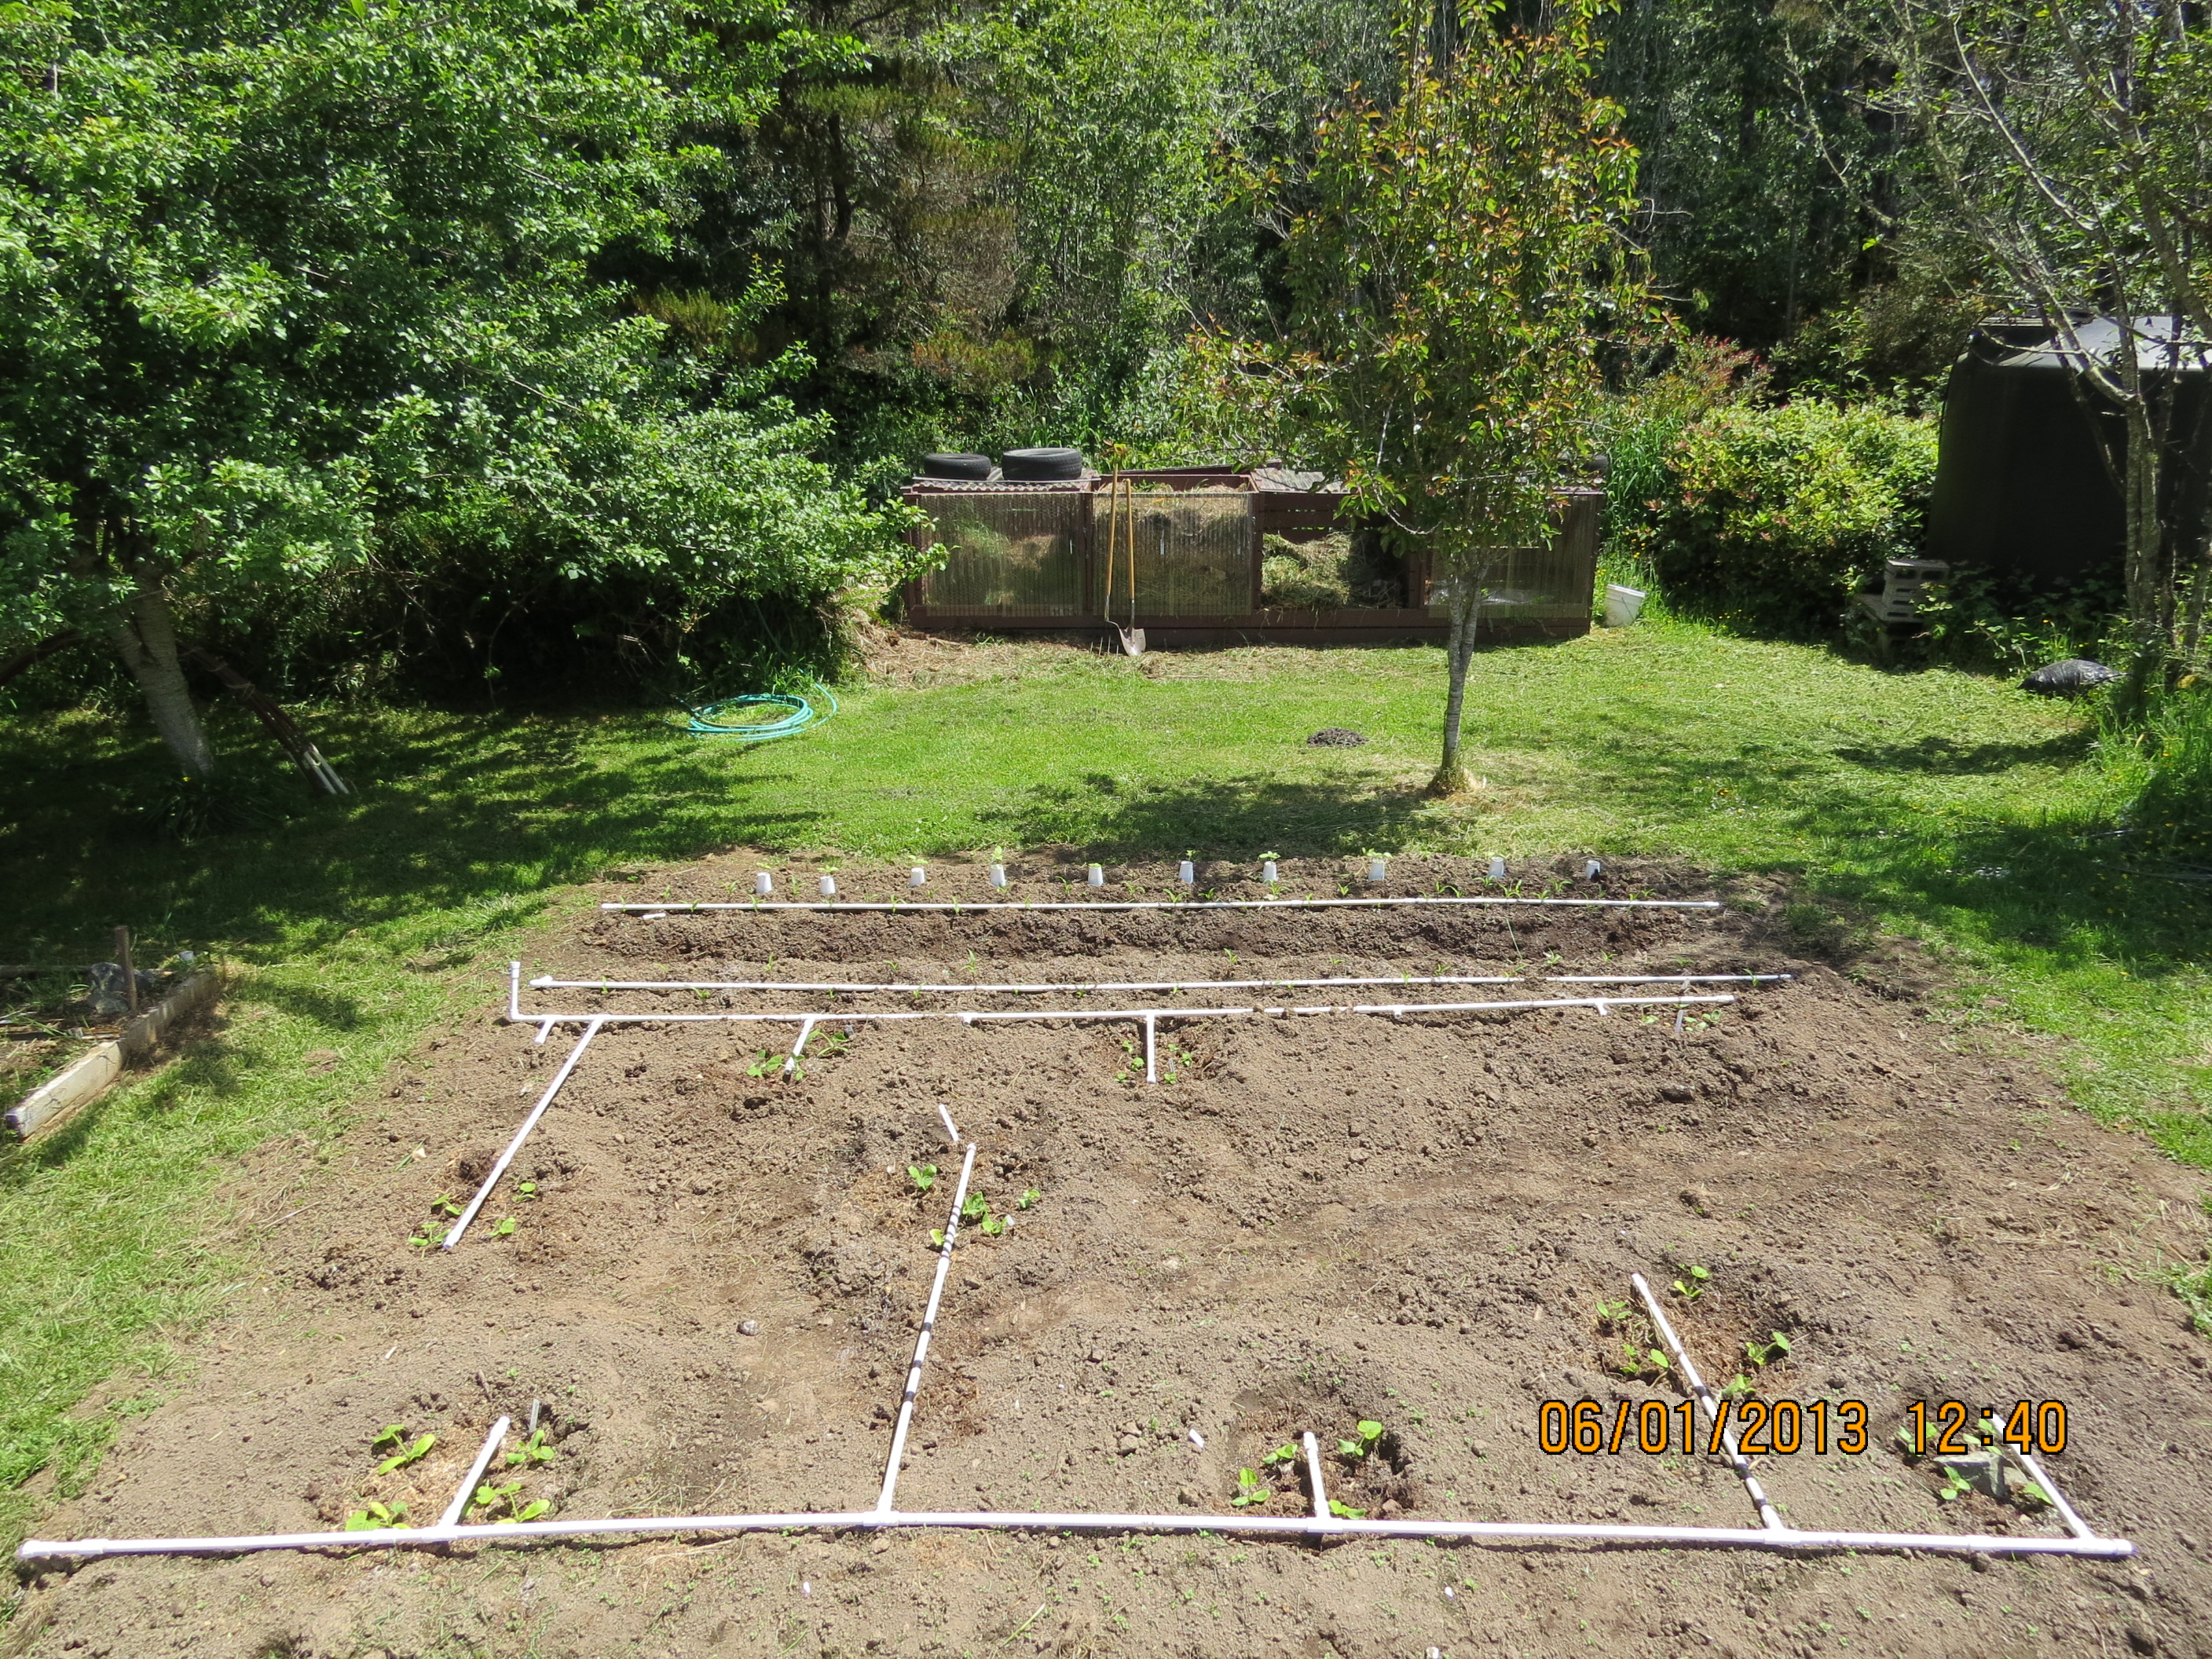
July 9…The drip water grid is in place. We’re ready to plant.
July 10…Turnip seeds planted and covered with vermiculite.
Deer net hoops set up.
July 17…It looks like ALL the turnip seeds germinated this year.
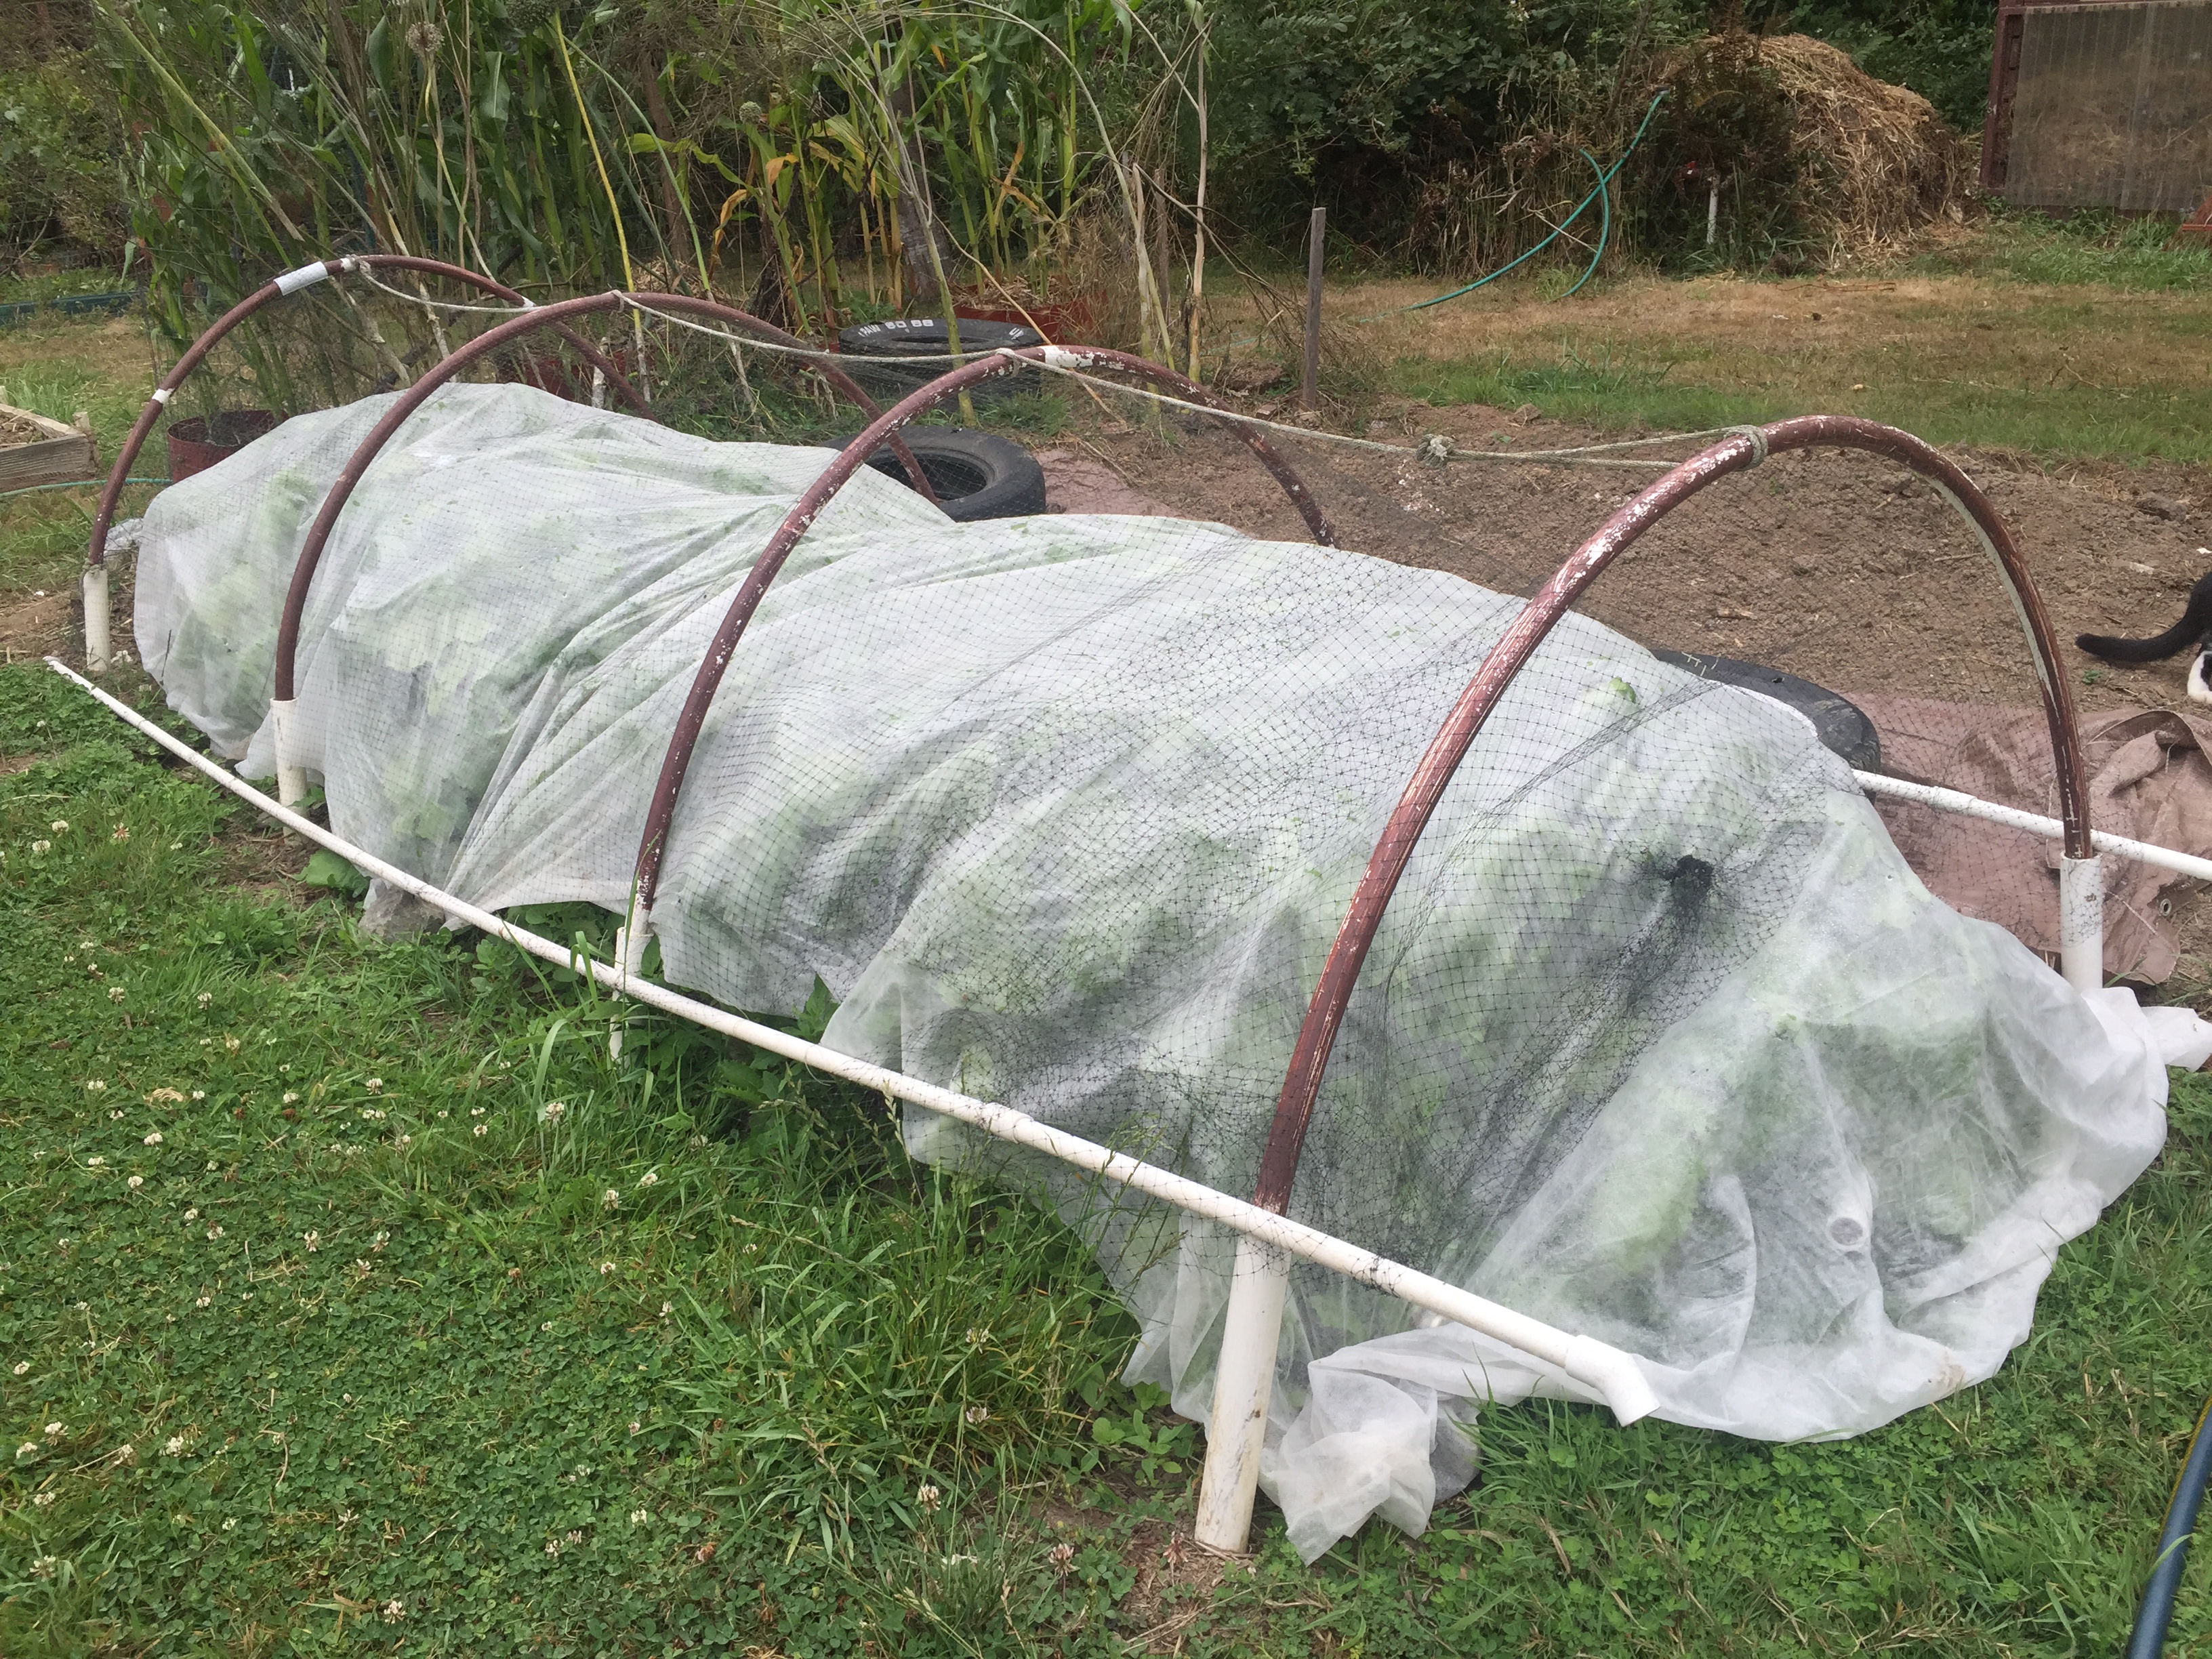
We better use some fabric to protect them from the wire worm.
August 1…Hmmm. I think I planted these too close. I better thin them out.
We’ll be eating turnip greens for a few days.
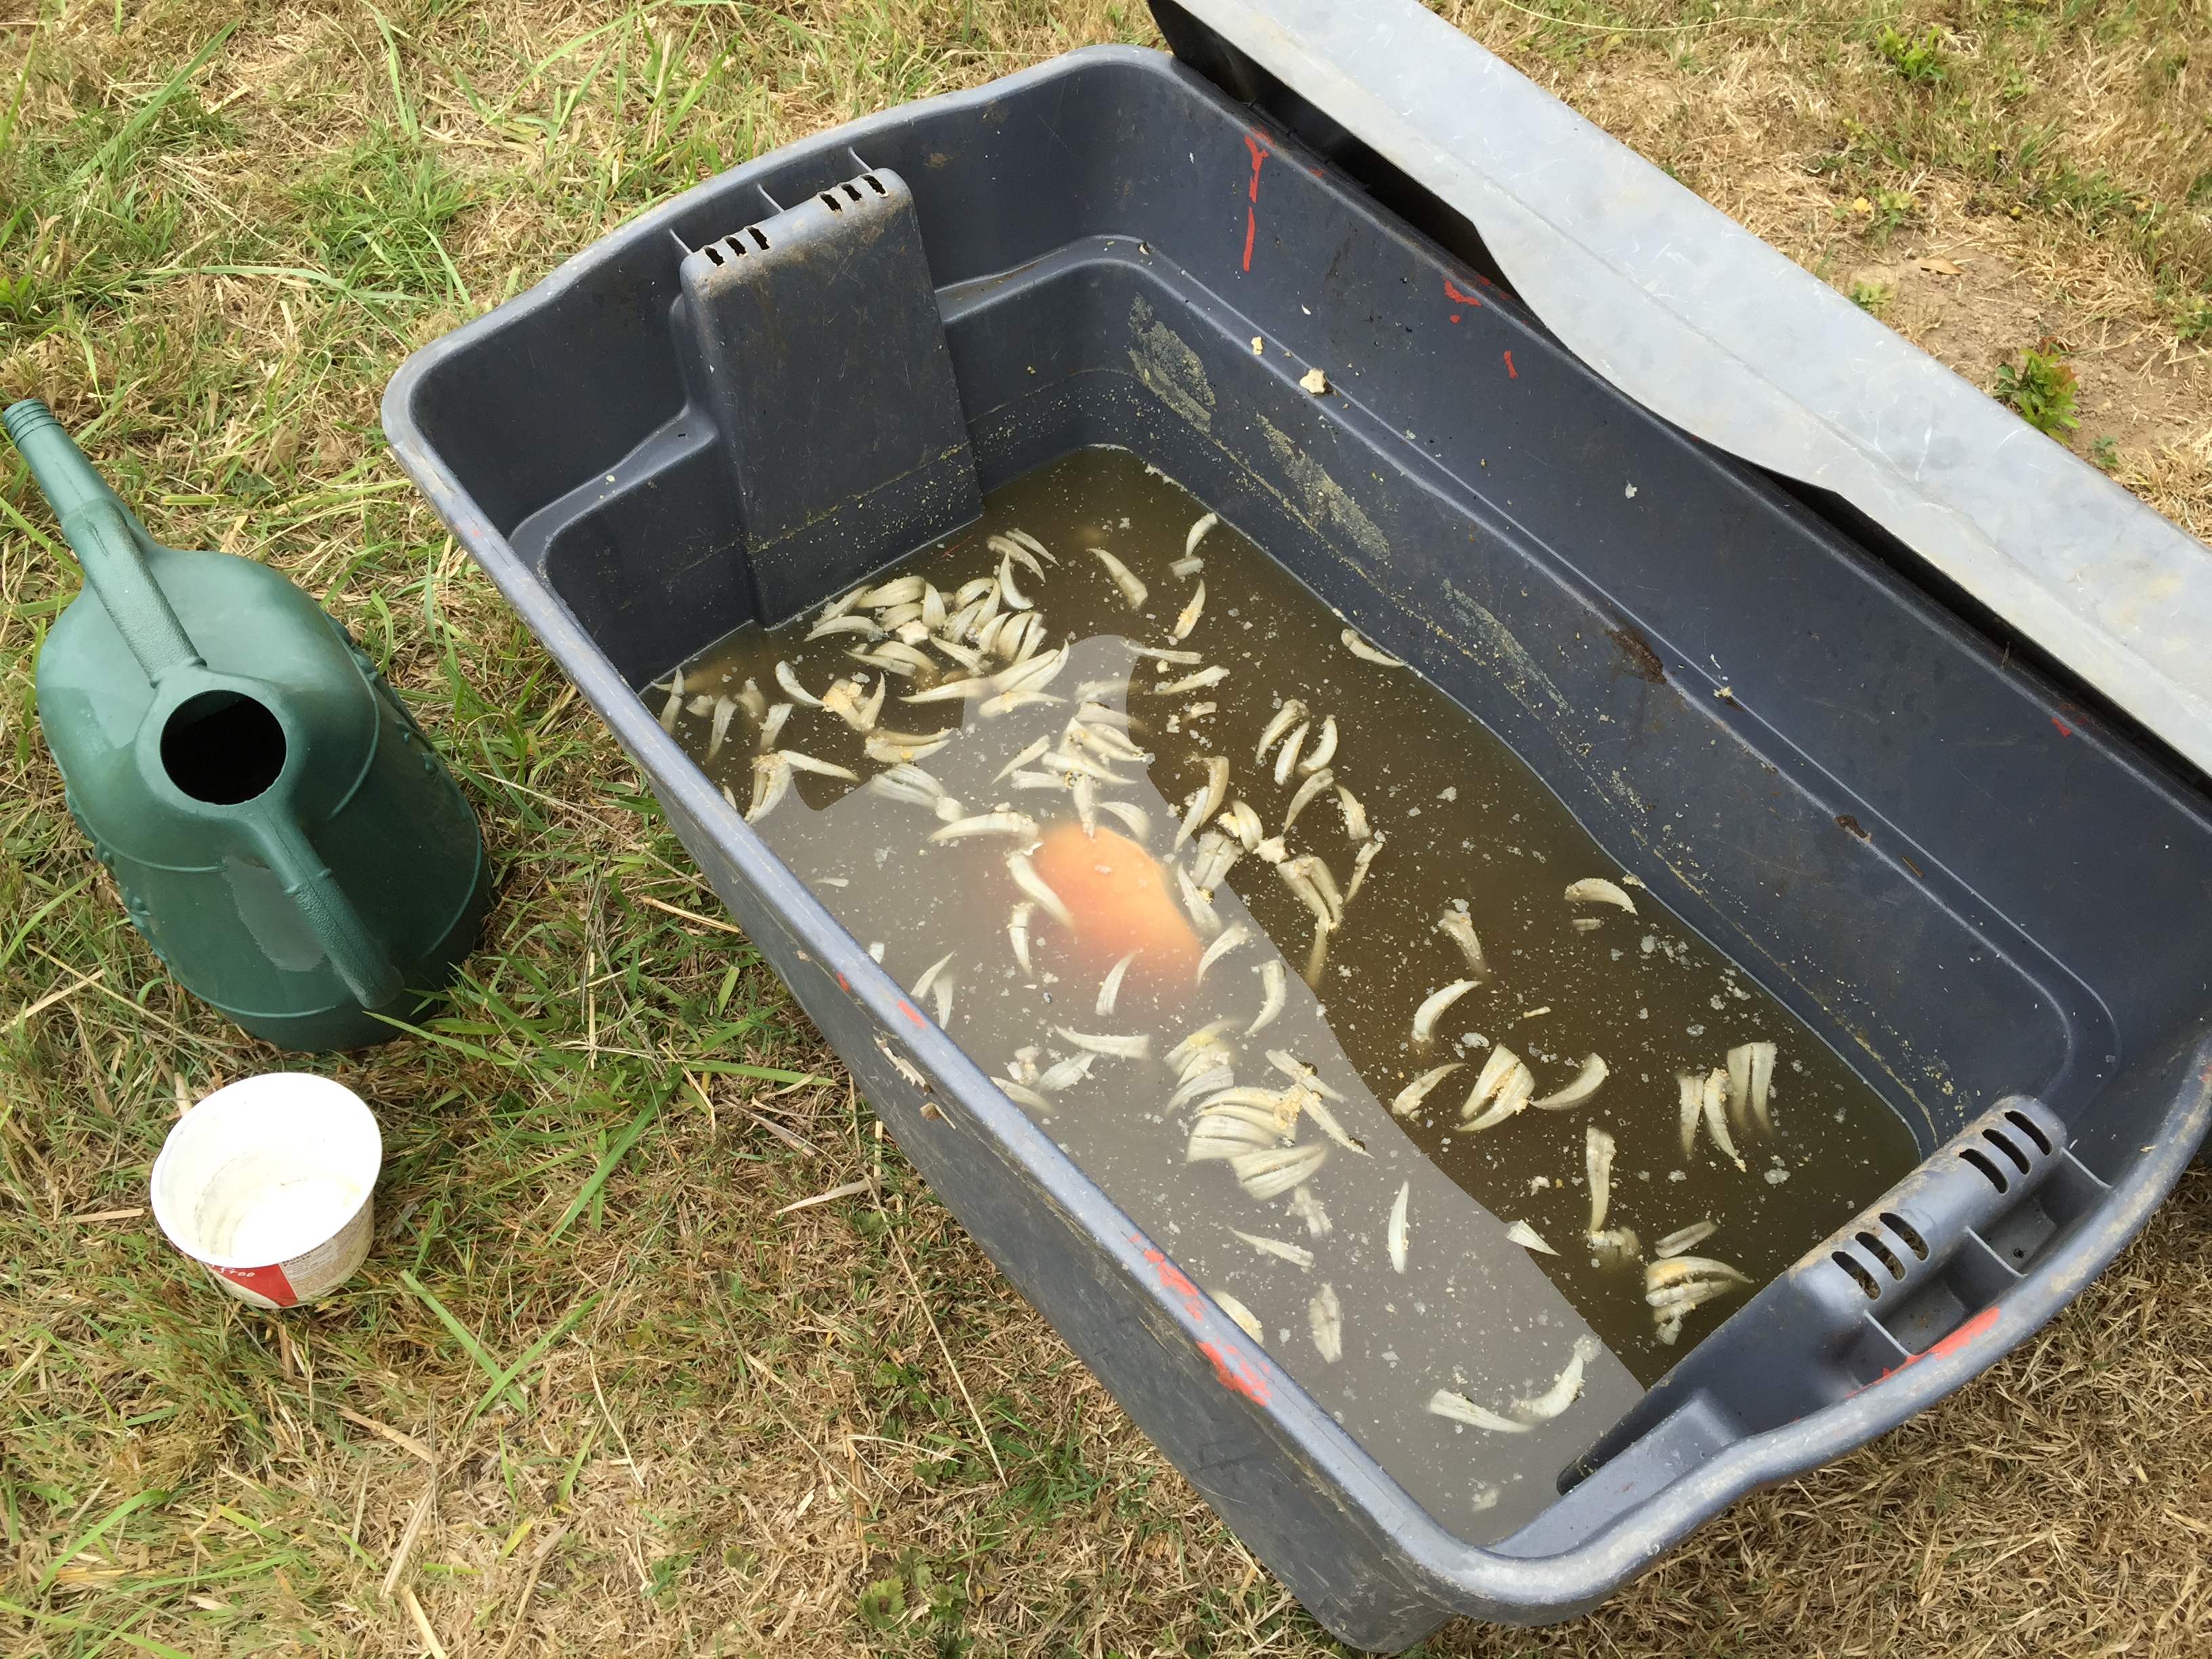
I’m going to try some crab water mixed 1:5 parts water to see what happens.
August 1…I’m watering just the outboard rows of turnips with the crab water just to see if crab water encourages them to grow stronger.
This yearling deer is waiting for me to leave ‘her’ garden.
Aug. 9…If a little crab shell is good, does that mean a lot is even better? Let’s add some more on this side.
I better protect it from the raccoons. I don’t want them tearing up the seedlings to get at the crab shell. If you’re wondering where I got all the tires, I used to plant 60 tomato plants…inside the tires for warmth. I poked, cut, and drilled holes in each one to drain rain water out. Now a days, I’m not planting that many tomatoes, but it’s costly to get rid of the tires…anyone want some free tires?
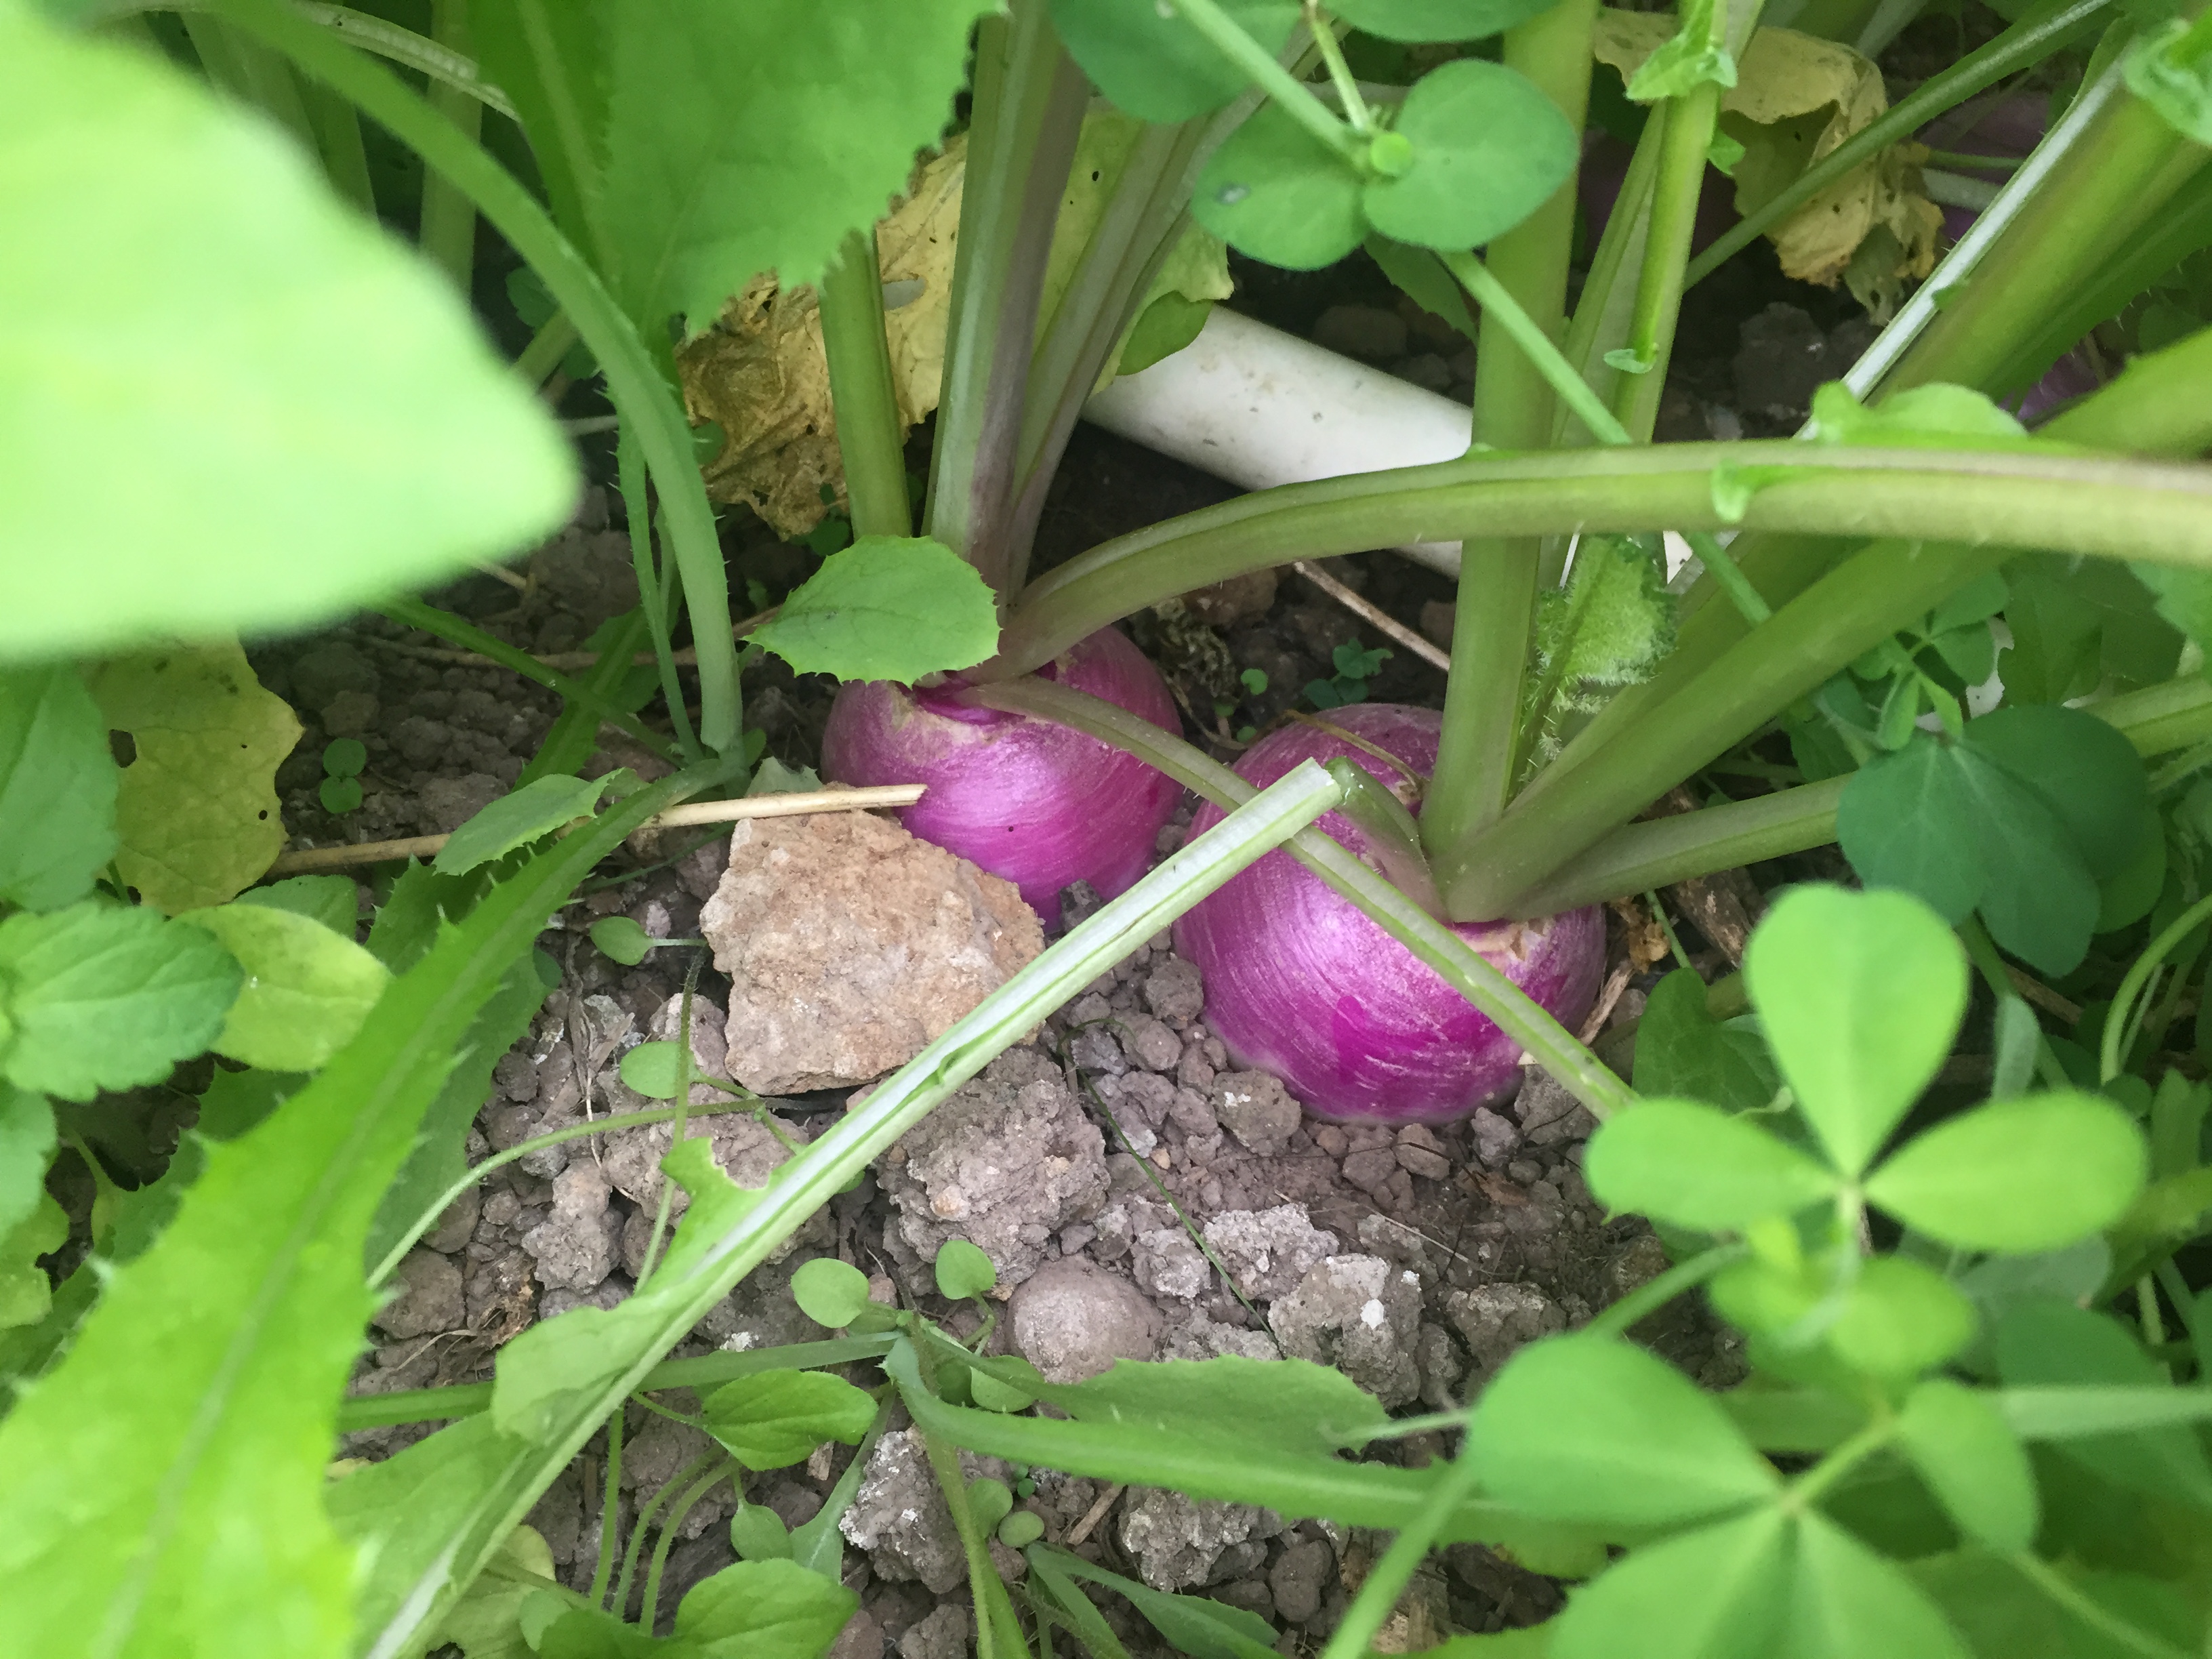
August 23…Turnips are exploding with growth. Just in time because this part of the garden is starting to lose the sun.
August 23…Making Purple Top White Globe Turnips.
August 29…Freshly picked turnip ‘thinnings.’
No bug holes, which is the reason why we use a ‘pest protection’ floating row cover.
August 29…Turnip soup made from scratch by my Sweetie. 🙂
September 2…More turnip thinnings result in a Turnip Frittata. Soooo very delicious!!! After reading about the health benefits of turnips, I planted more this evening. If they flower in January or February, the bees will benefit as well.
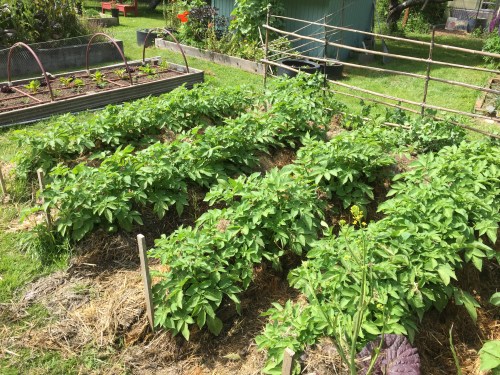
The potatoes have been weeded and hilled up. ‘Survivor*’ garlic is on the left and Meadowfoam is in the background, fenced away from deer, but still accessible to the bees. I’ll be using 12 foot lengths of 1/2″ PVC to drip water the potato rows. The seed potatoes were planted at about 9″ distances which match up to the holes drilled into the PVC drip watering system. *Survivor garlic is garlic that made good sized bulbs even though it got the rust virus.
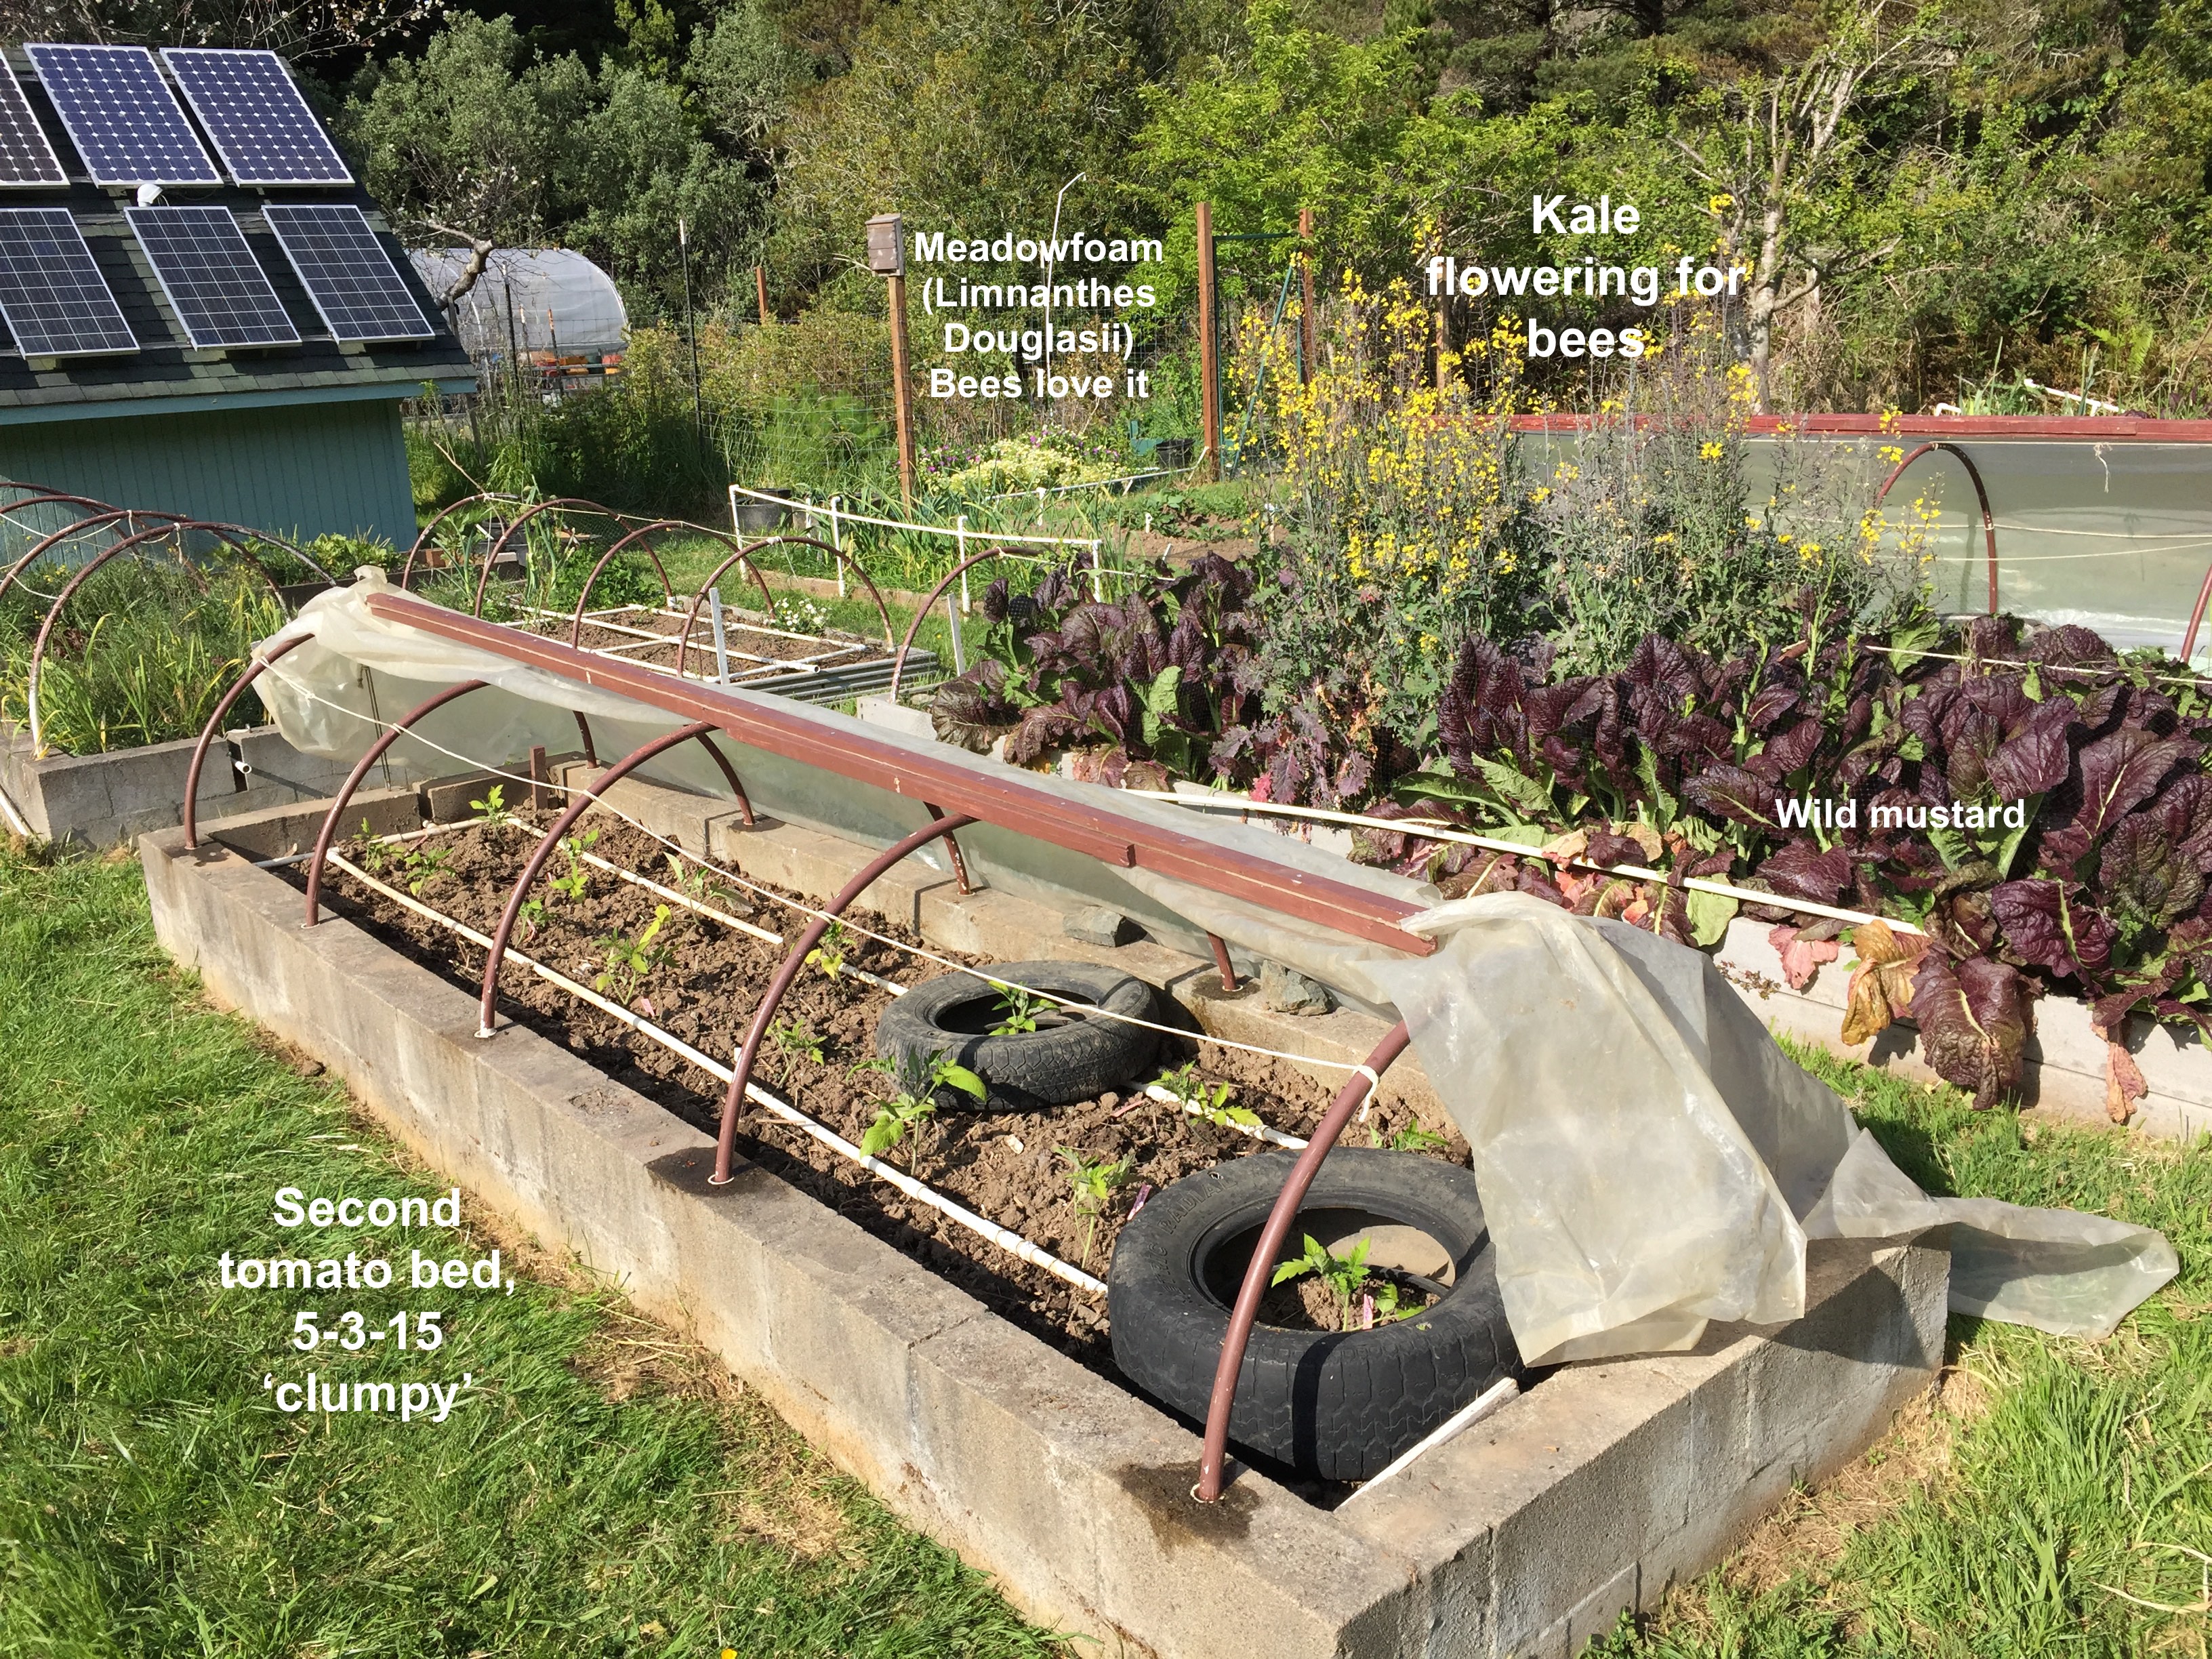
The first bed of tomatoes has been transplanted from the light stand in the house. We’ve used the tire method for 30+ years. They will dissipate heat into the evening. The night temps will get down into the mid 40’s (7C) even sometimes in the summer, so we’ve got to tent them. You might have noticed the wild mustard patch in the background…that started out as a clover patch. I wanted to grow clover to enhance the soil. I rigged up this PVC arrangement to hold the deer netting off the expected plants. I wanted to see the bees visit the clover blossoms in the spring. Then we experienced a cold snap. The clover died and the mustard plants germinated from the compost we spread out. It grows well, too well. I’ll probably have to spade it into the soil before it goes to seed.
A closer look at the tomatoes and drip watering grid. The 1/2″ PVC has been drilled so the water drips out near the plant. I’ve been using these for over ten years and it works well.
May 4th…The second tomato bed goes in. You might notice the ‘clumpy’ soil. I was soooo tempted to pull out my rototiller to break up the soil, but I resisted. We’ve been trying to prove that we can garden without the use of fossil-fuel. So the soil is a bit lumpy and we’re hoping the tomato plants don’t mind too much.
We’ve been eating lettuce and spinach from this first bed of salad greens for about three weeks. My wife likes the wild arugula, but it’s a bit hot for me.
March 28…Planting the second bed of lettuce, Parel cabbages which were started in the house, purchased broccoli plants and maybe some collard greens.
We’ve got to protect them from the cabbage moth.
May 3…Peeking under the cloth to see how the lettuce is doing.
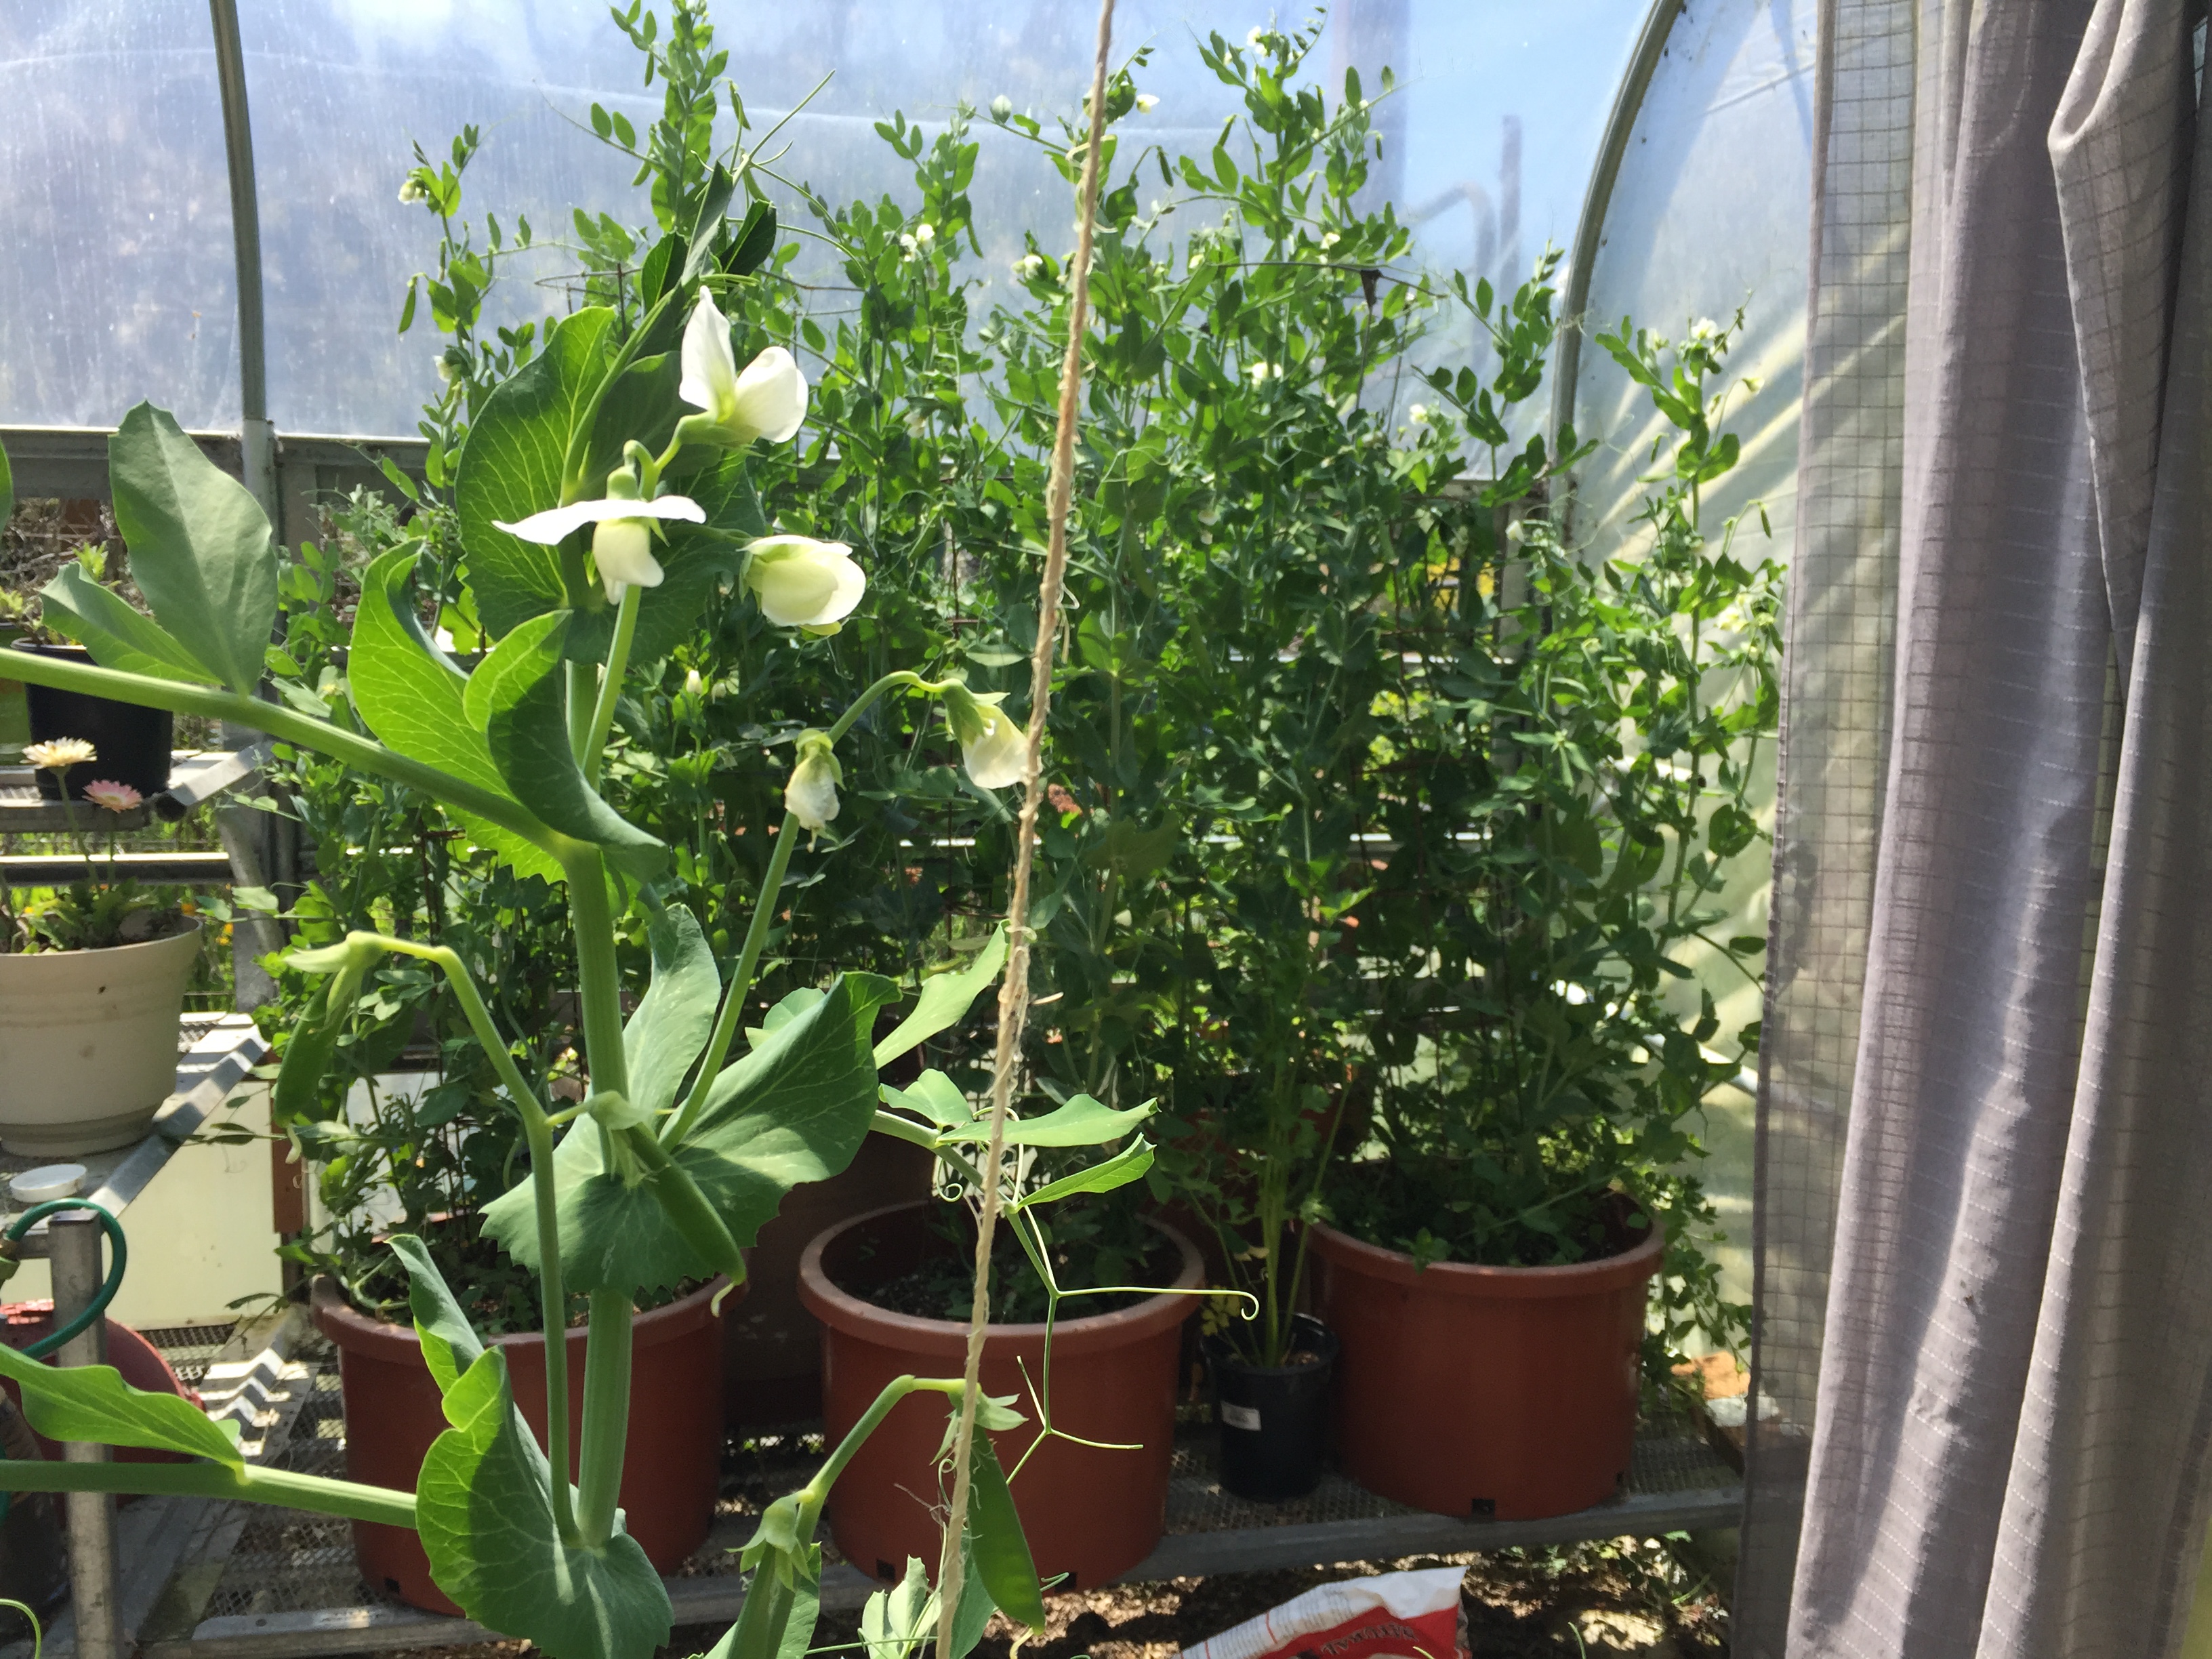
We planted the edible pod peas in the greenhouse in February.
…and have been using the pea pods in salads and soups for a good month.
April 25…Since the deer like to munch on nasturtiums, we’ve got to protect them. What better way than to clean out the weeds around an apple tree and plant them there. These are a new kind that will sport red blossoms. I hope the bees like them.
May I say something else about Limnanthes Douglasii Poached Egg Plant (Meadowfoam)? It wintered over without any kind of frost protection like a tarp or a pile of leaves. It was tough love for sure because it’s in a section of the garden that’s in the shade until noon. This was self seeded from last year’s crop which was about 1/4 the size. (What have I started?) The Vision Violet Geraniums also wintered over well. Together they have been attracting the bees in the afternoon hours.
May 3…I know, I know, I shouldn’t have to transplant borage because it grows ‘like a bad weed’ around here, but there was an empty spot in the hugelkulture bed after I weeded it and the bees love it so much. Three spade-fulls and I’ve got a three more spots to video the bees. 🙂
This Cardinal Climber is supposed to attract hummingbirds. We’ve started it under lights in the house. My wife is going to donate a couple of plants to try to get it to climb up the echium ‘tree.’ I think it’ll be fun to see if we can get some birds and bees.
May 3…”Reach for the sky,” little Cardinal Climber…
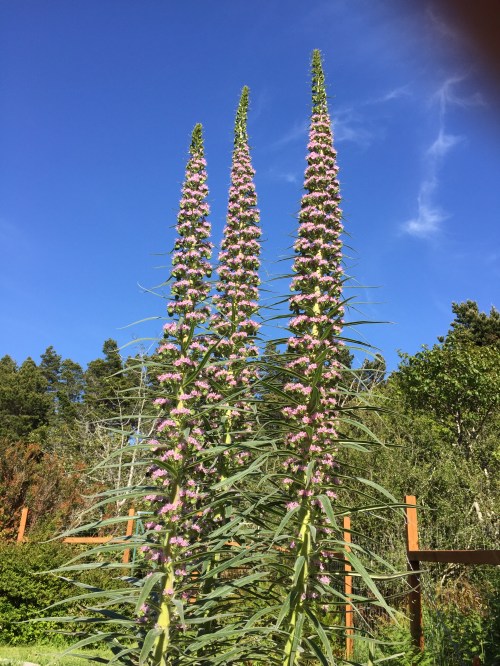
…You will have to if you want to climb this “Tower of Jewel” echium tree. It’s 12 ft tall and growing.
I just bought this African Blue Basil. Jeff, at my favorite nursery, tells me it’s a super bee magnet which will blossom all summer. He knows how to tempt me.
May 5…Because the bees were visiting the moss in the pond so much and because someone on the biobees.com forum mentioned that his grandfather used moss for a watering station, I thought I’d try it out. Who knows, the bees might be getting some kind of essential minerals or properties from it. I just dug some up, found a plastic container and try to keep it hydrated. It’s the only waterer I’ve had any success with.
Time to roll out the “Solar Roller.” Things are drying out. This ‘solar panel roller’ can be positioned to catch the early rays of the sun as well as the sunset. I can get about 10-12 hours of sunshine if I’m conscientious about moving it twice a day.
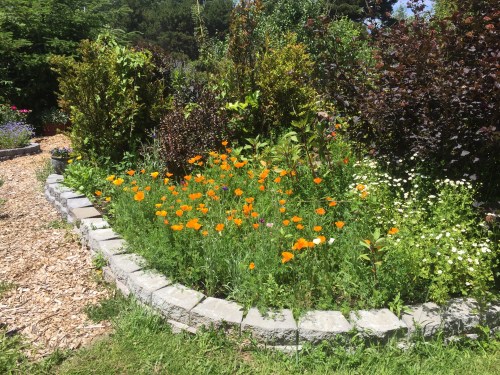
Forgive me if I’m talking about this new bee bed too often. It’s just that we wanted to add more flowers for the bees without taking away space from the veggie garden. This was the perfect solution…but after adding Walker’s Low Nepeta, artichokes, Scabiosa, and red echium, we’re already running out of space.
This started out as a garden video, but there was so much excitement today with two swarms happening and bees (from where?) checking out my new log hive. I had to include some video below.
July 7, 2013…Spring veggies harvested, soil spaded and leveled, drip watering in place, this bed is ready to plant our winter garden.
When we planted turnips, lettuce and kale in July for our winter garden little did we know we were planting for the bees as well as ourselves.
July 28, 2013…turnips are growing nicely in the center, lettuce and kale are on the sides. Deer netting over pvc hoops.
January 16, 2014…We had eaten most of the turnips and just left a few to go to seed. We never thought the bees would be enjoying them in mid January. What a welcome surprise.
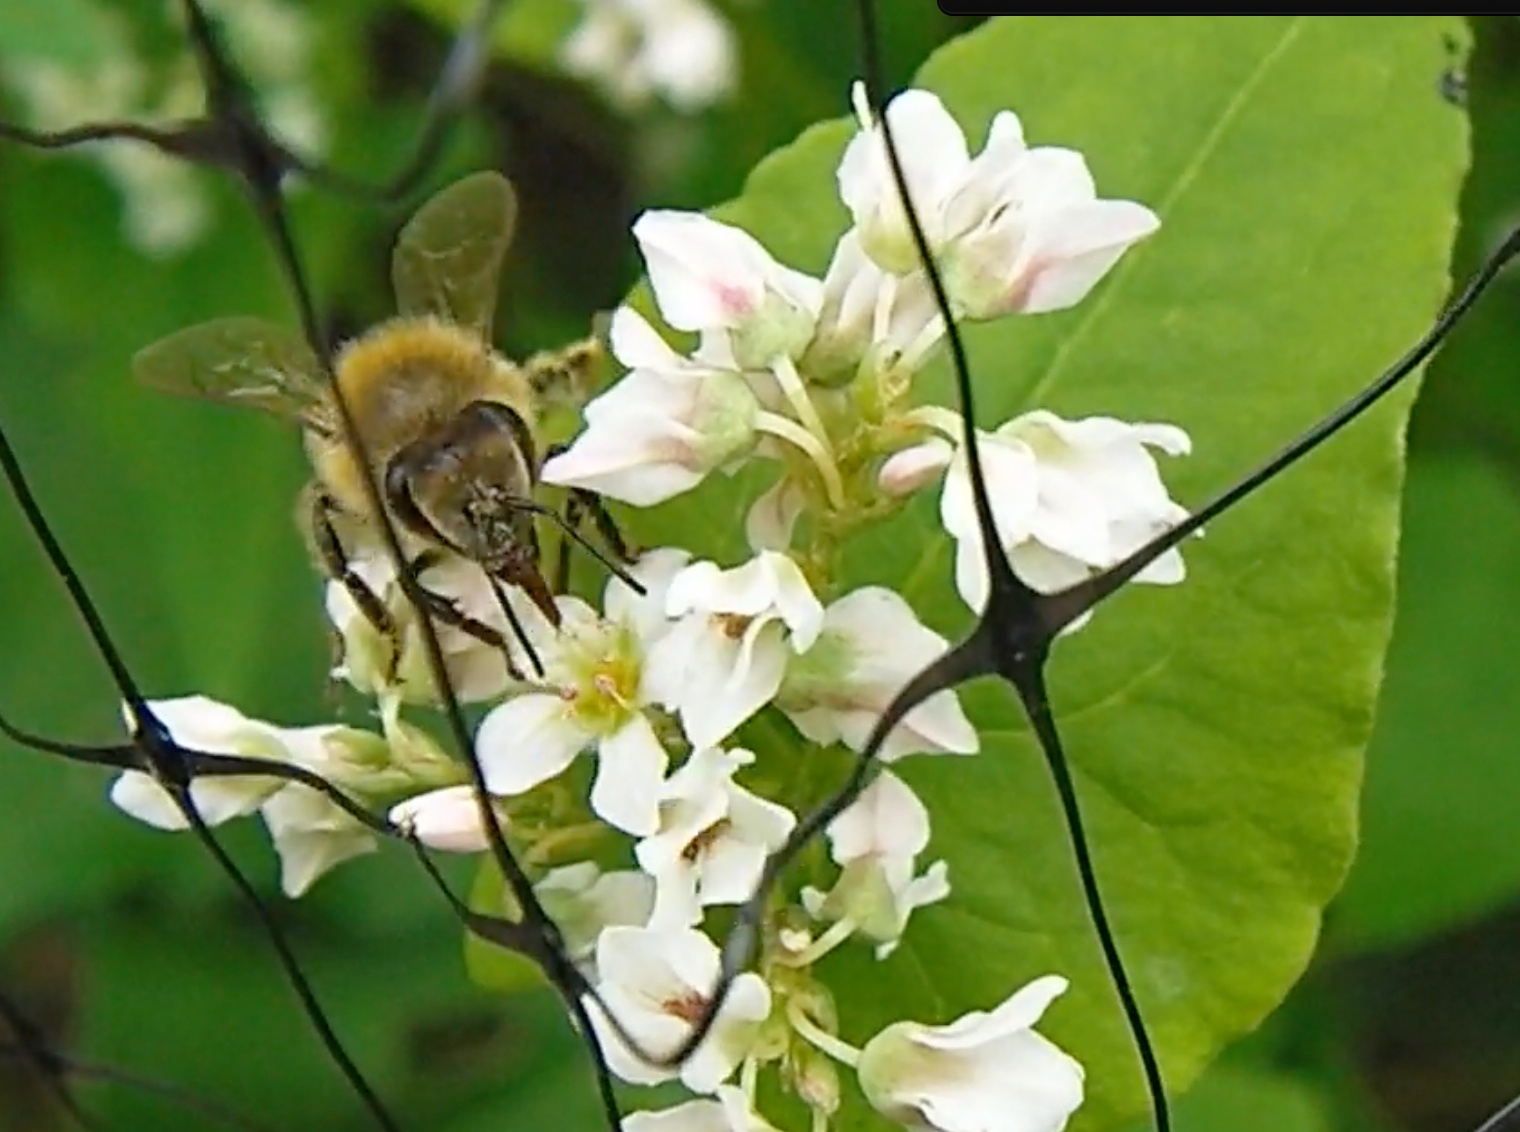
February 9, 2014…My apologies for posting such a fuzzy picture of a bee on the catkins,but it was rather high up. I wanted to show where the pollen was coming from that is going into my log hive.
February 9, 2014…Many colors of pollen can be seen entering the hive. In the video you can see the bright yellow pollen from turnip flowers. It’s possible this shot is from the pussy willows that are just starting to blossom. The darker orange might be from early gorse.
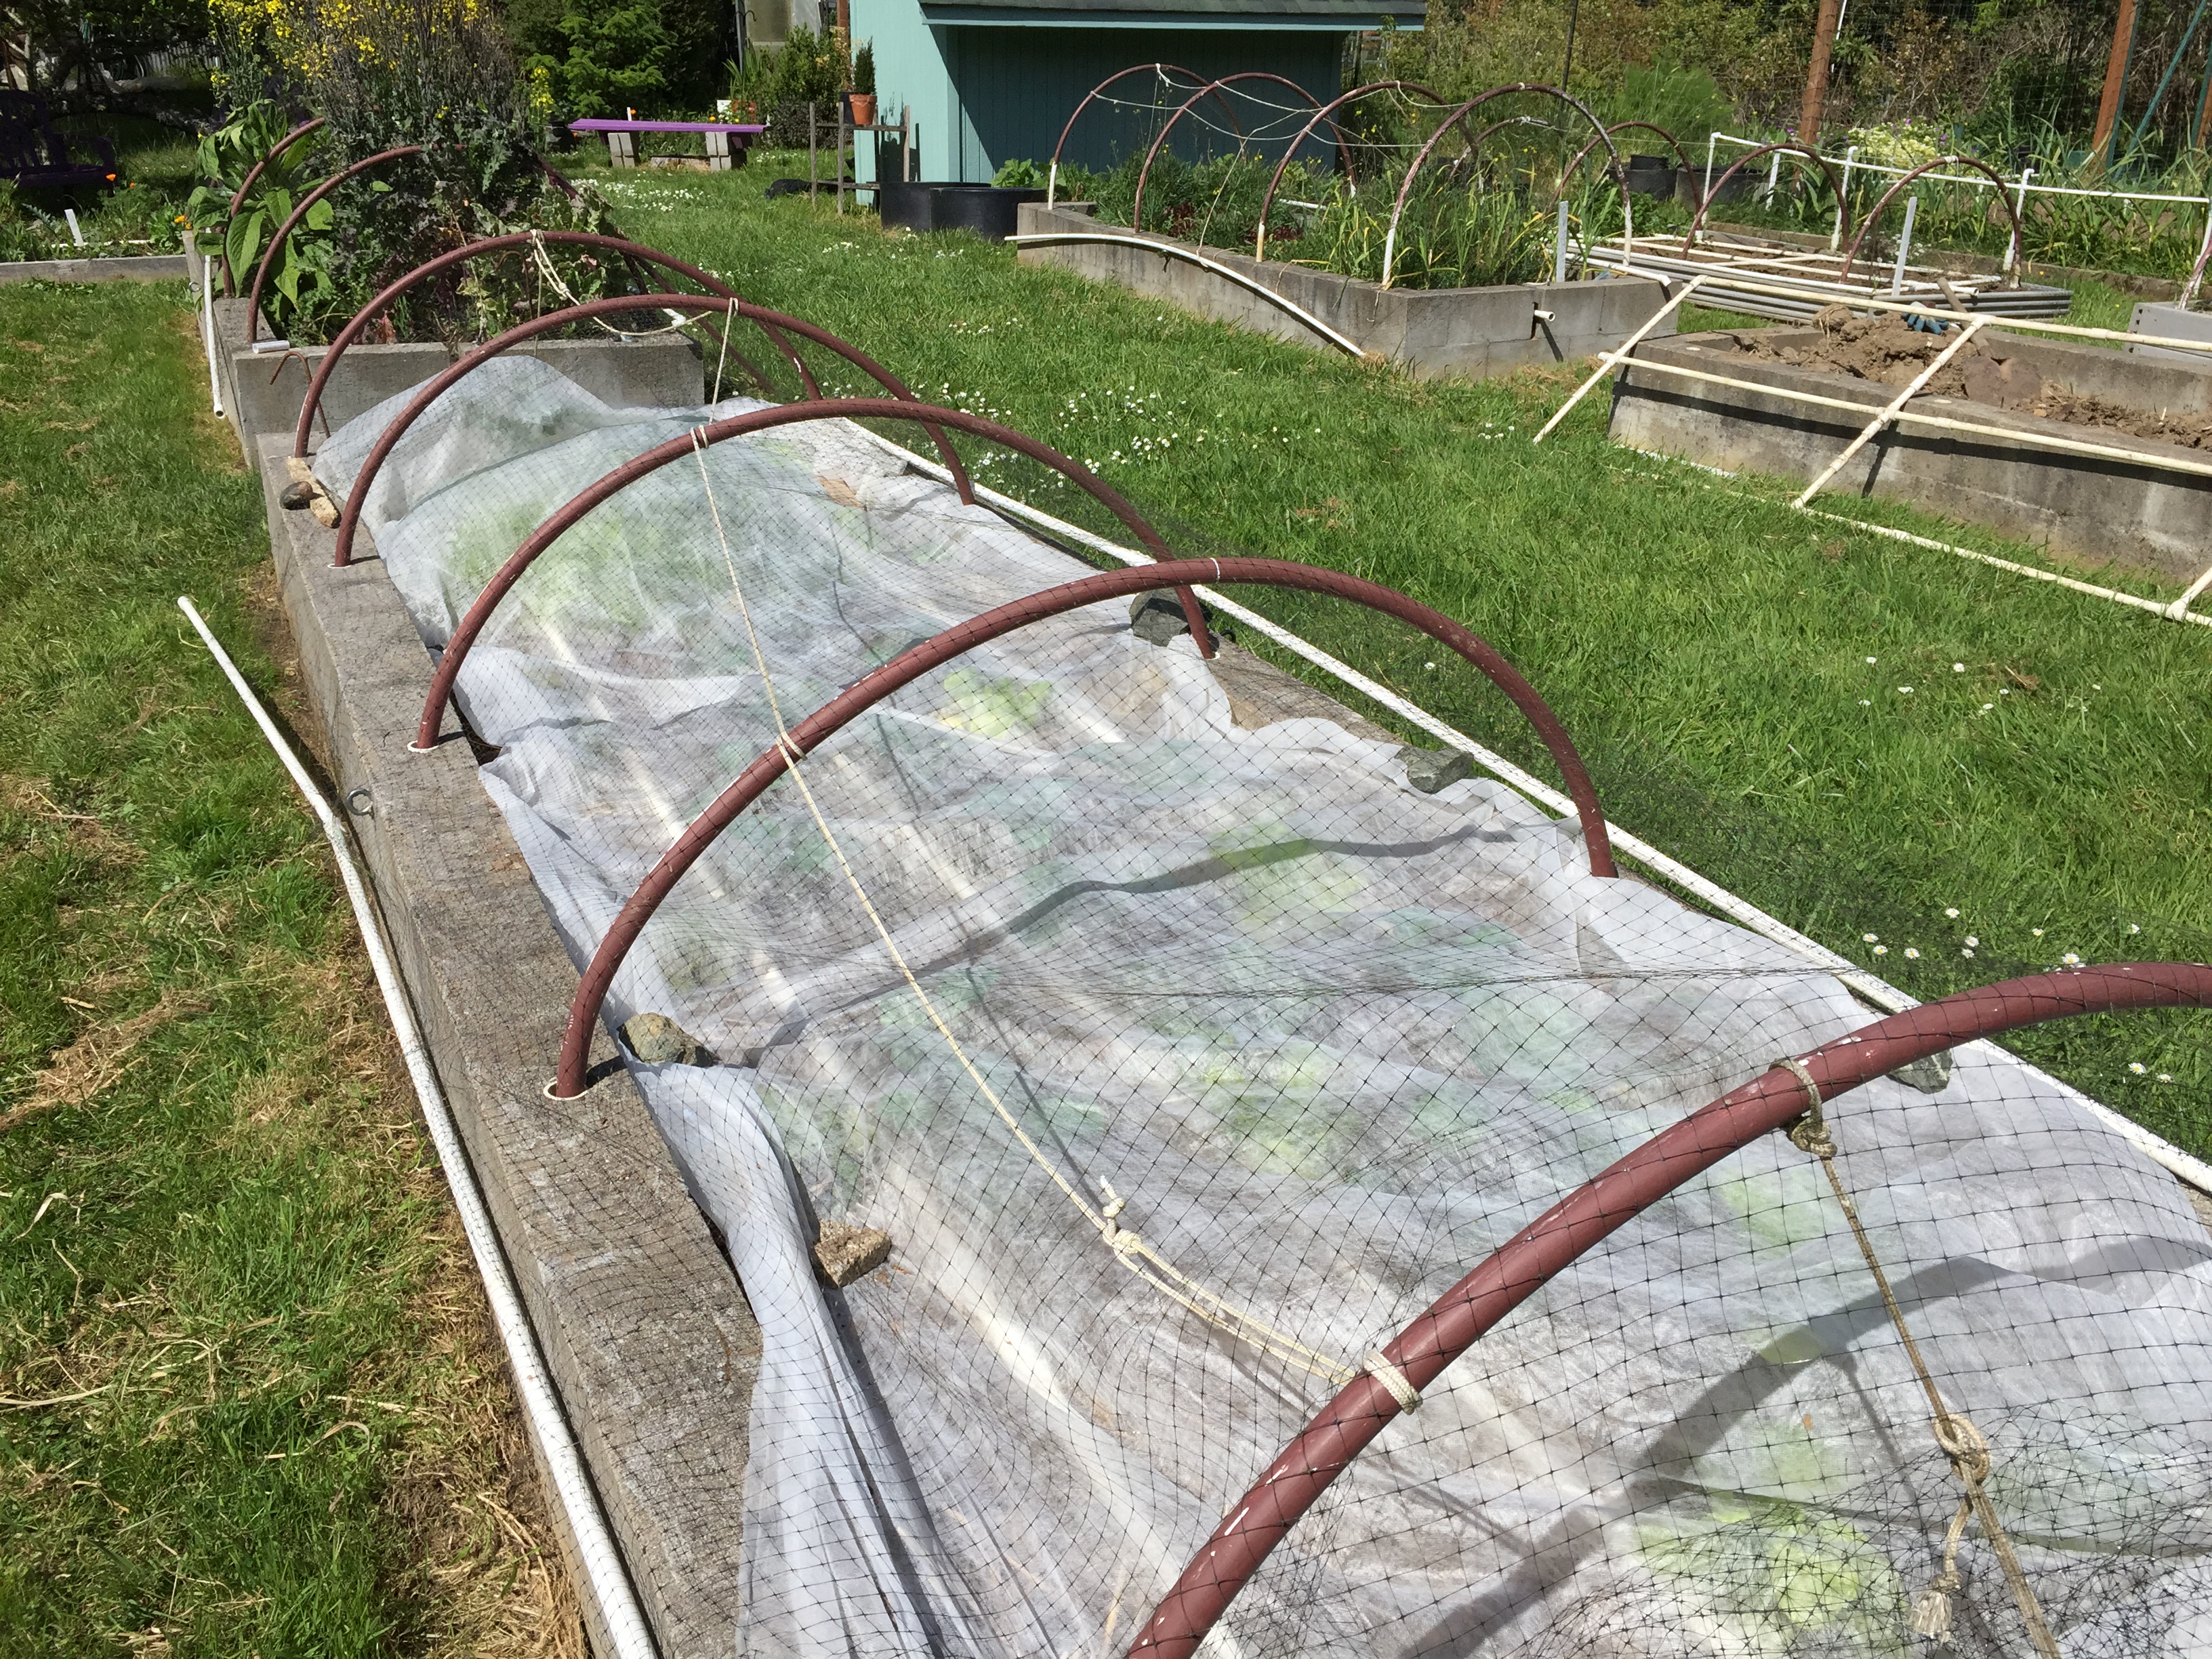
February 10, 2014…Yellow turnip flowers have been flowering since mid January. Pussy willows are starting to blossom already. Second bed is producing greens for our salads. We can eat them 15 minutes after they are picked…can’t get much fresher than that. We cover them with plastic film (partially visible on far side) on nights of sub freezing temps.
June 1, 2013…Squash and corn area with PVC water grids.
July 6, 2013…Squash and corn growing well after mulch added to keep soil from drying out.
July 24, 2013…Squash and corn bed. Corn is starting to tassel..
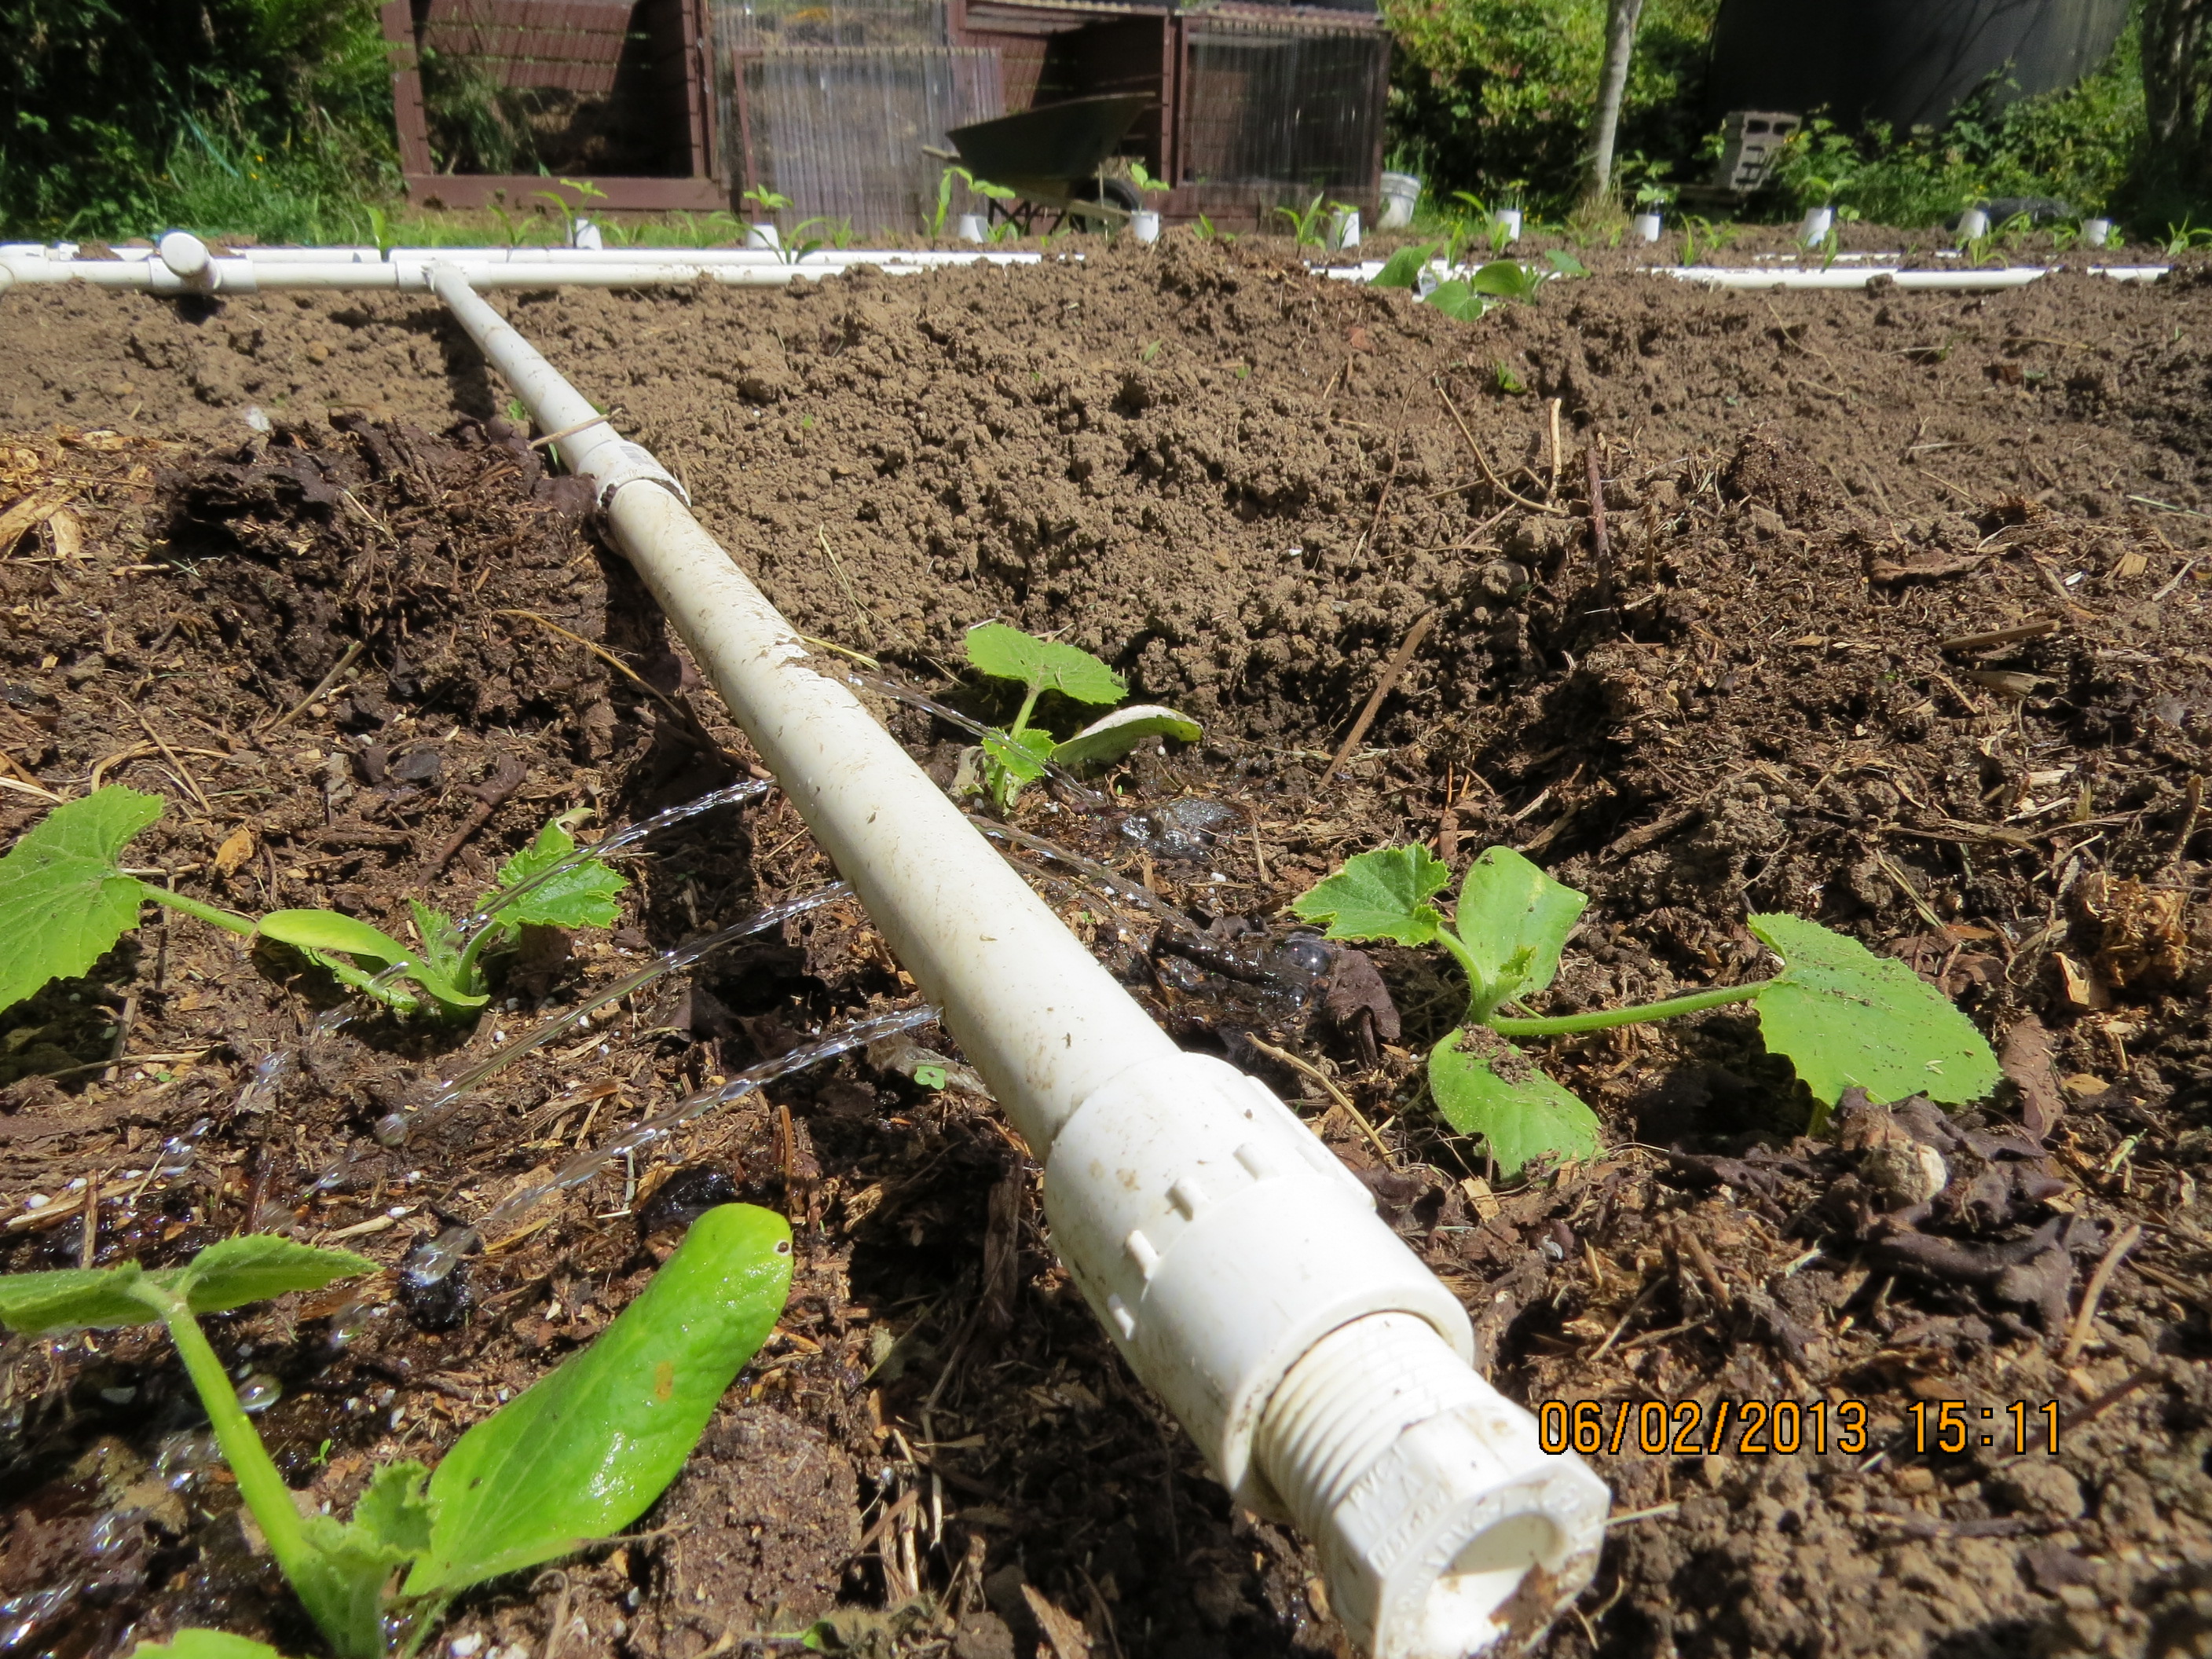
Despite the fact that the Oregon Coast gets about 60 inches (1500 mm) of rain a year, we still are very frugal about watering. Overhead sprinklers not only waste water but can invite plant diseases. We’ve found drip watering works well…but how do you water squash which is spaced so far apart? Over the years, we’ve developed a method that gets the job done with a little effort at the beginning of the season. It’s as easy as playing with tinker toys.
PVC can deliver straight to the customer…but these connections are the screw-in type that I started with about 15 years ago. I’ve since graduated to glue-less slip-ons…cheaper and easier to work with.
This glue-less connection can swing in any direction for the water hose connection.
You don’t usually need a water pressure reliever, just turn the shut-off valve on your hose if the pressure is too high.
The garden hose adapter slips on the length of PVC. Use the thin-walled type of PVC because you’ll be drilling holes in it and it doesn’t have to hold pressure.
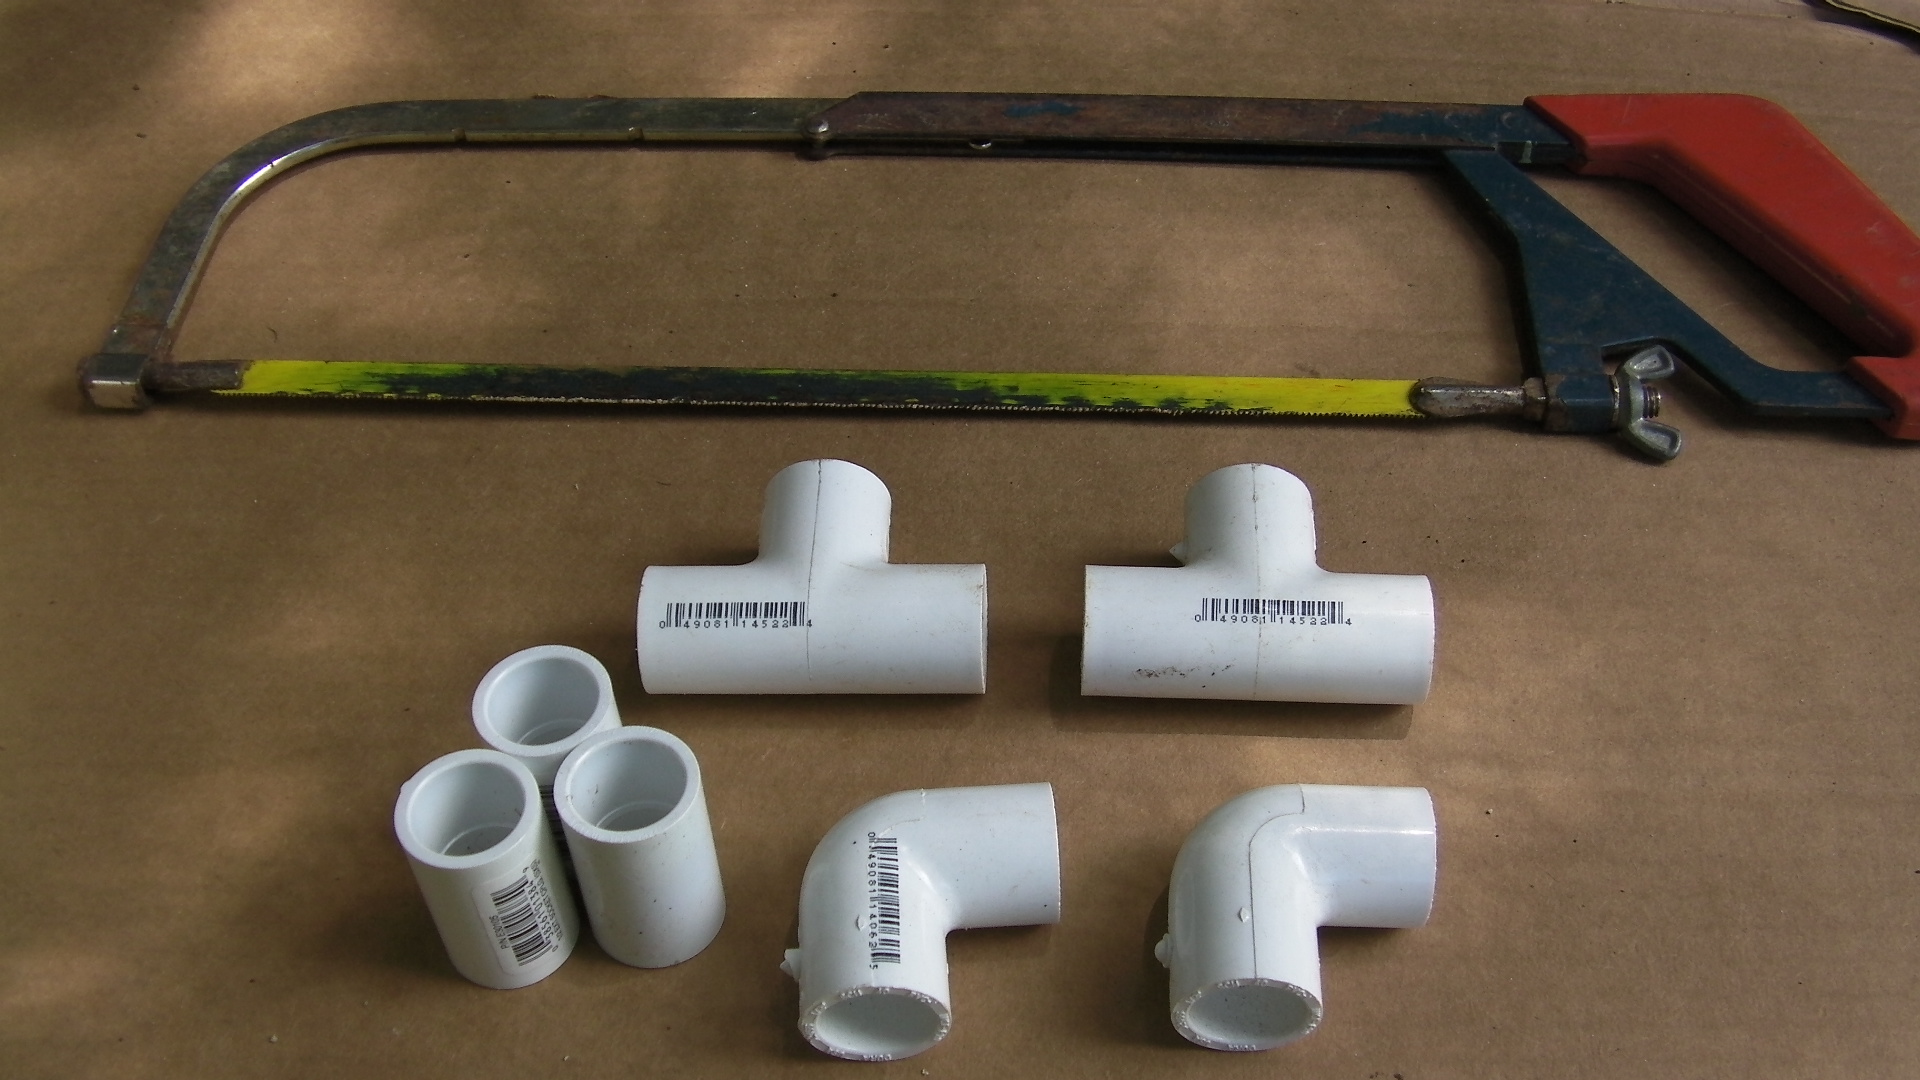
Tees, couplers, and ells, are just about all you need besides the hacksaw and 10 foot lengths of the thin walled Schedule 20 pvc.
You can economize by sharing a hose connector between two grids.
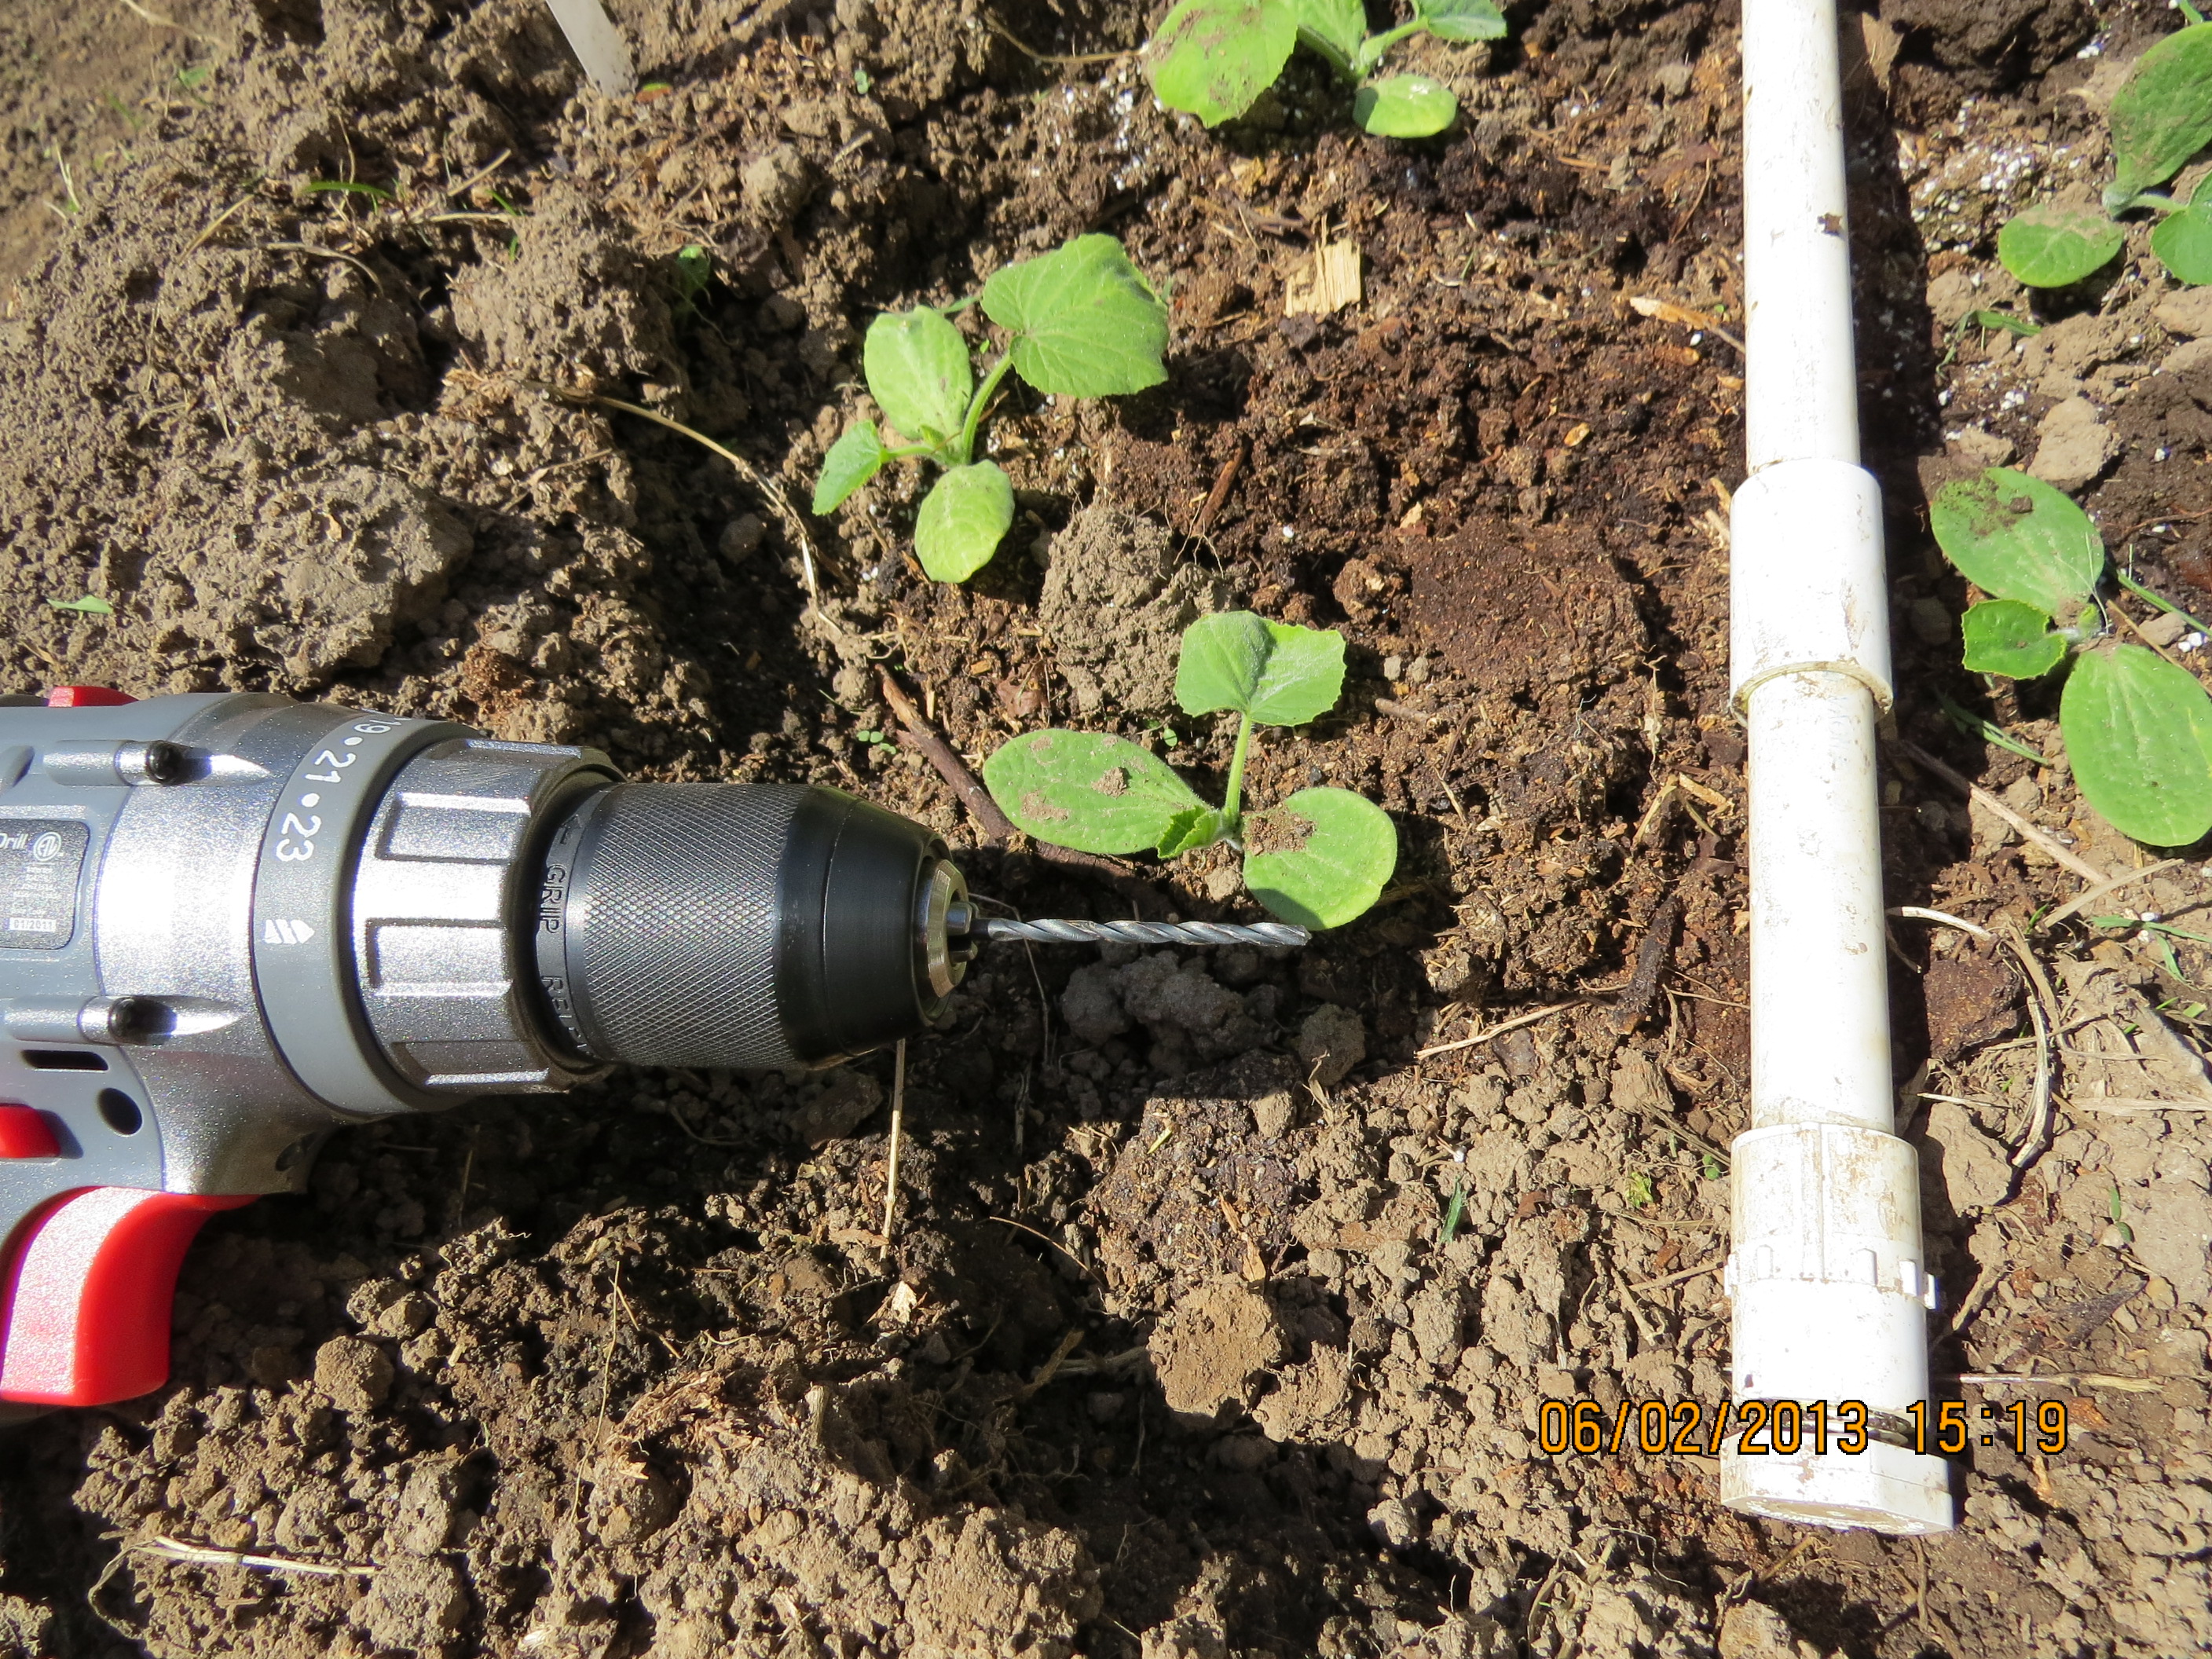
Need new holes, just drill where you want it…be careful though, it’s a little tricky getting the bit to stay put on a round surface. Don’t hold it in your hands or on your lap. If you slip…well, you get the picture.
Too many holes? Wind electrician’s tape to block off extra holes in unneeded places.
Need to get over to top of a raised bed? With the slip-on connections, it’s much easier.
Don’t be tempted to plant first and then figure out how to water it…it takes more work like this one, a real mess. My SO was in a hurry to get the seedlings in.
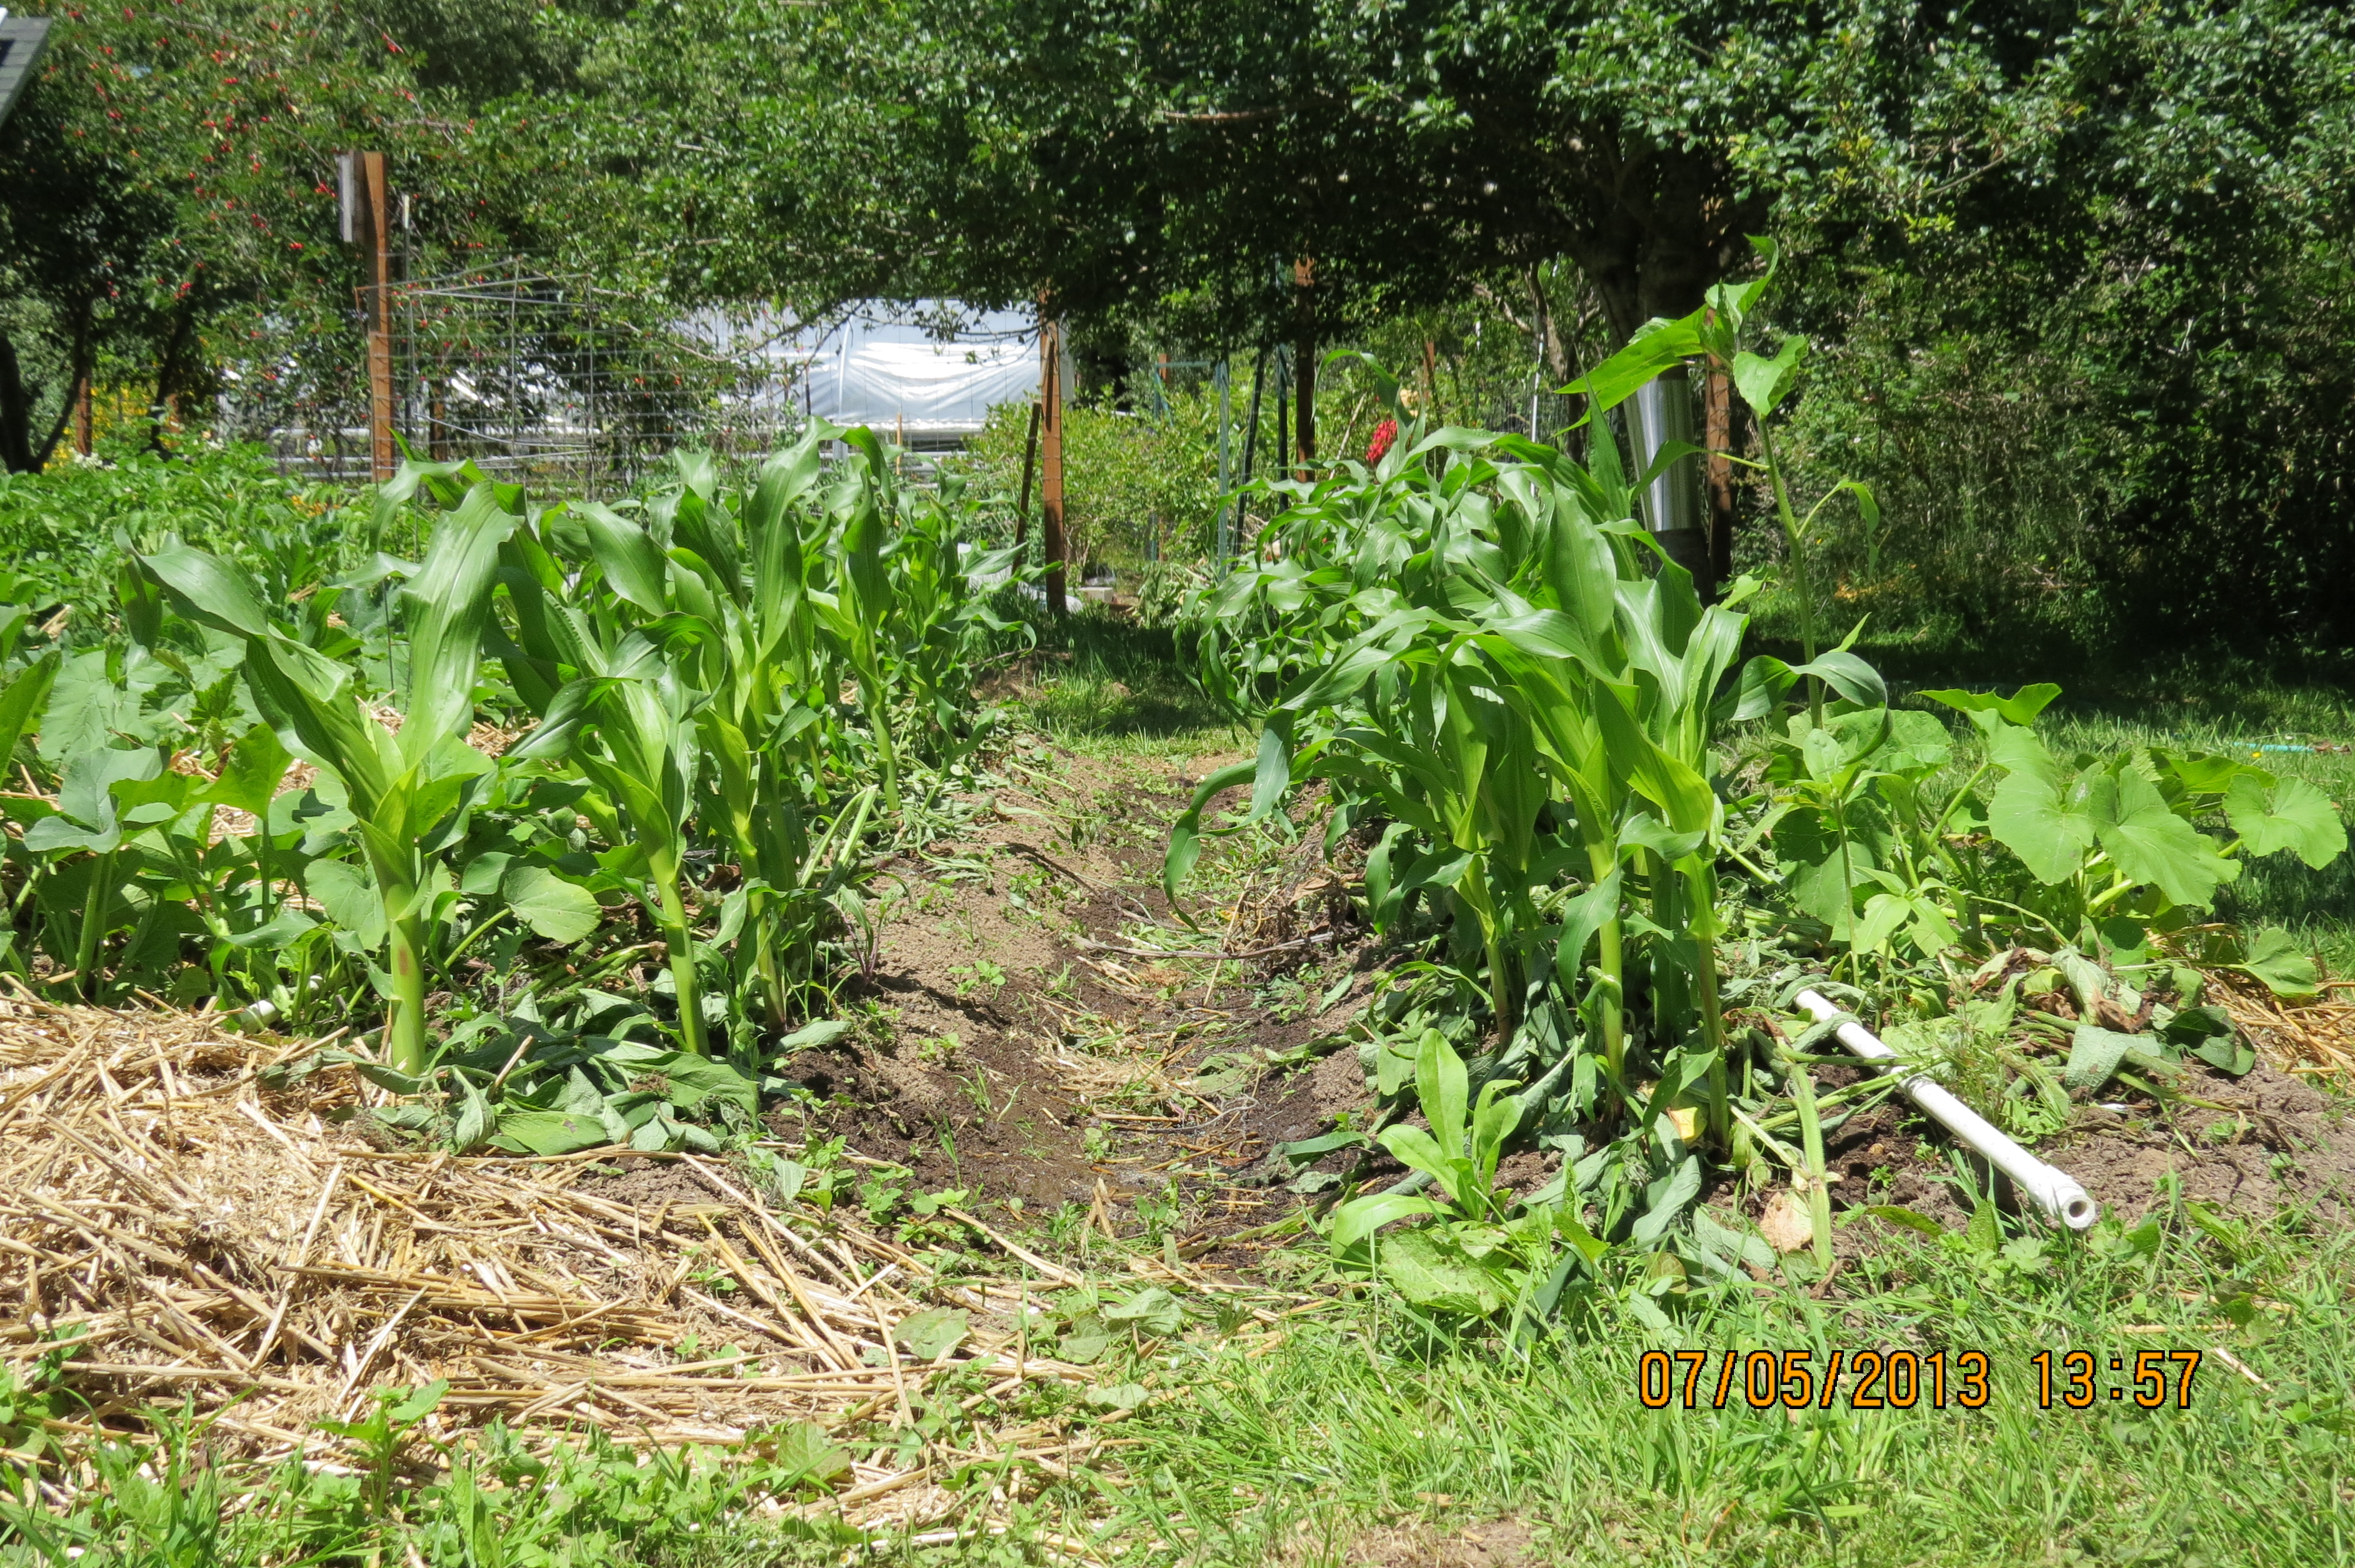
July 5, 2013…I’m trying a new compost tea. It’s made from soaking chopped-up comfrey leaves for three weeks. I’ve added it to the right row of corn only for comparison…it sure smells bad, if it doesn’t work I’ll know why. Footnote…my wife doesn’t think much of it.
An example of drip water PVC that DIDN’T work. I tried this on the Hugelkulture bed…back to the drawing board.
Drip watering potatoes…I space the potatoes at 9″ apart. The holes are drilled in the pvc at that distance. This stick is the length of all my potato beds. When I finish with one, I can move it to the next row. I use it year after year, but you know, you have to rotate your crops. Don’t follow tomatoes with potatoes, or potatoes with potatoes for at least a year, preferably two.
This is how I water all my tomatoes. You space the holes where you want the tomatoes, lay the grid in the bed, plant where the water drips out.
The start of our winter lettuce…This year I’m determined to grow enough for the winter…might be a tad early though.
July 28, 2013…time to thin lettuce and turnip greens. I had to get the deer net up, the deer are hungry, and we are on their dinner route.
July 28,2013…This new fawn was frisking around. I was able to catch it (on camera) by waiting it out. It’s momma was showing it where the best places to eat were.
After watching a video about extended season gardening about 15 years ago, my wife and I decided to try it out. We had to make a few adjustments to keep the tents from blowing down in the wind. By strapping 1.25″ pvc to the inside of the wood we can adjust the height of the hoops…one year we’ll have short hoops for greens, the next year we’ll have tall hoops for tomatoes.
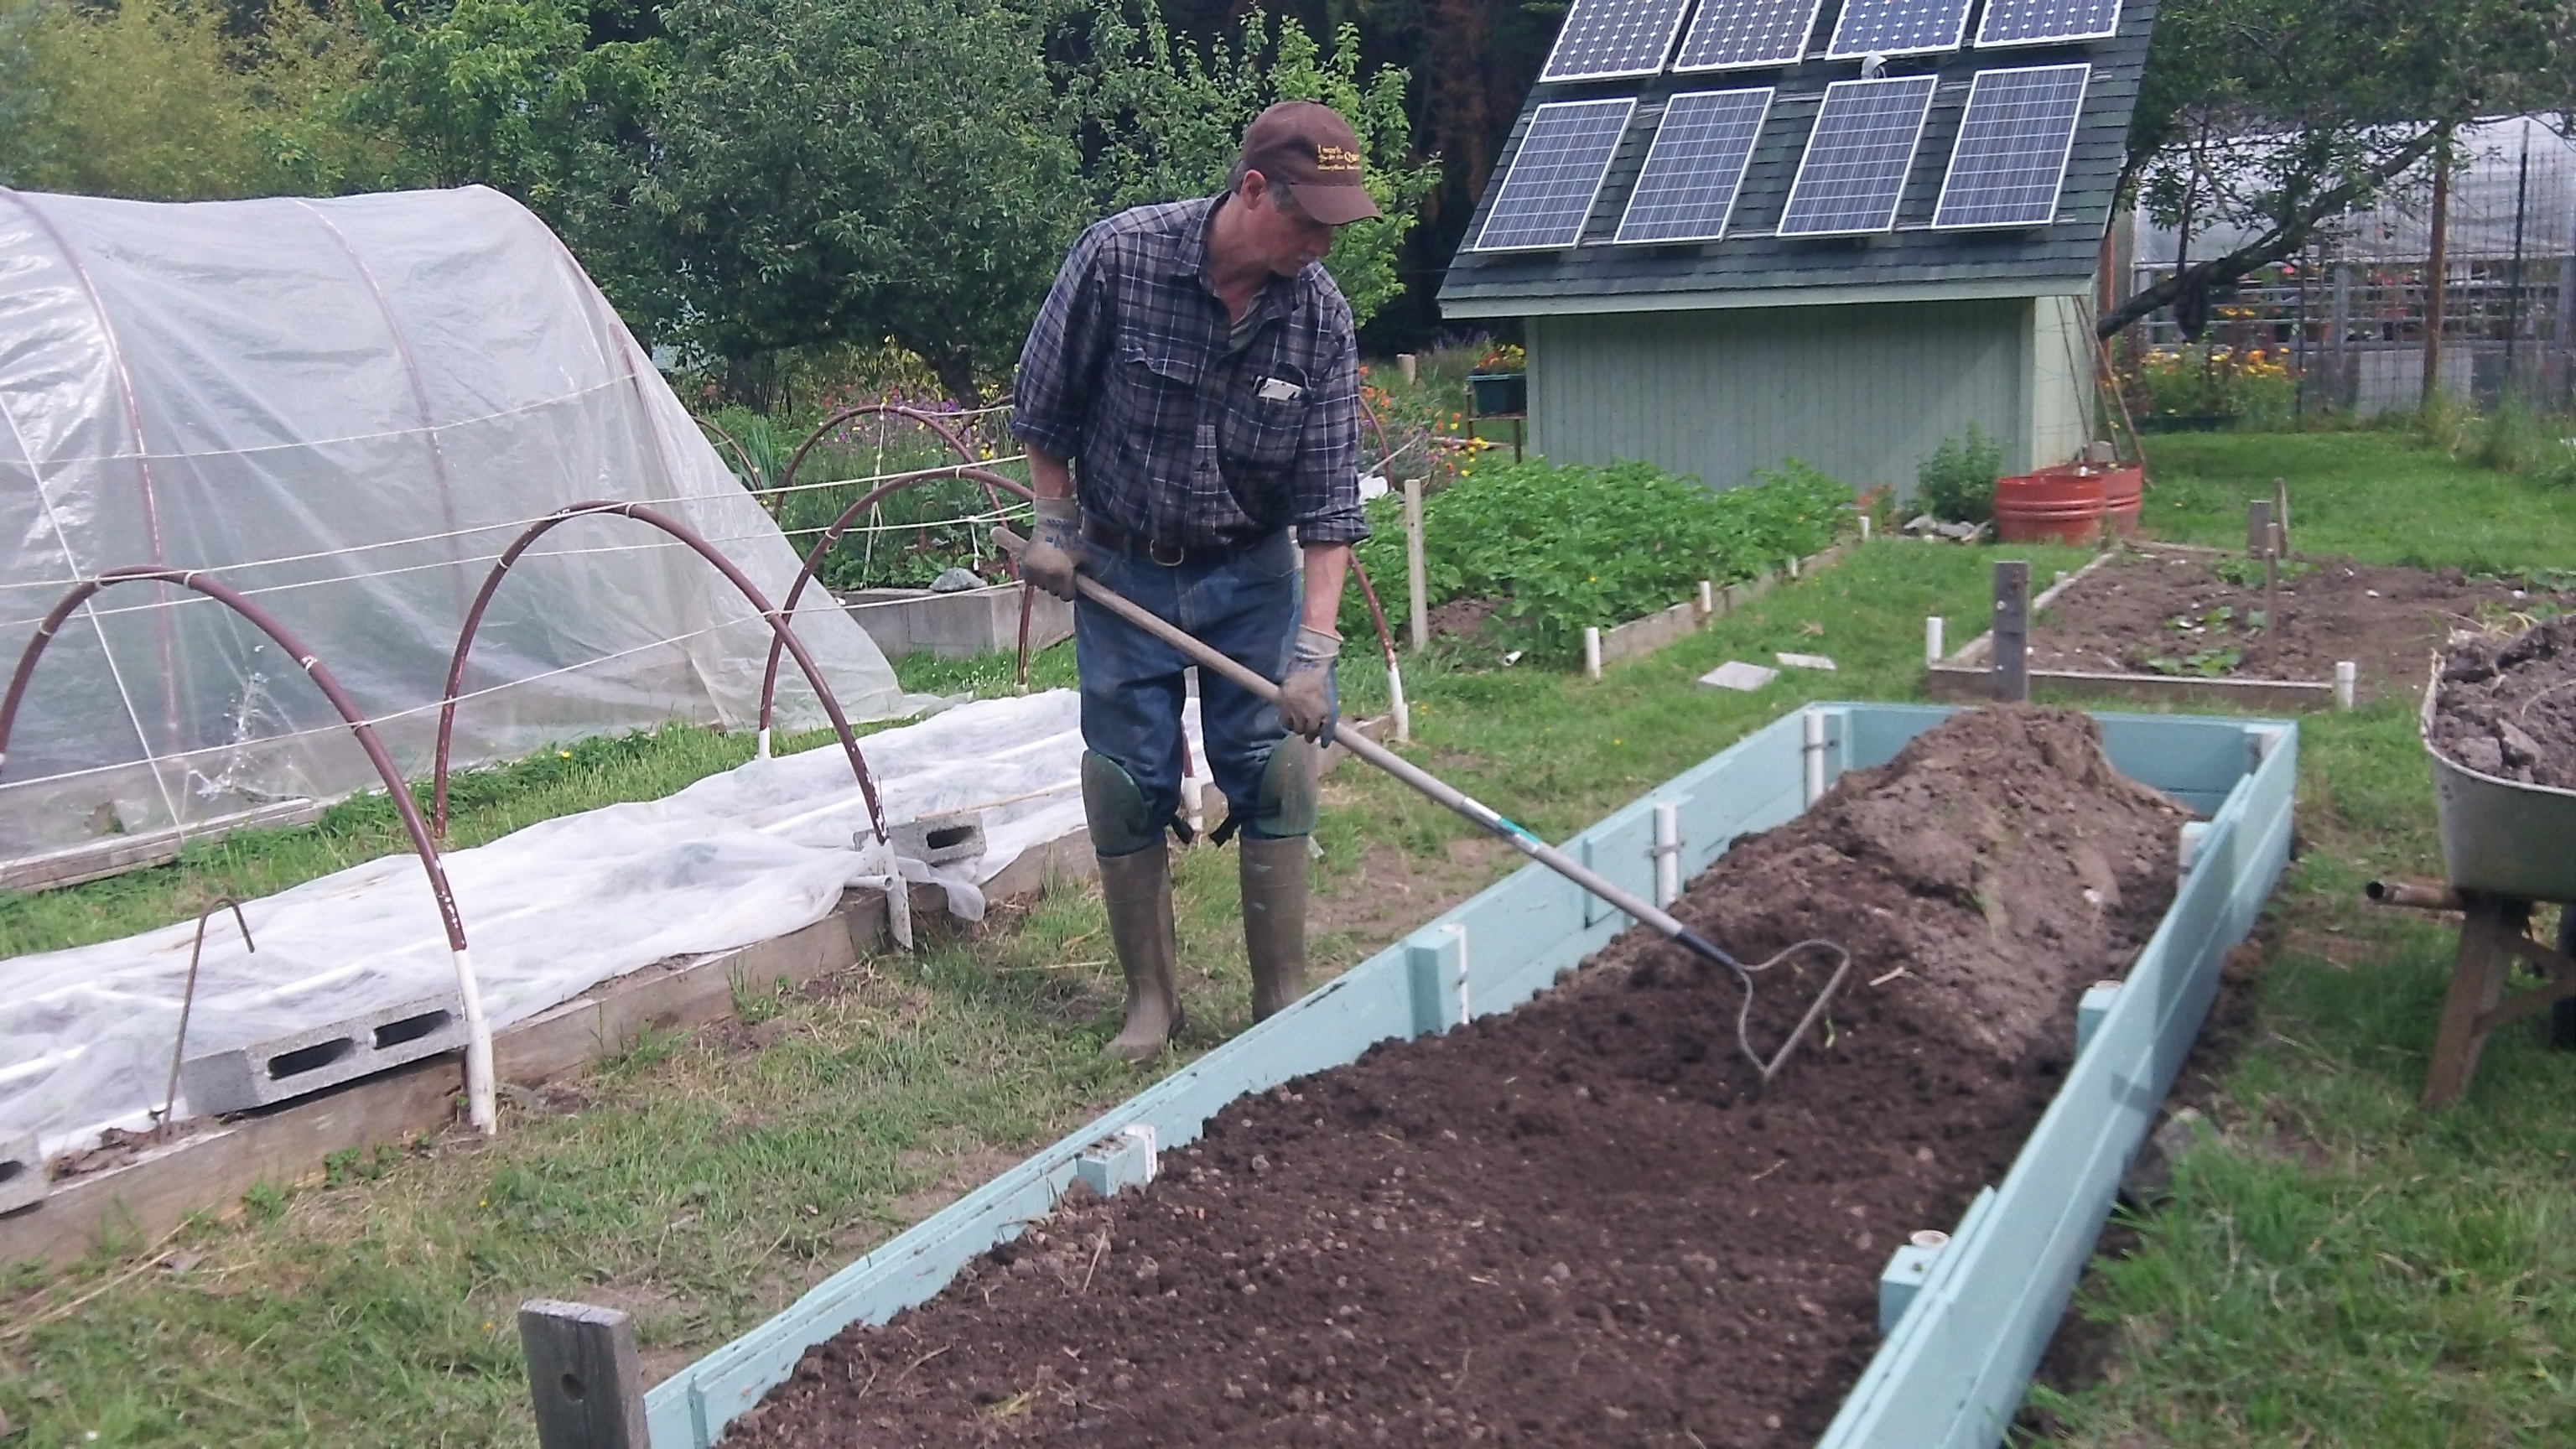
Those raised beds served us well, but are starting to rot. When we replaced some partially rotten wood siding on the house, I decided to use it as a replacement raised bed. I sawed out the rotten areas and just cobbled these together to get a 4′ x 16′ x 14″ tall bed. (1.22 m x 4.87 m x 35 cm) I painted this time with some left over house paint, hoping it will protect the wood for another 15 years.
I added two drip watering grids by using 8′ (2,44 m) pieces of pvc. The joints do not have to be glued because with all the holes drilled in them, they won’t leak. I drilled the holes about 6″ apart (15 cm) on each side and then plant where the water comes through.
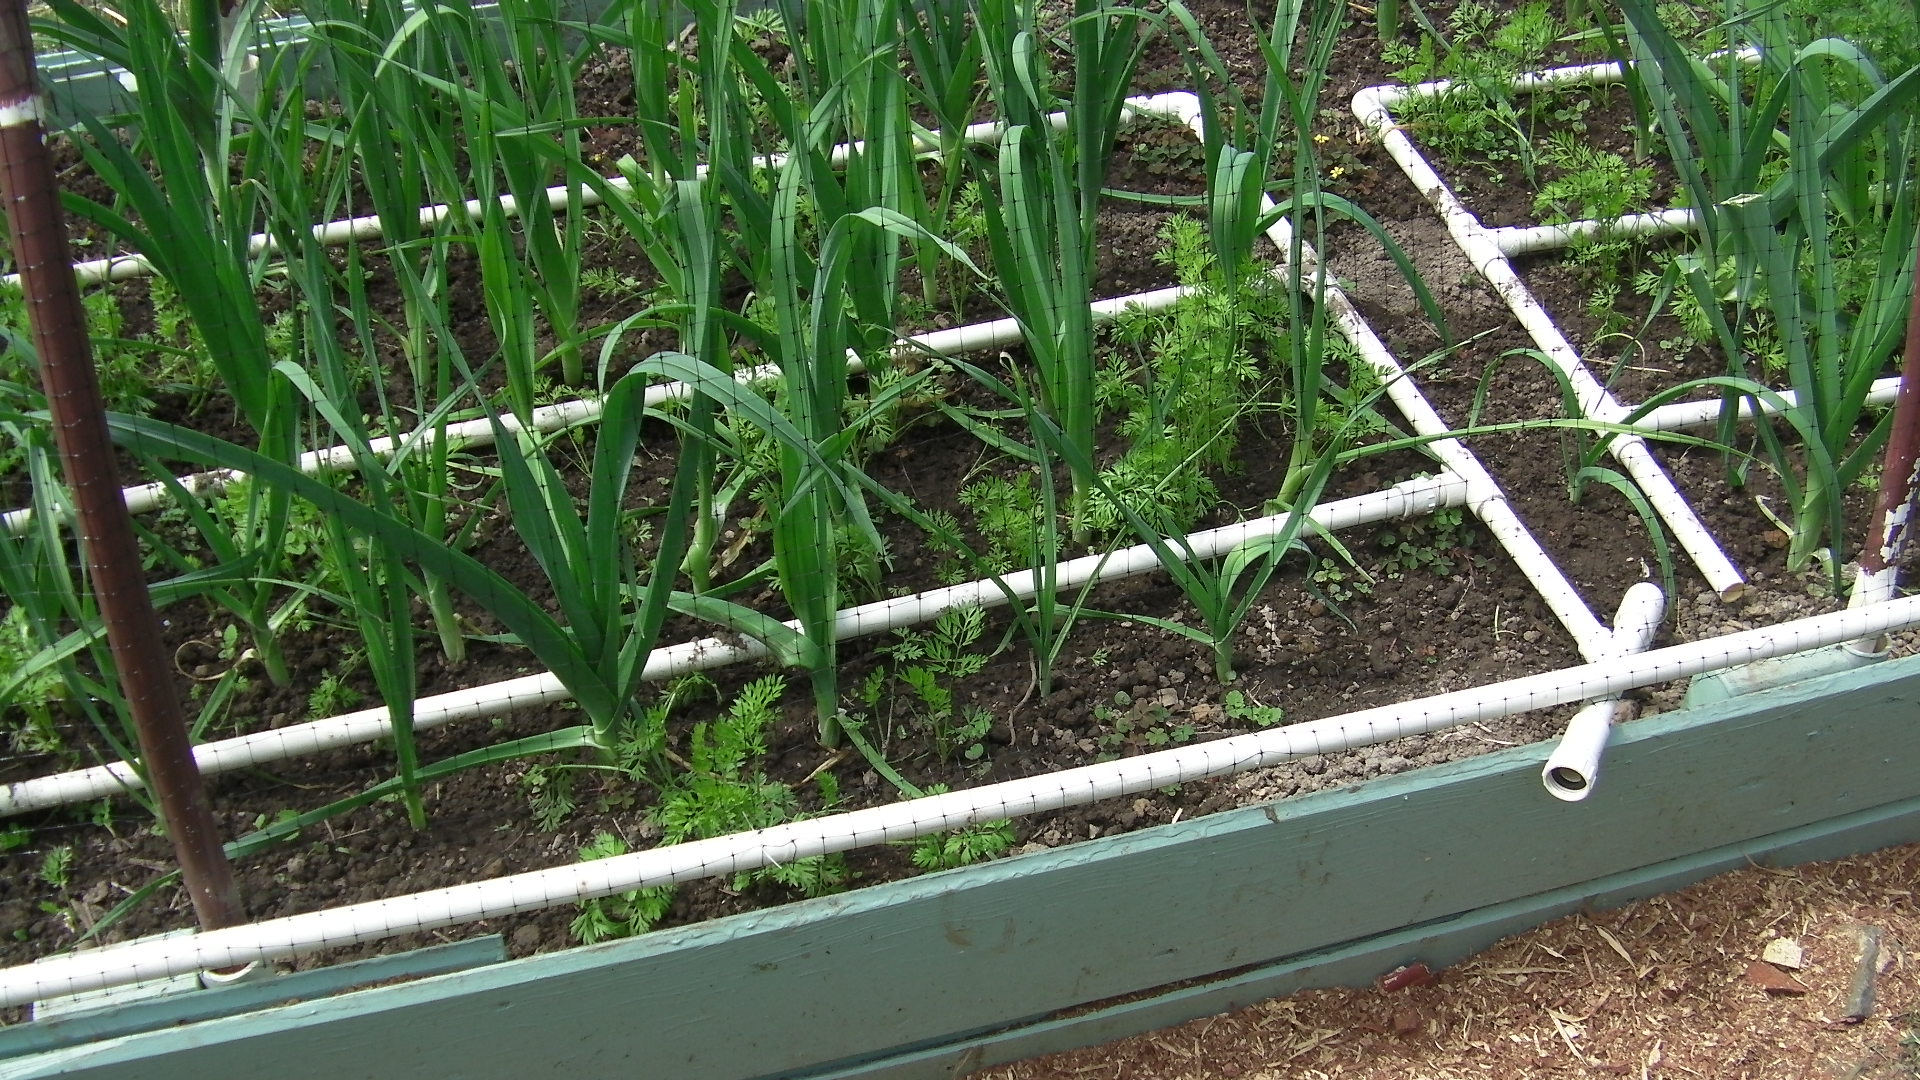
We’ve had trouble with growing carrots in the past. Sometimes they fail to germinate. If we get them to grow early in the season, the slugs get them. So we wait until July or August, but then we get a carrot maggot, those little worms that tunnel into the carrots. So in an effort to grow great carrots AND avoid the tunneling worms we found leeks to be a good companion plant to carrots. They repel the carrot fly.
Drip water grid. By not gluing the joints, I can use the same garden hose to water grid connection, by slipping it off one grid, and onto the other. Also I can ‘mix and match’ the pvc to fit longer or shorter beds the following years.
Carrots and leeks growing well
3/4 inch pvc hoop slips easily into socket (Looks like I didn’t paint it very well)
Deer love carrot tops, so to avoid a high fence all around the garden, we opt to net everything. I’ve tried twine, wire, and now fishing line to tie the netting to some pvc. It’s a very tedious job, but once it’s done, little effort is needed to flip the netting off. Just remember to flip it back or the deer will enjoy.
By placing the plastic, I can decide to protect against the raging storms, or to let a gentle rain soak the soil. In winter, I keep the plastic on to protect them in frost or the occasional snow.
The reward are healthy carrots free of little black worms and leeks for the winter dishes.
Our nights get down to a chilly 47 degrees F (8 deg. C.) so without extra care it would be impossible to grow things like peppers and eggplants.
Water grid in place, hook up hose and place transplants where the water drips out.
Add hoops, deer netting and the plastic film weighted with 1×2’s nailed to 2×2’s.
This is what it looks like now (after 3 1/2 months) with some calendulas that my wife won’t let me take out and a volunteer Swiss Chard.
The green peppers are small because the nights are so cool, but at least we get some.
Japanese eggplant (the only one that will ripen here because it’s smaller) is finally ready to be picked.
Tomatoes are coming on strong…ready for sandwiches or to be roasted.
Tomatoes, peppers, eggplants, string beans, carrots, beets, basil, (and other herbs like oregano and thyme), onions and garlic slathered with olive oil, balsamic vinegar, salt and pepper. Roast it at 425 deg. F for about 25 minutes or until the tomatoes start to brown.
After this cools, we throw it in the blender, then it goes into the quart size freezer bags so it will stack up well. It can be used over rice or potatoes, or as a spaghetti or pizza sauce.
Burying the very available crab shell and coffee grounds to spice up the soil is the first thing. Warre hive is on the left and Bee Beard carved log hive on the right. I’m in good company.
Potatoes…should we harvest now or leave them in to grow more? If I leave them in, the voles might eat them…I better take them out. Then I can plant buckwheat in both beds.
Red Pontiacs – Three at once
A mole tunnel…the moles dig the tunnels, the voles follow the tunnels to the potatoes. More than a few potatoes had been chewed on, so it was good idea to get them out of the ground.
Some of the potatoes harvested from this first potato bed. We could have left them in to grow more, but the voles would have taken a big bite out of our harvest. This way we can grow buckwheat in both beds for the bees in September.
We’ve been fairly successful in the “no tilling” method for a few years. We think it’s important to use less manufactured energy and more physical energy. Is spading ‘as good as’ using a tiller? Probably not, but it’s important to be able to grow food without using fossil fuel for the possible time when we don’t have any.
We have dug in crab shell, kitchen scraps (no meat), comfrey leaves, and coffee grounds to enhance the soil. Now we’re planting the buckwheat seed.
The drip irrigation grid and the deer netting are in place.
Why do we need deer netting? Because of her…and all her offspring!
According to this article by the Thomas Jefferson Agricultural Institute “…buckwheat crop seems to improve soil tilth, and is reported to make phosphorous more available as a soil nutrient, possible through root-associated mycorrhizae. Buckwheat flowers profusely, making it popular with bee keepers and an attractive crop in the landscape.”
Sept. 9, 2012…about 5 weeks after planting, buckwheat is looking good. Bees have been working the blossoms for a couple of weeks already.
Sept. 9, 2012…Honeybees attending to the buckwheat blossoms under the deer netting.
A fly mimicking a bee on the buckwheat blossom.
My wife saved me the ultimate embarrassment of thinking I found some kind of new bee. “Honey, that’s a FLY!” “Ulp.”
The first raised bed planted is usually the first to be harvested, enhanced, and replanted
This raised bed was planted in late March. It’s time to harvest the lettuce and cabbages, add soil amenities, and replant. We try to keep the use of a car to a minimum so today we’re getting the crab shell and coffee grounds using the bicycle and trailer.
We like to use whatever is naturally available. We’ll use coffee grounds, crab shell, kitchen garbage, leaves when available (in the fall) and garden trimmings.
Scooping up coffee grounds to add to the soil
Kitchen garbage is a surprising source of nitrogen for the soil.
Fresh crab shell gets chopped up. The soft parts will decompose by the time the roots reach it. I’ll be planting this within 3 days…can’t waste any time.
I’ve tried adding fresh crab shell to the compost pile…DON’T DO IT!!! It stinks for days. If you bury it, you won’t smell it, and you’ll be surprised by how fast the microorganisms in the soil will break it down. Just keep the dogs out of it.
Getting filled up
I hate pulling out the kale flowers that the bees love so much, but if I don’t, the deer will get under the netting and eat up my little transplants. I’ll hang it upside down in the greenhouse and save the seed.
I can’t believe I actually needed the shade cloth, but the little transplants were wilting…it serves a dual purpose in preventing (I hope) the deer from investigating. The old netting got tangled in the kale and had to be cut away.
Soil enhanced, transplanted, protected from deer and ready for Prime Time…no more wimpy shade cloth needed here
We started working on this bed 5 days before we planted. That may seem like we’re not leaving enough time for the scraps to break down, but there are 4 to 5 inches (10 to 12 cm) of soil and we figure by the time the roots get down there, it will be decomposed enough. We’ve done it many times and it seems to work well. The worms love it.


")