Archive for the ‘Drip watering’ Category

July 10, 2013...Spring veggies harvested, soil spaded and leveled, drip watering in place, this bed is ready to plant our winter garden.

July 7, 2013…Spring veggies harvested, soil spaded and leveled, drip watering in place, this bed is ready to plant our winter garden.

When we planted  turnips, lettuce and kale in July for our winter garden little did we know we were planting for the bees as well as ourselves.

July 28, 2013...turnips are growing nicely in the center, lettuce and kale are on the sides.

July 28, 2013…turnips are growing nicely in the center, lettuce and kale are on the sides. Deer netting over pvc hoops.

January 16, 2014...We had eaten most of the turnips and just left a few to go to seed.  We never thought the bees would be enjoying them in mid January.  What a welcome surprise.

January 16, 2014…We had eaten most of the turnips and just left a few to go to seed. We never thought the bees would be enjoying them in mid January. What a welcome surprise.

February 9, 2014...My apologies for posting such a fuzzy picture of a bee on the catkins,but it was rather high up.  I wanted to show where the pollen was coming from that is going into my log hive.

February 9, 2014…My apologies for posting such a fuzzy picture of a bee on the catkins,but it was rather high up. I wanted to show where the pollen was coming from that is going into my log hive.

February 9, 2014...Many colors of pollen entering the hive.  In the video you can see the bright yellow from the turnip flowers.  It's possible this is from the pussy willows that are just starting to blossom

February 9, 2014…Many colors of pollen can be seen entering the hive. In the video you can see the bright yellow pollen from turnip flowers. It’s possible this shot is from the pussy willows that are just starting to blossom.  The darker orange might be from early gorse.

February 10, 2014...Yellow turnip flowers have been flowering since mid January.  Pussy willows are starting to blossom already.

February 10, 2014…Yellow turnip flowers have been flowering since mid January. Pussy willows are starting to blossom already.  Second bed is producing greens for our salads.  We can eat them 15 minutes after they are picked…can’t get much fresher than that.  We cover them with plastic film (partially visible on far side) on nights of sub freezing temps.

Read Full Post »

Squash and corn area 6-1-13, with water grid.

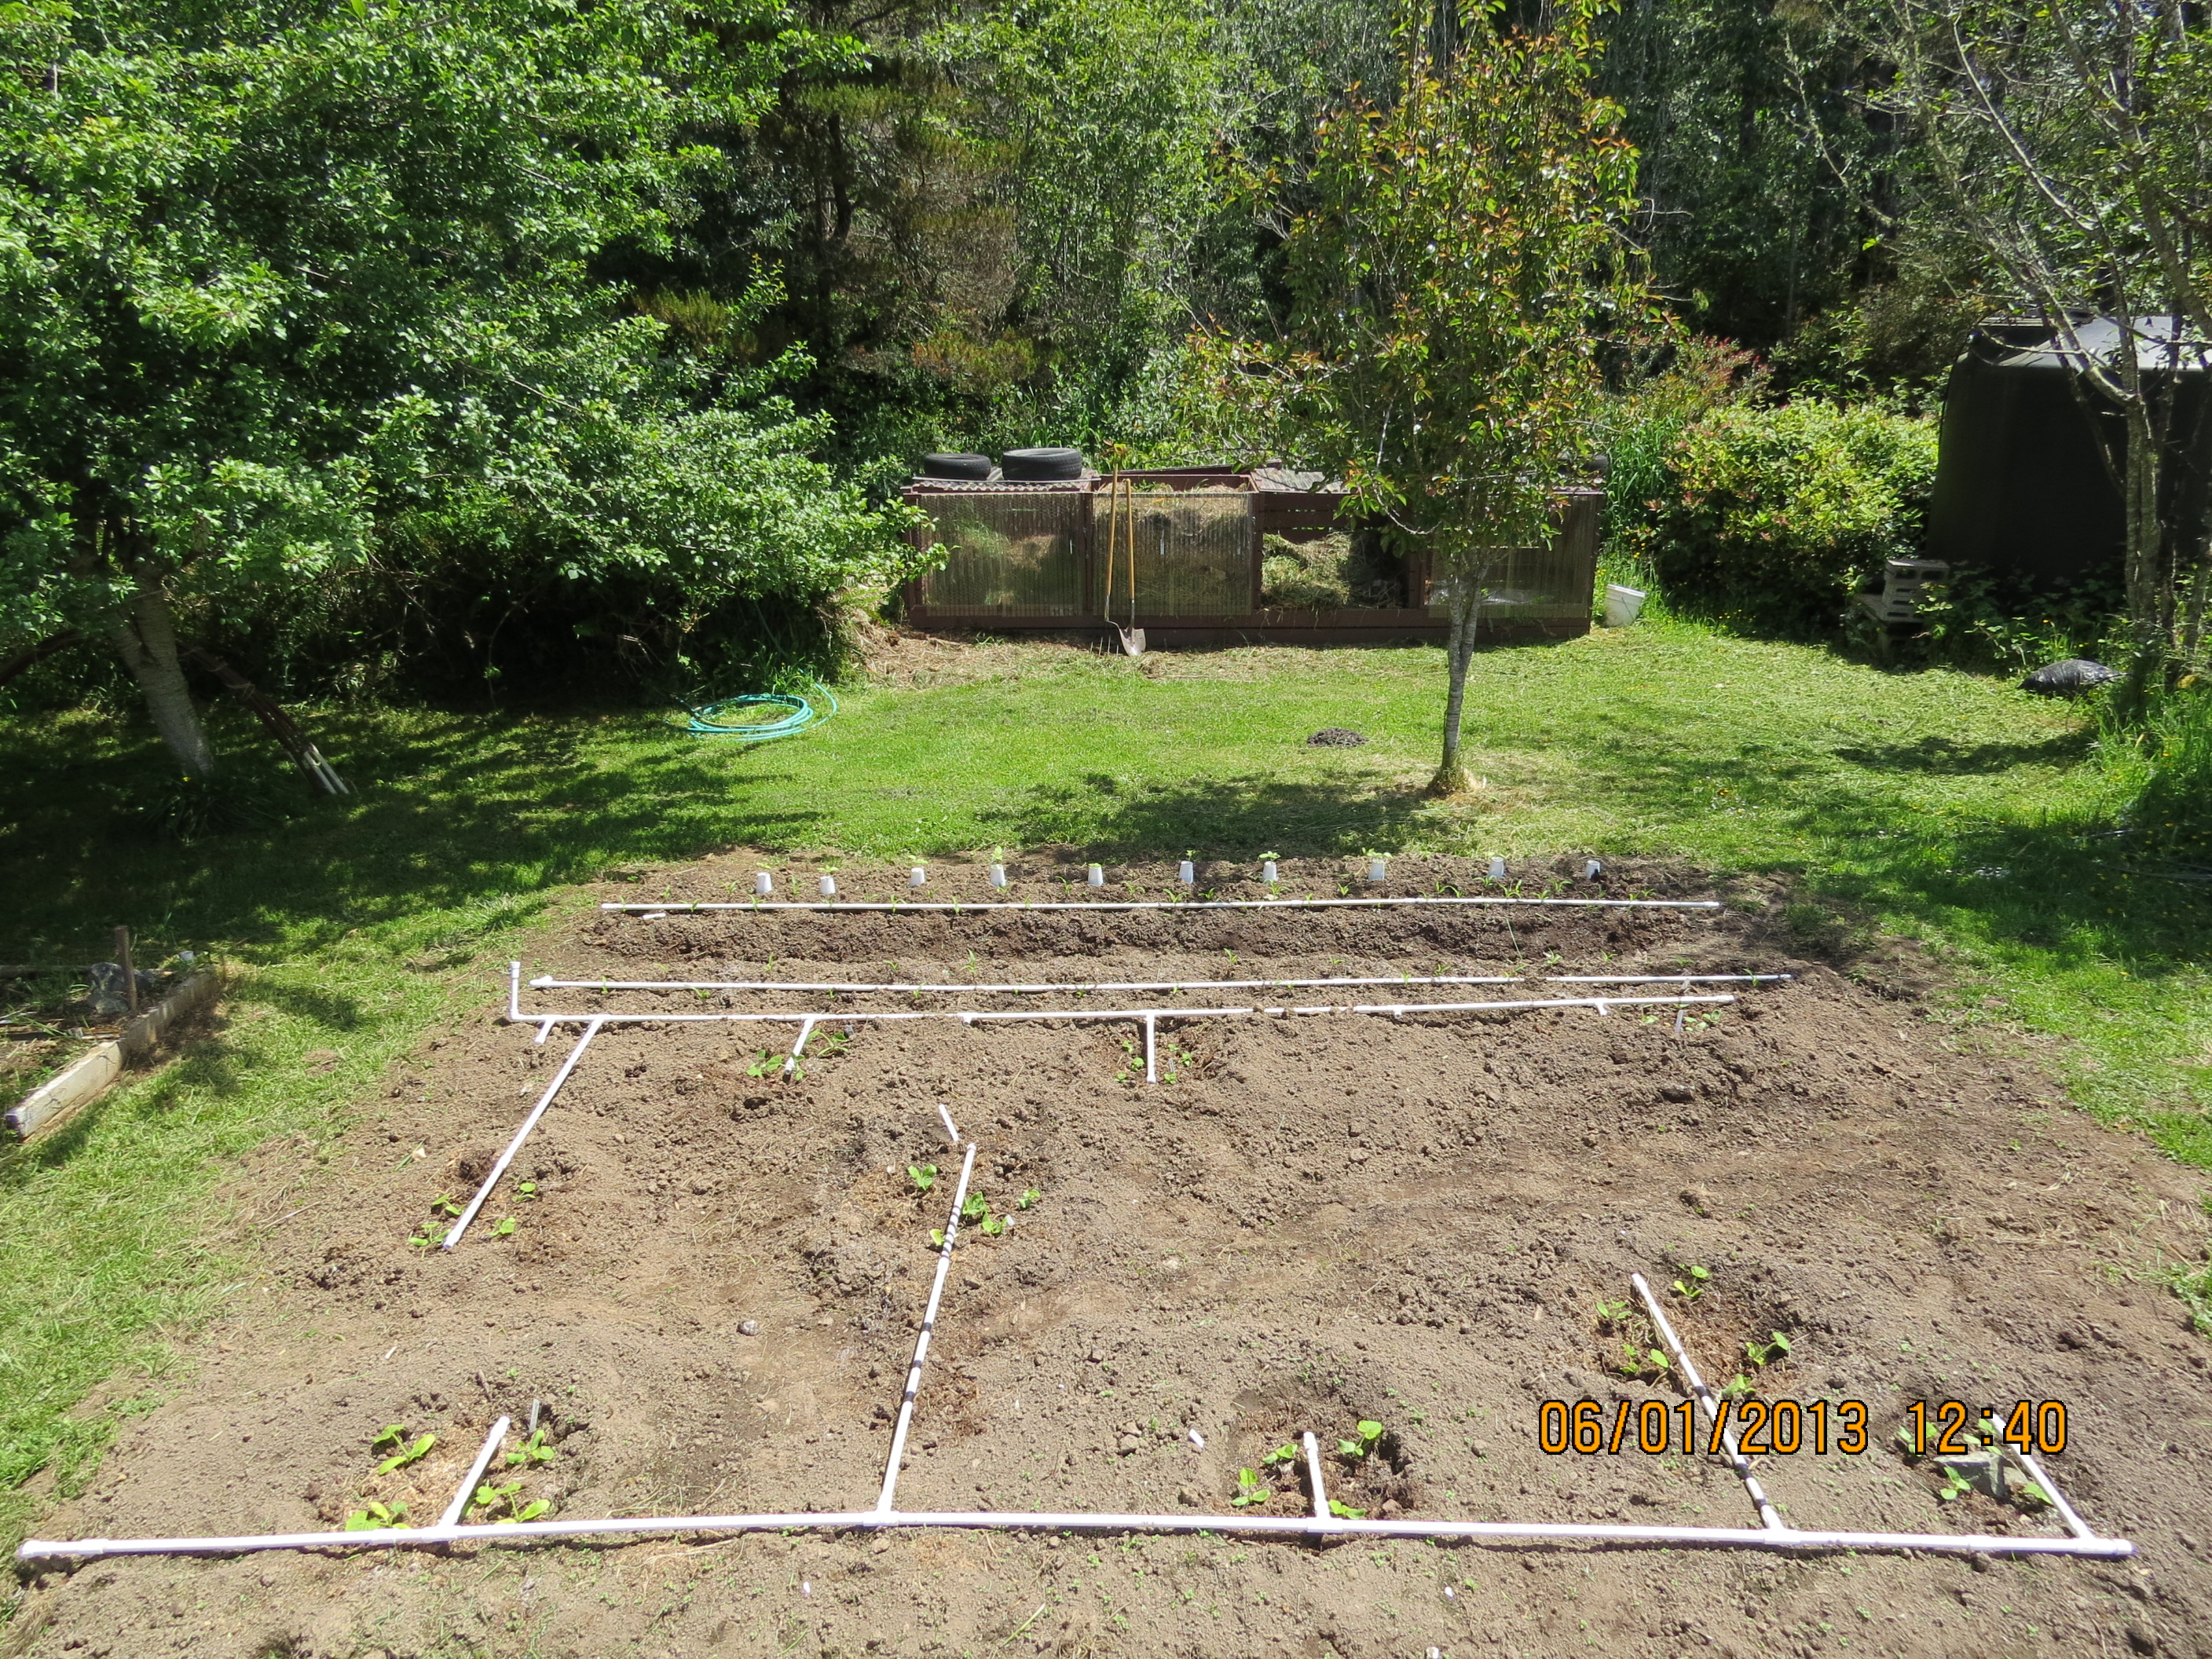
June 1, 2013…Squash and corn area with PVC water grids.

July 6, 2013...Squash and corn growing well after mulch added to keep soil from drying out.

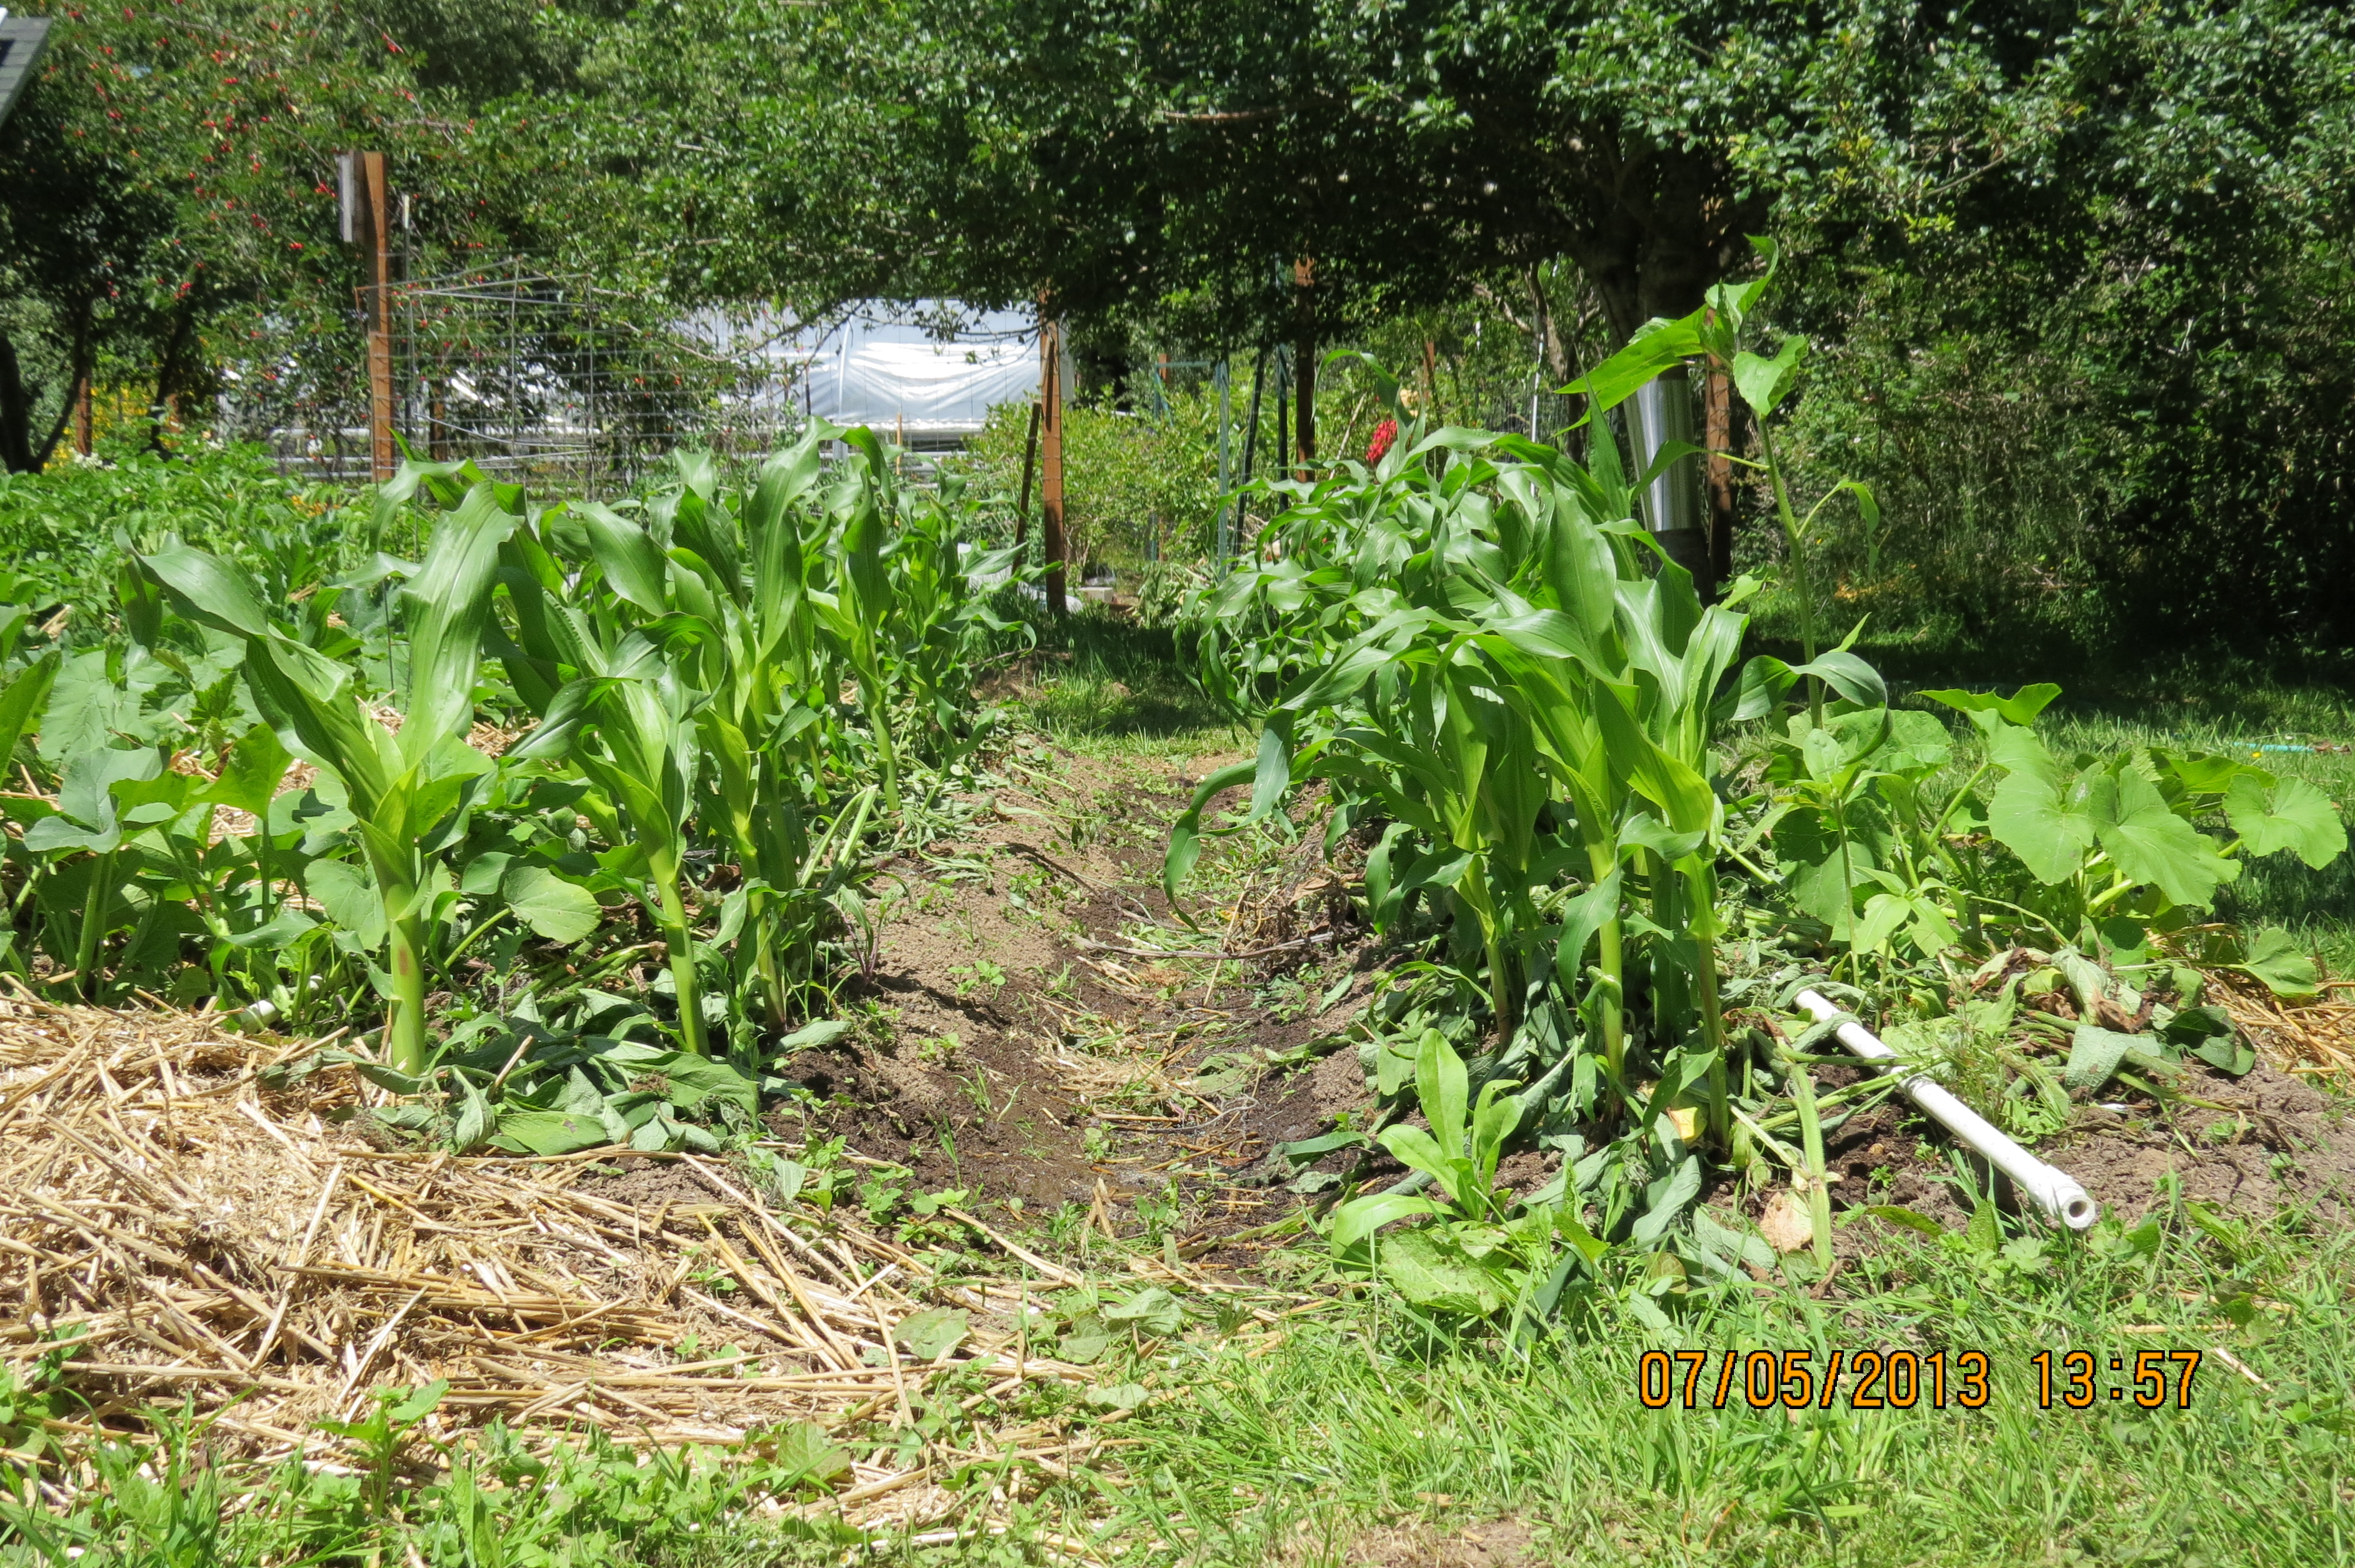
July 6, 2013…Squash and corn growing well after mulch added to keep soil from drying out.

July 24, 2013...Squash and corn bed, almost ready to harvest some.

July 24, 2013…Squash and corn bed.  Corn is starting to tassel..

Despite the fact that the Oregon Coast gets about 60 inches (1500 mm) of rain a year, we still are very frugal about watering.   Overhead sprinklers not only waste water but can invite plant diseases.  We’ve found drip watering works well…but how do you water squash which is spaced so far apart?  Over the years, we’ve developed a method that gets the job done with a little effort at the beginning of the season.  It’s as easy as playing with tinker toys.

PVC can deliver straight to the customer...but these connections are the screw-in type that I started with about 15 years ago.  I've since graduated to slip-ons...cheaper and easier to work with.

PVC can deliver straight to the customer…but these connections are the screw-in type that I started with about 15 years ago. I’ve since graduated to glue-less slip-ons…cheaper and easier to work with.

This connection can swing in any direction for the water hose connection.

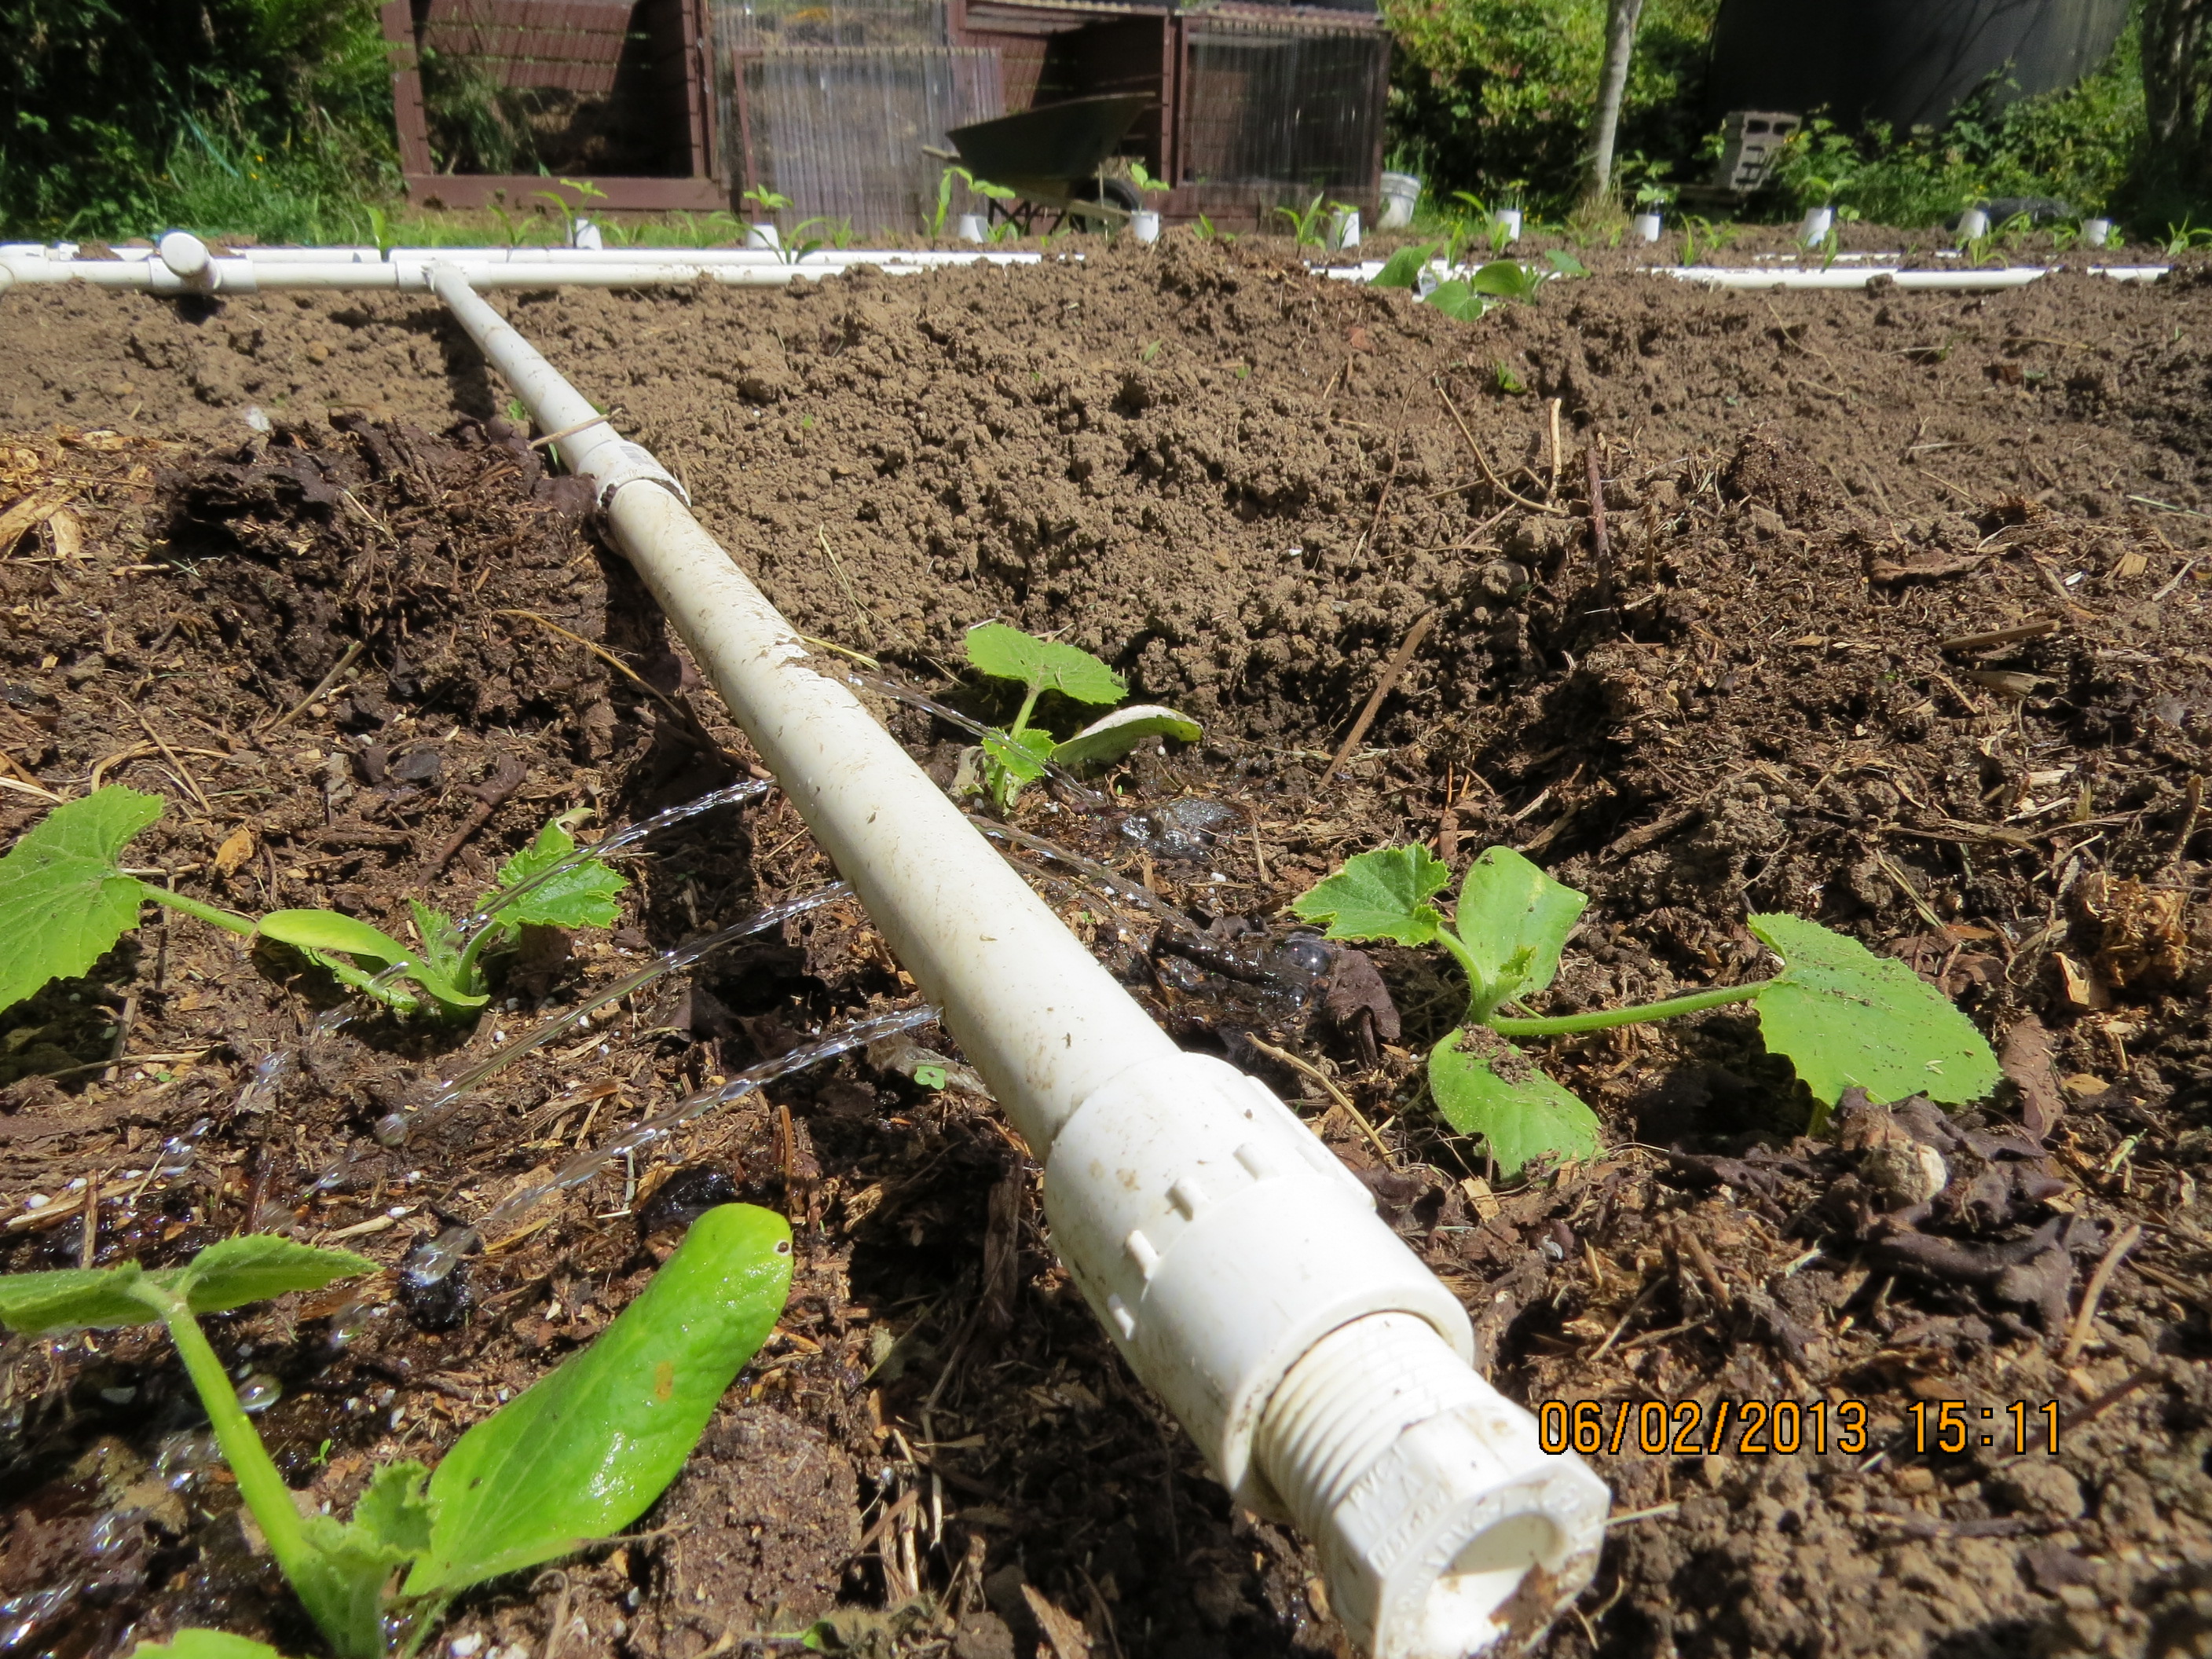
This glue-less connection can swing in any direction for the water hose connection.

You don't usually need a water pressure reliever, just turn the shut-off valve on your hose if the pressure is too high.

You don’t usually need a water pressure reliever, just turn the shut-off valve on your hose if the pressure is too high.

The garden hose adapter slips on the length of PVC.  Use the thinner type of PVC (cheaper as well) because you'll be drilling holes in it and it doesn't have to hold pressure.

The garden hose adapter slips on the length of PVC. Use the thin-walled type of PVC because you’ll be drilling holes in it and it doesn’t have to hold pressure.

Tees, couplers, and ells, are just about all you need besides the hack saw and 10 foot lengths of the thin walled Schedule 20 pvc.

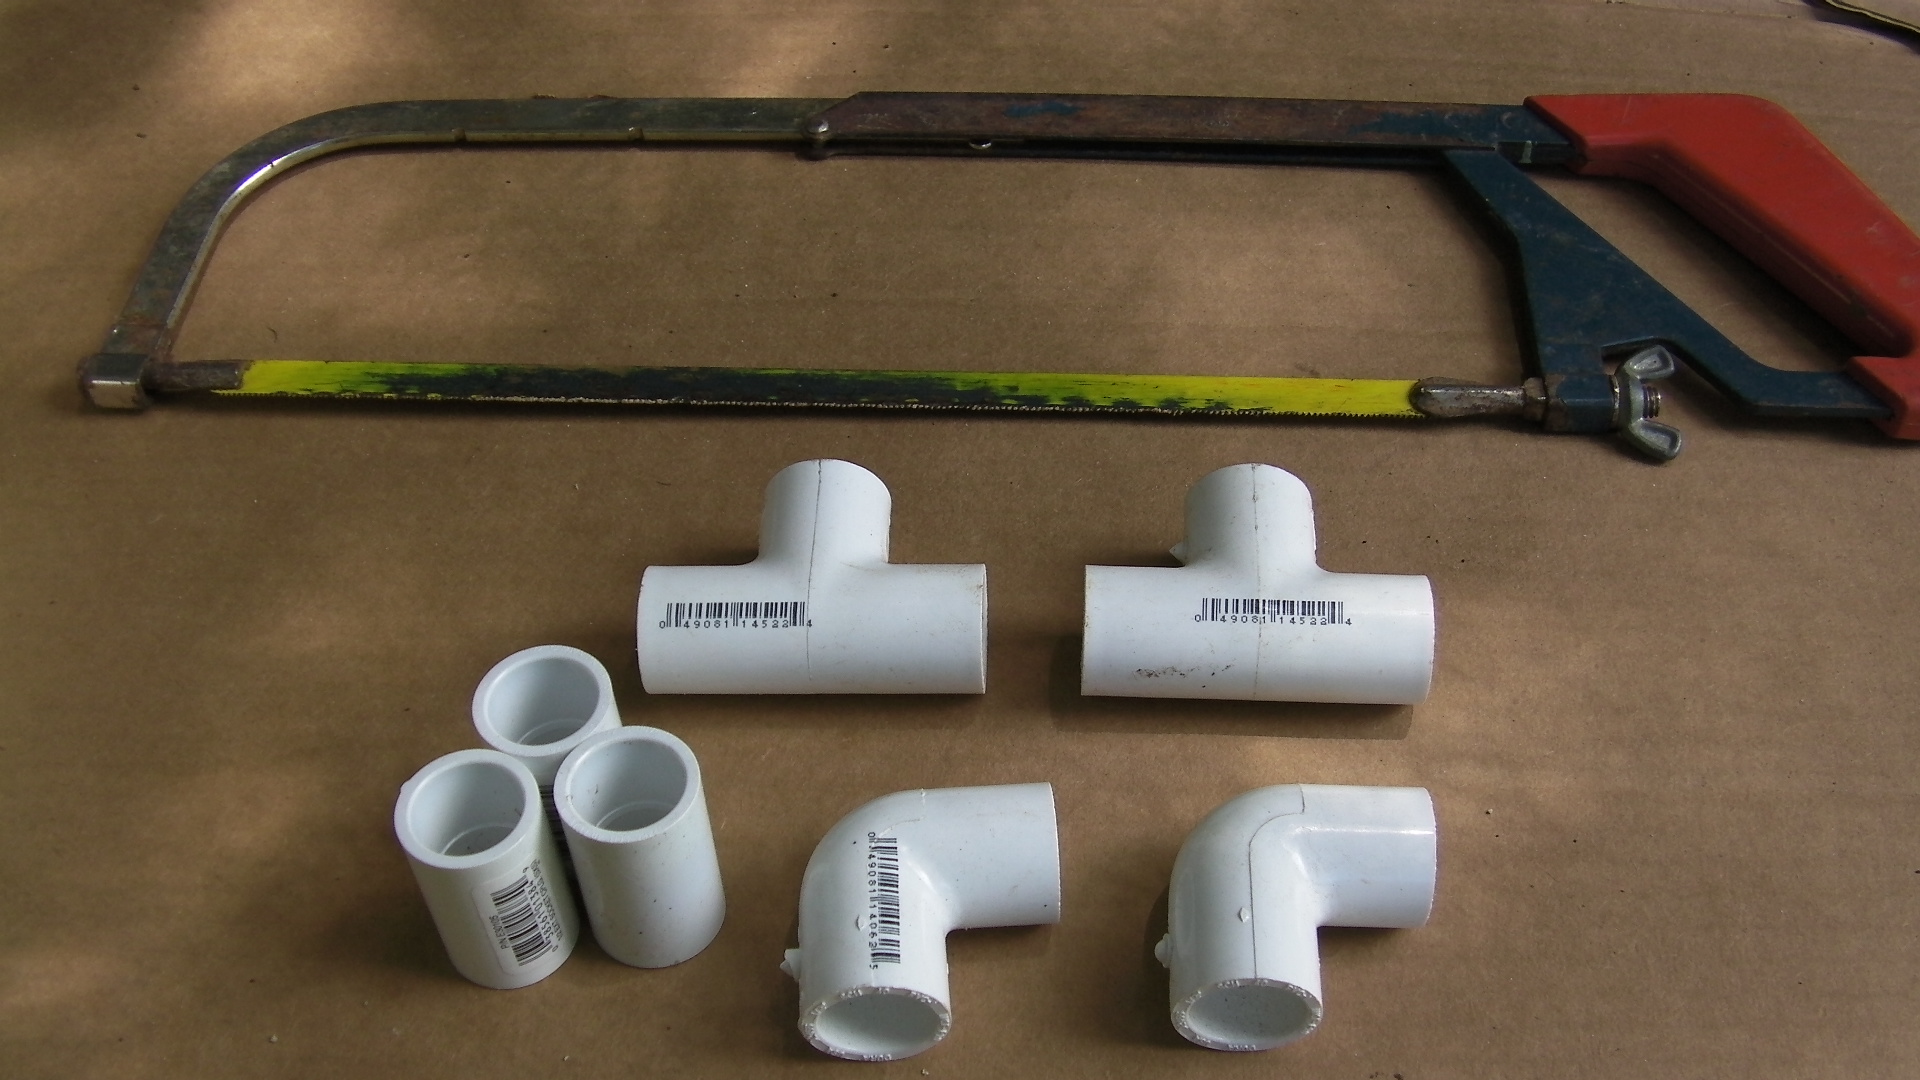
Tees, couplers, and ells, are just about all you need besides the hacksaw and 10 foot lengths of the thin walled Schedule 20 pvc.

You can economize by sharing a hose connector between two grids.

You can economize by sharing a hose connector between two grids.

Need new holes, just drill where you want it...be careful though, it's a little tricky getting the bit to stay put on a round surface.

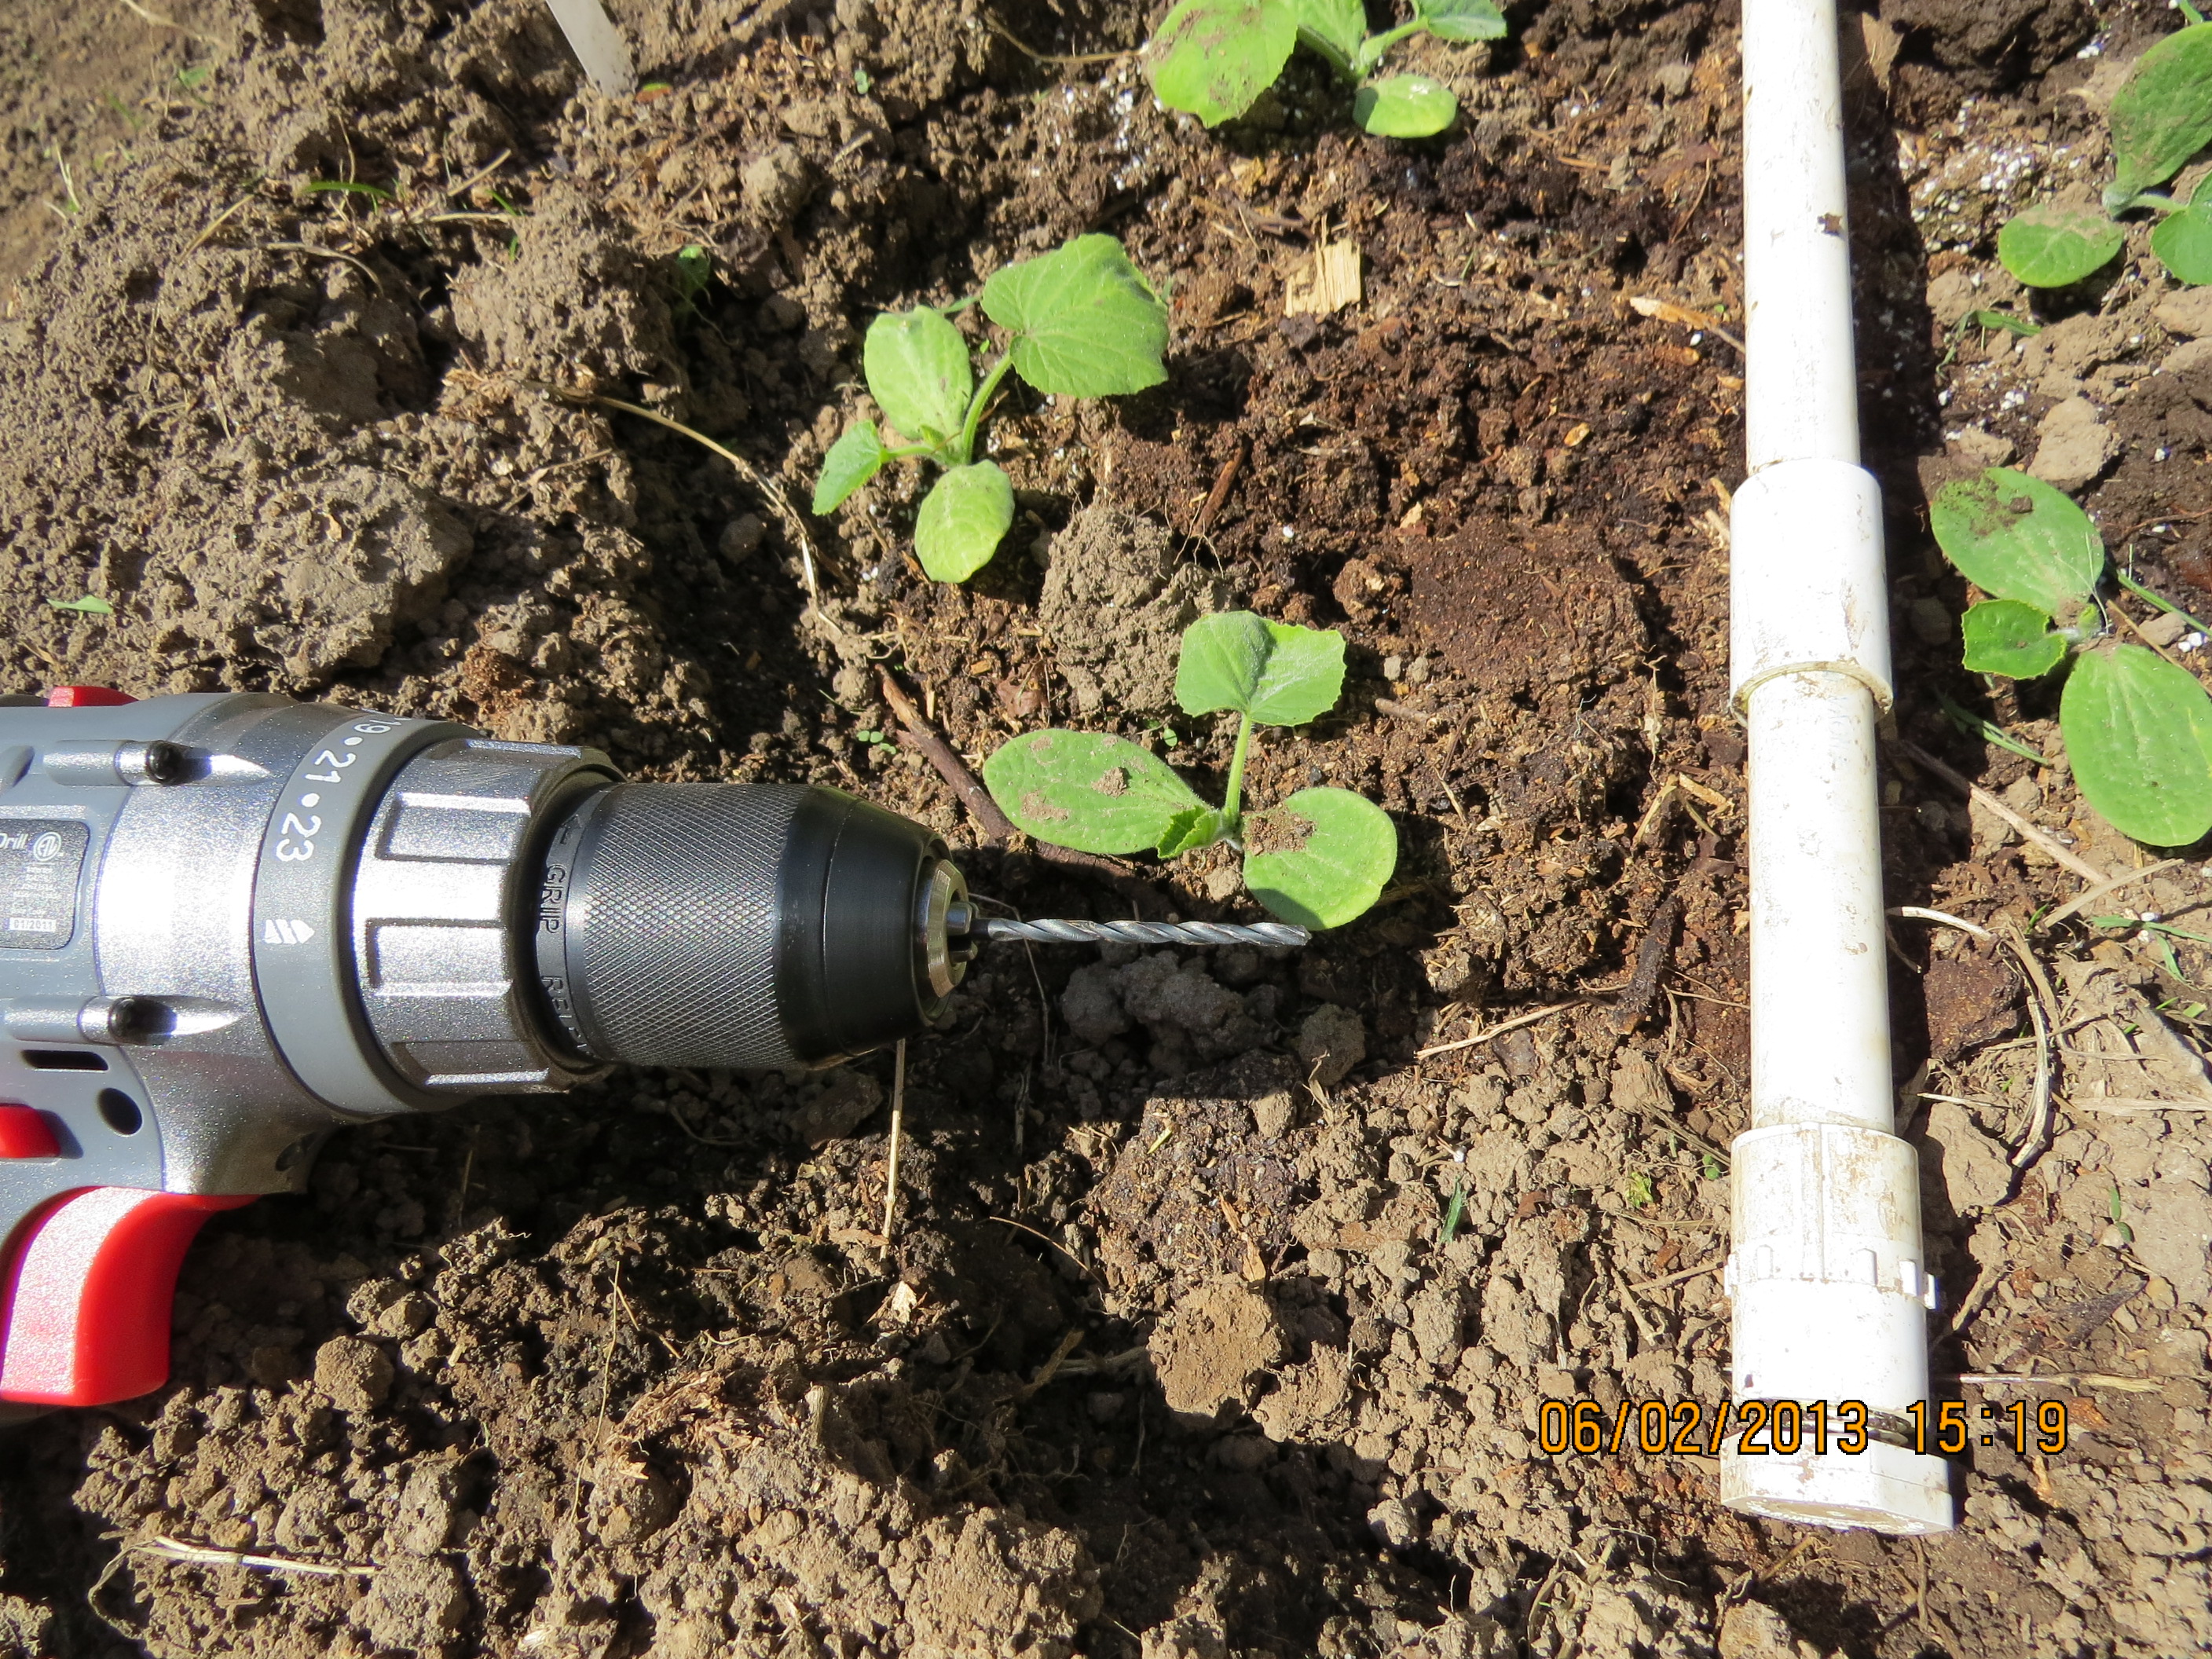
Need new holes, just drill where you want it…be careful though, it’s a little tricky getting the bit to stay put on a round surface.  Don’t hold it in your hands or on your lap.  If you slip…well, you get the picture.

Too many holes?  Wind electrician's tape to block off extra holes in unwanted places.

Too many holes? Wind electrician’s tape to block off extra holes in unneeded  places.

Need to get over a raised bed?  With the slip-on connections, it's much easier.

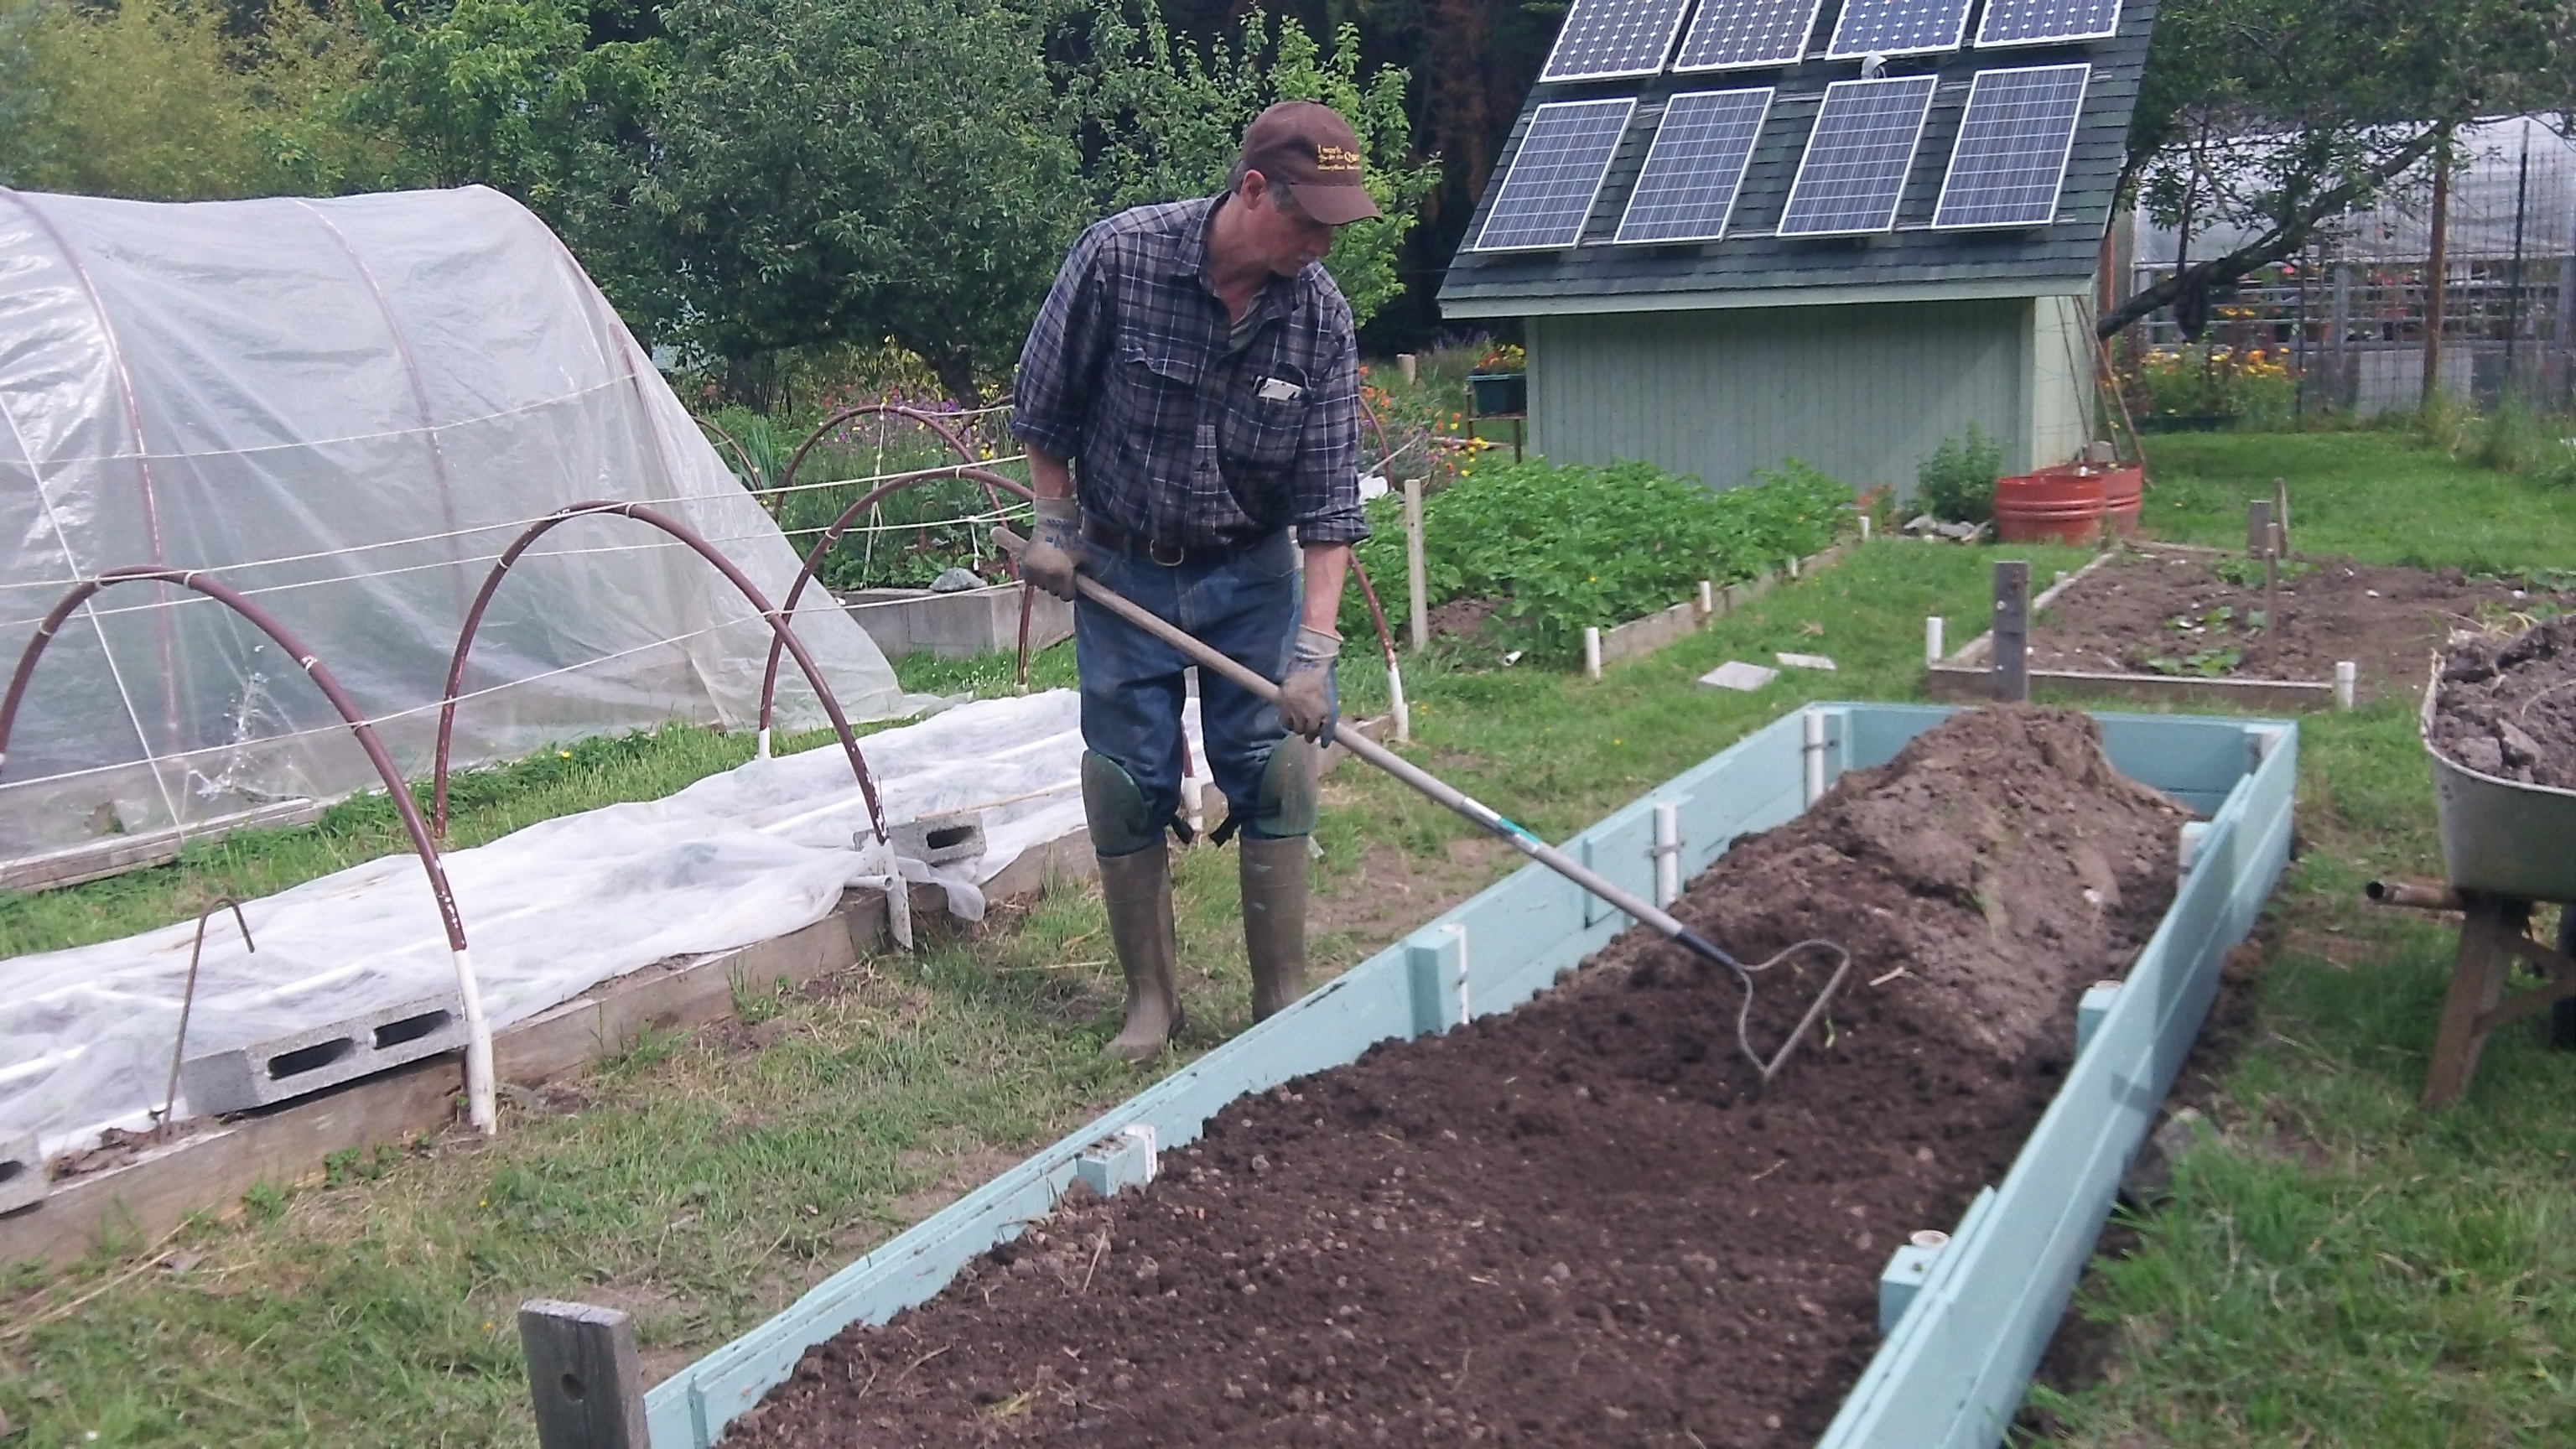
Need to get over to top of a raised bed? With the slip-on connections, it’s much easier.

Don't plant first and then figure out how to water it...it takes more work like this one.

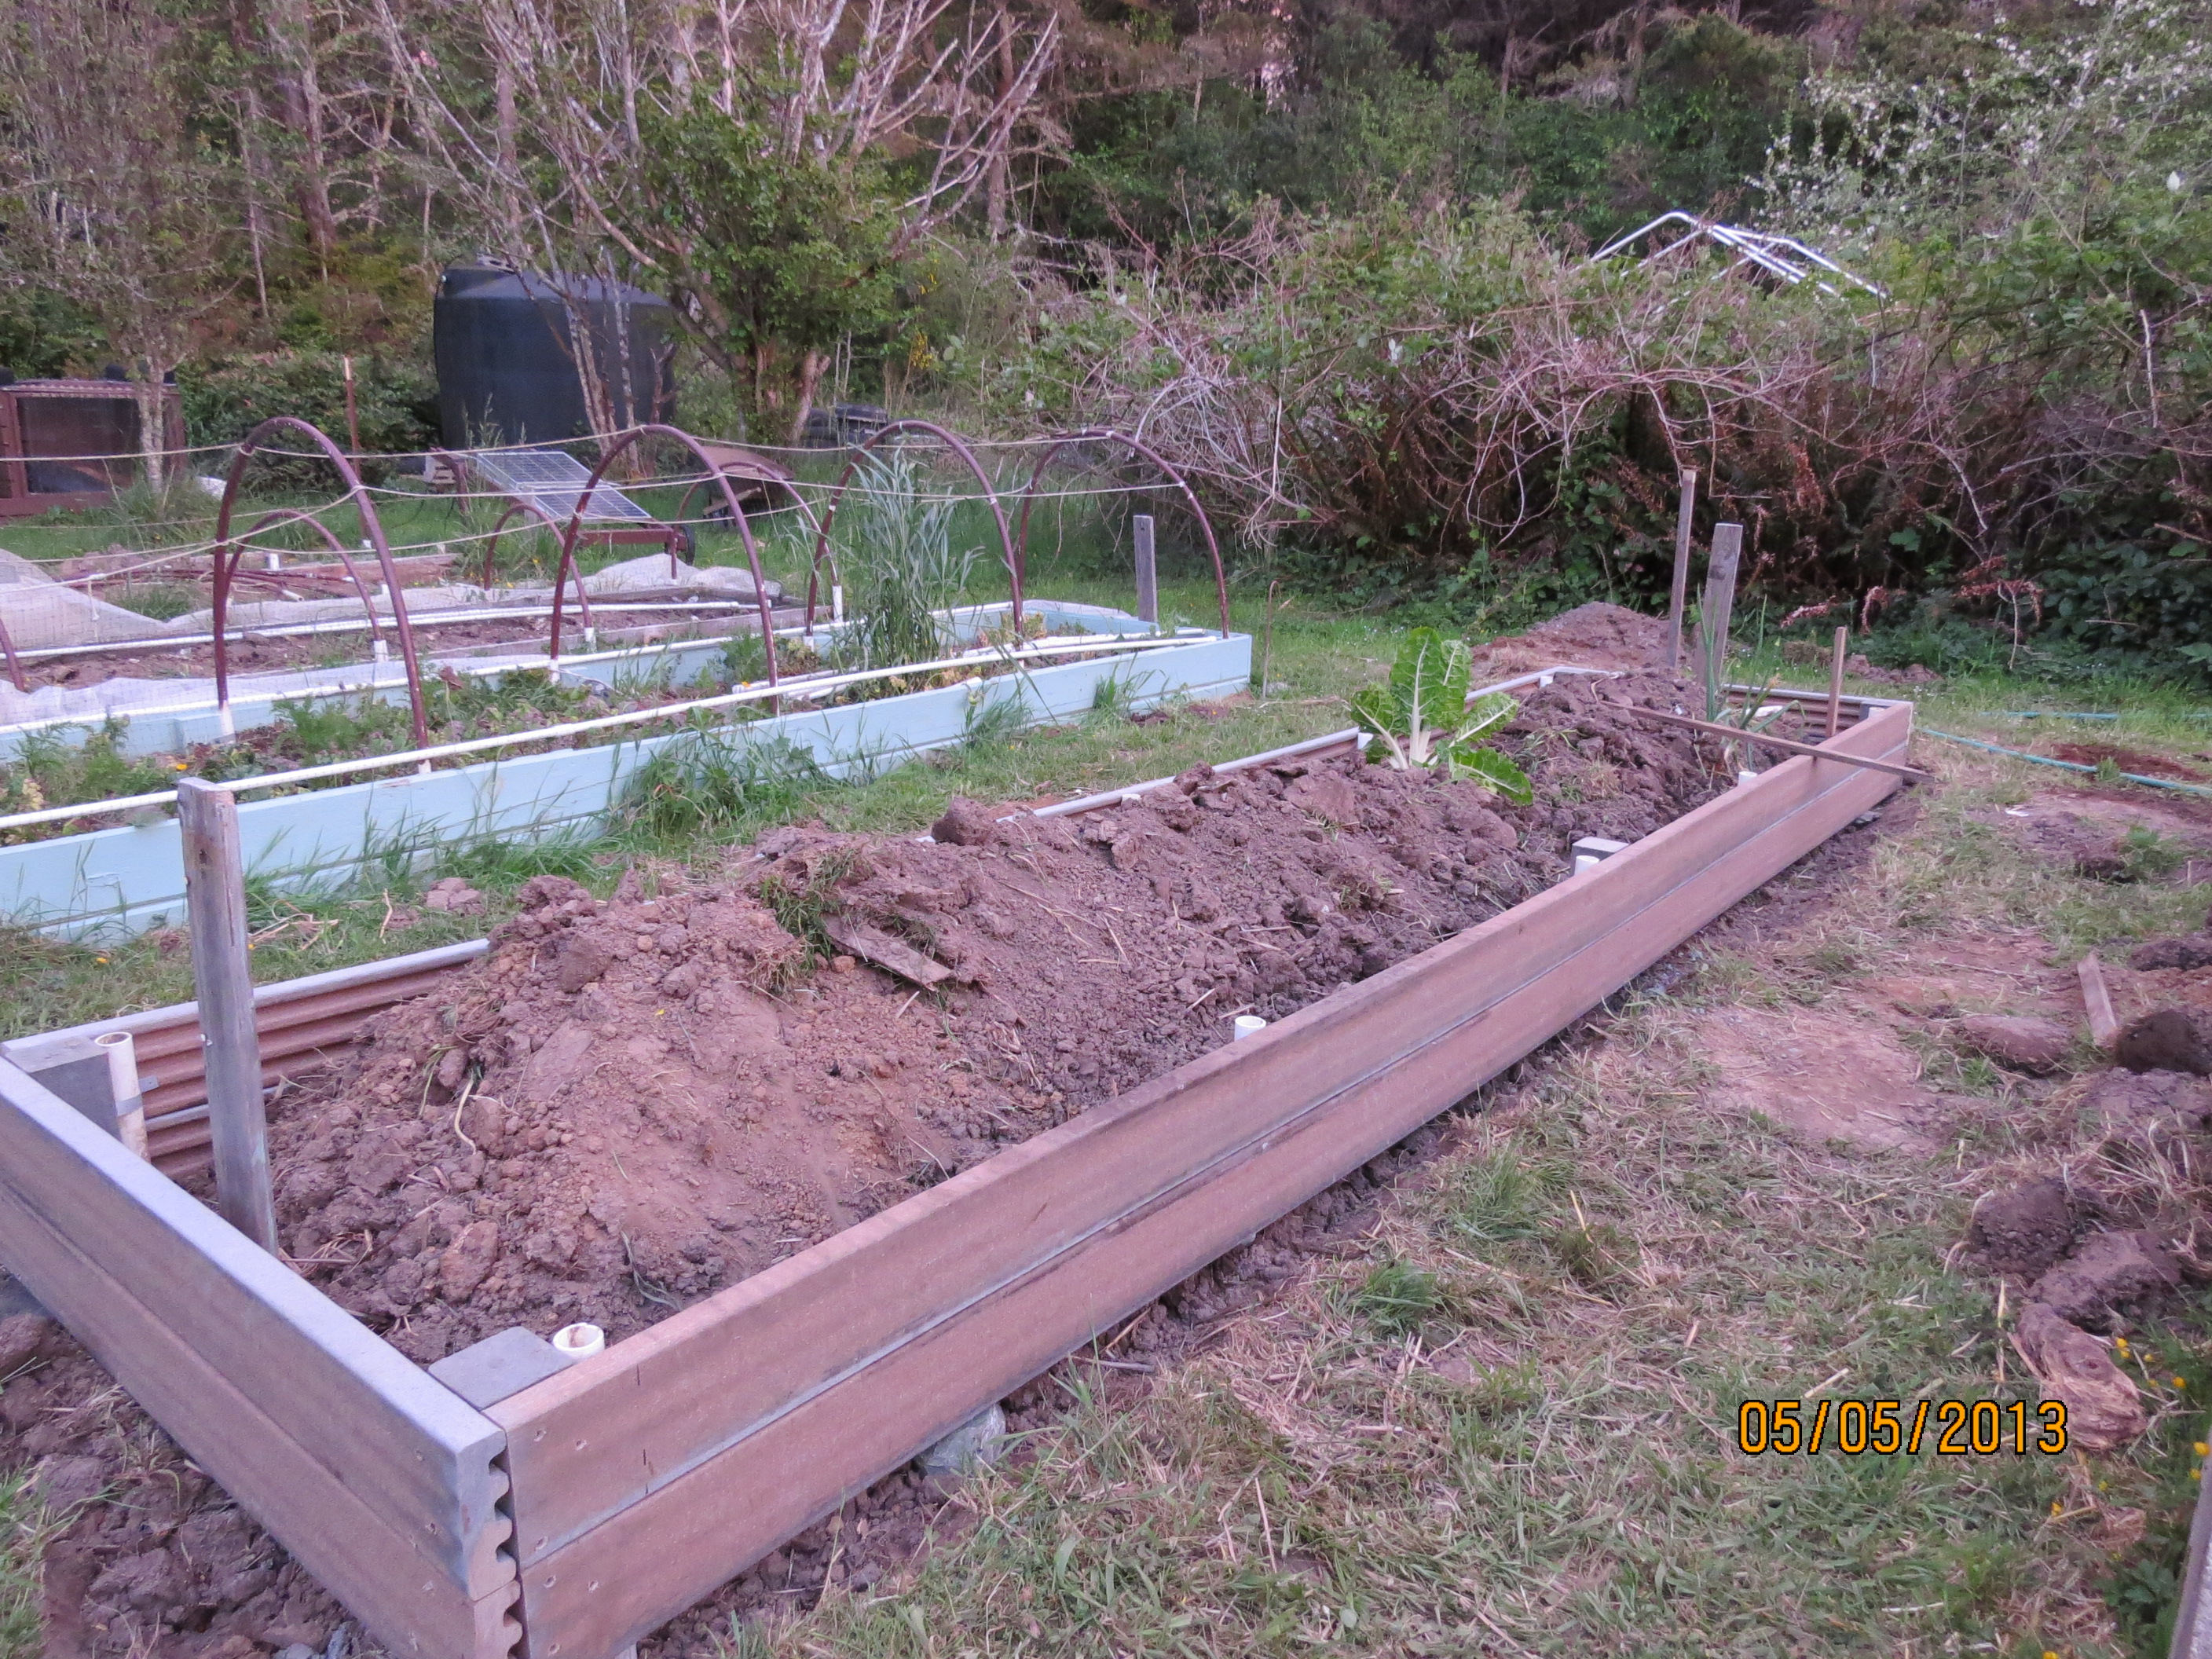
Don’t be tempted to plant first and then figure out how to water it…it takes more work like this one, a real mess.  My SO was in a hurry to get the seedlings in.

July 6, 2013...I'm trying a new compost tea.  It's made from soaking comfrey for three weeks.  I've added it to the right row of corn only for comparison.

July 5, 2013…I’m trying a new compost tea. It’s made from soaking chopped-up comfrey leaves for three weeks. I’ve added it to the right row of corn only for comparison…it sure smells bad, if it doesn’t work I’ll know why.  Footnote…my wife doesn’t think much of it.

An example of drip water PVC that didn't work.  I tried this on the Hugelkulture bed.  I'll have to work on this a little more.

An example of drip water PVC that DIDN’T work. I tried this on the Hugelkulture bed…back to the drawing board.

I space the potatoes at 9" apart.  The holes are drilled in the pvc at that distance.  This stick is the length of all my potato beds.  When I finish with one, I can move it to the next row.  I use it year after year, but you know, you have to rotate your crops.  Don't follow tomatoes with potatoes, or potatoes with potatoes.

Drip watering potatoes…I space the potatoes at 9″ apart. The holes are drilled in the pvc at that distance. This stick is the length of all my potato beds. When I finish with one, I can move it to the next row. I use it year after year, but you know, you have to rotate your crops. Don’t follow tomatoes with potatoes, or potatoes with potatoes for at least a year, preferably two.

This is how I water all my tomatoes.  You space the holes where you want the tomatoes, lay the grid in the bed, plant where the water drips out.

This is how I water all my tomatoes. You space the holes where you want the tomatoes, lay the grid in the bed, plant where the water drips out.

The start of our winter lettuce...This year I'm determined to grow enough for the winter...might be a little early though.

The start of our winter lettuce…This year I’m determined to grow enough for the winter…might be a tad early though.

July 28, 2013...time to thin lettuce and turnip greens.

July 28, 2013…time to thin lettuce and turnip greens.  I had to get the deer net up, the deer are hungry, and we are on their dinner route.

This new fawn was frisking around like they do.  I was able to catch it by waiting it out.

July 28,2013…This new fawn was frisking around. I was able to catch it (on camera) by waiting it out.  It’s momma was showing it where the best places to eat were.

Read Full Post »

This is how the garden looked in August 1998.  All those beautiful raised beds are rotting into the ground after 15 years and need to be replaced.

This is how the garden looked in August 1997. All those beautiful raised beds are now rotting into the ground after 16 years and need to be replaced.

Trex-built raised bed 5-5-13

Trex-built raised bed 5-5-13  Don’t look at the background…it’s messy.  I’m linear.  I can only work on one bed at a time!

We built most of our raised beds in 1996 and ’97.  The lumber came from a small sawmill using white cedar that had been passed over by the big timber companies.  It was sawn to a full 2 x 10 x 16′ (5.08 cm x 25.4 cm x 4.87 m)  It was beautiful wood.  We had less personal time then but more energy…lots more.  As good as that wood was, it still rots when in contact with the soil.  So after 17 years all those 16 beds have got to be replaced.  We found this decking material on close-out.  It’s not cheap but is supposed to outlast wood.  It’s a little wobbly so I had to set the corners in concrete, but if it outlasts wood, it’ll be worth it.  We’re trying to replace ONE raised bed a year now.  The green one was built last year out of old siding…much cheaper than this one, but won’t last as long.

Soil leveled, drip water grid laid out, tires centered over drip holes in pvc.

Soil leveled, drip water grid laid out, tires centered over drip holes. The tires extend the warm temps into the cool evening.

Hoops added with 1x2x8 re-enforcement.

Hoops added with 1 x2x 8 re-enforcement.  I use this to hold the tent open  too.

Don't glue any of the pvc like I did for many years.  That way you can have more options like this swing-away hose connection

Don’t glue any of the pvc like I did for many years. That way you can have more options like this swing-away hose connection

Clear plastic over hoops, held up rope and the re-enforcement wood.

Clear plastic over hoops, held up by rope and the re-enforcement wood.  Why have ‘tents?’  Our night time temperatures will dip to 45 deg. F (7 deg. c)  even in the middle of summer.  Use 6 mil UV stable greenhouse film. It’ll last for years of opening and closing every day.  We like our tomatoes to be warm and happy.

Read Full Post »

Myy new raised bed made from scrap siding.

My new raised bed made from scrap siding.

After watching a video about extended season gardening about 15 years ago,  my wife and I decided to try it out.  We had to make a few adjustments to keep the tents from blowing down in the wind.  By strapping 1.25″ pvc to the inside of the wood we can adjust the height of the hoops…one year we’ll have short hoops for greens, the next year we’ll have tall hoops for tomatoes.

Those raised beds served us well, but are starting to rot.  When we replaced some partially rotten wood siding on the house, I decided to use it as a replacement raised bed.  I sawed out the rotten areas and just cobbled these together to get a 4′ x 16′ x 14″ tall bed.  (1.22 m x 4.87 m x 35 cm)  I painted this time with some left over house paint, hoping it will protect the wood for another 15 years.

I added two drip watering grids by using 8′ (2,44 m) pieces of pvc.  The joints do not have to be glued because with all the holes drilled in them, they won’t leak.   I drilled the holes about 6″ apart (15 cm) on each side and then plant where the water comes through.

Companion planting  (Look at the comfrey site too)

We’ve had trouble with growing carrots in the past.  Sometimes they fail to germinate.  If we get them to grow early in the season, the slugs get them.  So we wait until July or August, but then we get a carrot maggot, those little worms that tunnel into the carrots.  So in an effort to grow great carrots AND avoid the tunneling worms we found leeks to be a good companion plant to carrots.  They repel the carrot fly.

Drip water grid.  By not gluing the joints, I can use the same hose to grid connection, by slipping it off one grid, and onto the other.

Drip water grid. By not gluing the joints, I can use the same garden hose to water grid connection, by slipping it off one grid, and onto the other.  Also I can ‘mix and match’ the pvc to fit longer or shorter beds the following years.

Carrots and leeks growing well

Carrots and leeks growing well

3/4 inch pvc hoop slips easily into socket (Looks like I didn't paint it very well)

3/4 inch pvc hoop slips easily into socket (Looks like I didn’t paint it very well)

Deer love carrot tops, so to avoid building a 10' (3 m) fence all around the garden, we opt to net everything.  I've tried twine, wire, and now fishing line

Deer love carrot tops, so to avoid a high fence all around the garden, we opt to net everything. I’ve tried twine, wire, and now fishing line to tie the netting to some pvc.  It’s a very tedious job, but once it’s done, little effort is needed to flip the netting off.  Just remember to flip it back or the deer will enjoy.

By placing the plastic, I can decide to protect against the raging storms, or to let a gentle rain soak the soil

By placing the plastic, I can decide to protect against the raging storms, or to let a gentle rain soak the soil.  In winter, I keep the plastic on to protect them in frost or the occasional snow.

Healthy carrots and leeks

The reward are healthy carrots free of little black worms and leeks for the winter dishes.

Read Full Post »

Our nights get down to a chilly 47 degrees F (8 deg. C.) so without extra care it would be impossible to grow things like peppers and eggplants.

Water grid in place, hook up hose and place transplants where the water drips out.

Add hoops, deer netting and the plastic film weighted with 1×2’s nailed to  2×2’s.

This is what it looks like now (after 3 1/2 months) with some calendulas that my wife won’t let me take out and a volunteer Swiss Chard.

The green peppers are small because the nights are so cool, but at least we get some.

Japanese eggplant (the only one that will ripen here because it’s smaller) is finally ready to be picked.

Tomatoes are coming on strong…ready for sandwiches or to be roasted.

Tomatoes, peppers, eggplants, string beans, carrots, beets, basil, (and other herbs like oregano and thyme), onions and garlic slathered with olive oil, balsamic vinegar, salt and pepper.  Roast it at 425 deg. F for about 25 minutes or until the tomatoes start to brown.

After this cools, we throw it in the blender, then it goes into the quart size freezer bags so it will stack up well.  It can be used over rice or potatoes, or as a spaghetti or pizza sauce.

Check out planting tomatoes in a cool rainy climate.

Read Full Post »