Archive for April, 2013

Bee-atrice is looking good.

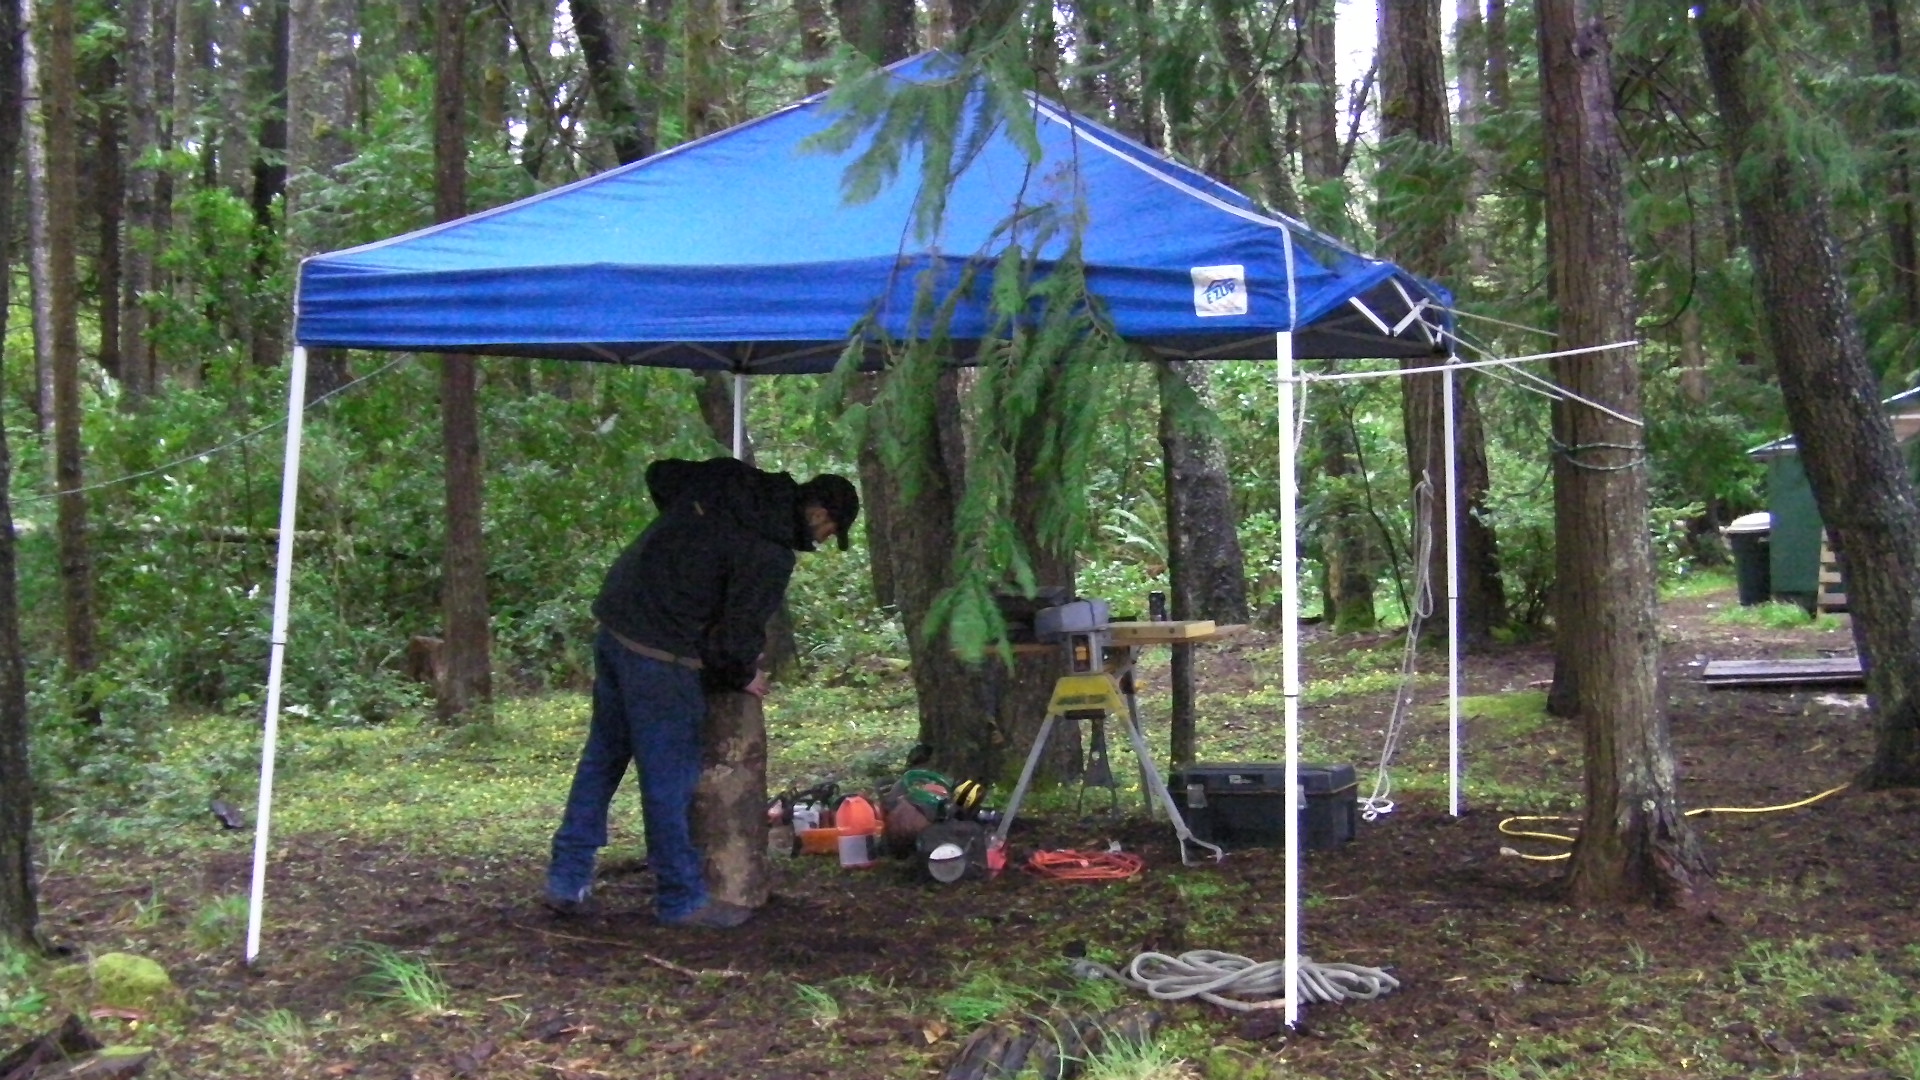
Bee-atrice is looking good.  Okay, the yard sign on her head isn’t too flattering, but it was all I could come up with in a hurry.  We will fix that later.

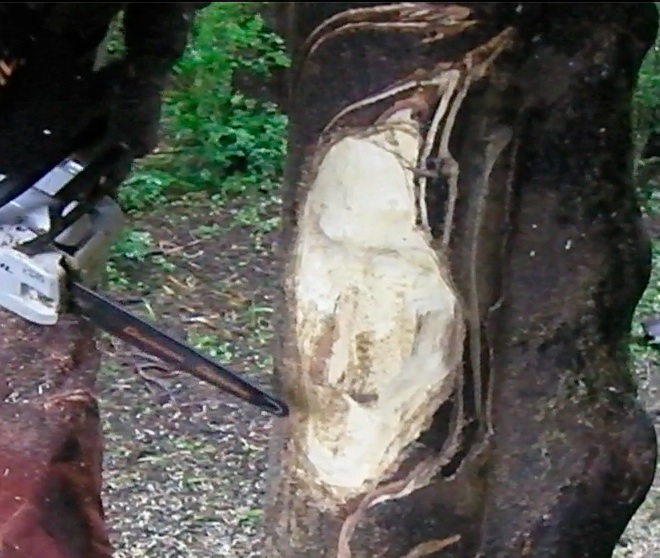
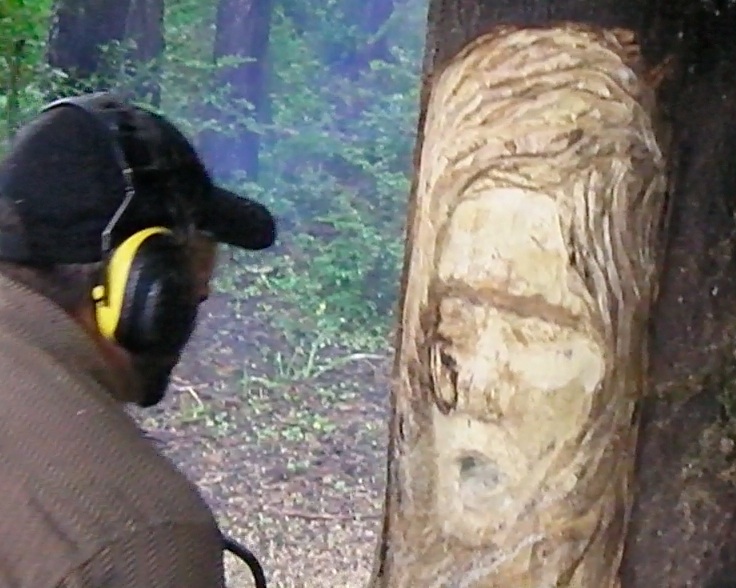
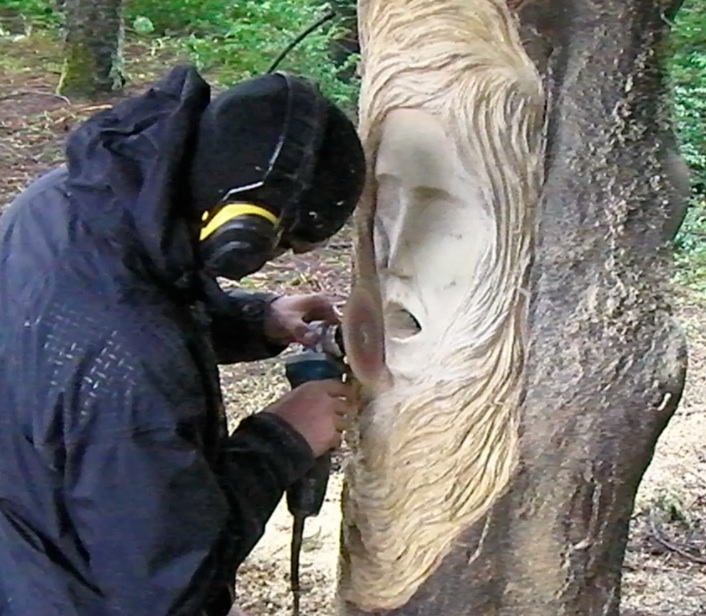
 When Bee-atrice became aware of her beauty she developed a real attitude.  Her long golden hair, the color of the setting sun, a beauty mark on her face, and the fact that she was carved out of a hard wood by a professional wood carver made her vain.  In conversations, the iPod would always be pulled out to show how she was carved. She would tell people.  “I’m special.  I was carved out of myrtlewood which only grows on the Oregon Coast and in the Holy Land.”  We told her the brochures weren’t exactly true, myrtlewood also grew along the California Coast, and the kind in the Holy Land was a different variety.  She would counter with the fact that “Myrtlewood” is the only wood still in use as a base “metal” for legal tender,  “besides my mouth was carved ‘open’ so I can sing.”  I think she fashioned herself as some kind of diva or something.

We decided to place her near Bee Beard.   We just figured they’d hit it off because they had so much in common.  One look at Bee Beard and she realized her open mouth was carved to let bees pass in and out.  She was shocked and humiliated…stomped off in a huff. I couldn’t figure it out.  Bee Beard has never complained about anything, not even once.  He’s been through a whole year of wind, rain, and bees.   It’s true we’ve never smoked him or bothered him much, I just figured Bee-atrice would be the same.  Not so…“I don’t want to be next to him and I don’t like bamboo.  It attracts wasps.  We ended up promising her a one of a kind Easter hat and face her into the sun so it could shine on her beautiful golden hair.  She gave in to the flattery, but there was no way she would agree to be near Bee Beard or even to look at him.

The bees first couple of nights were spent here in the upper corner of log.

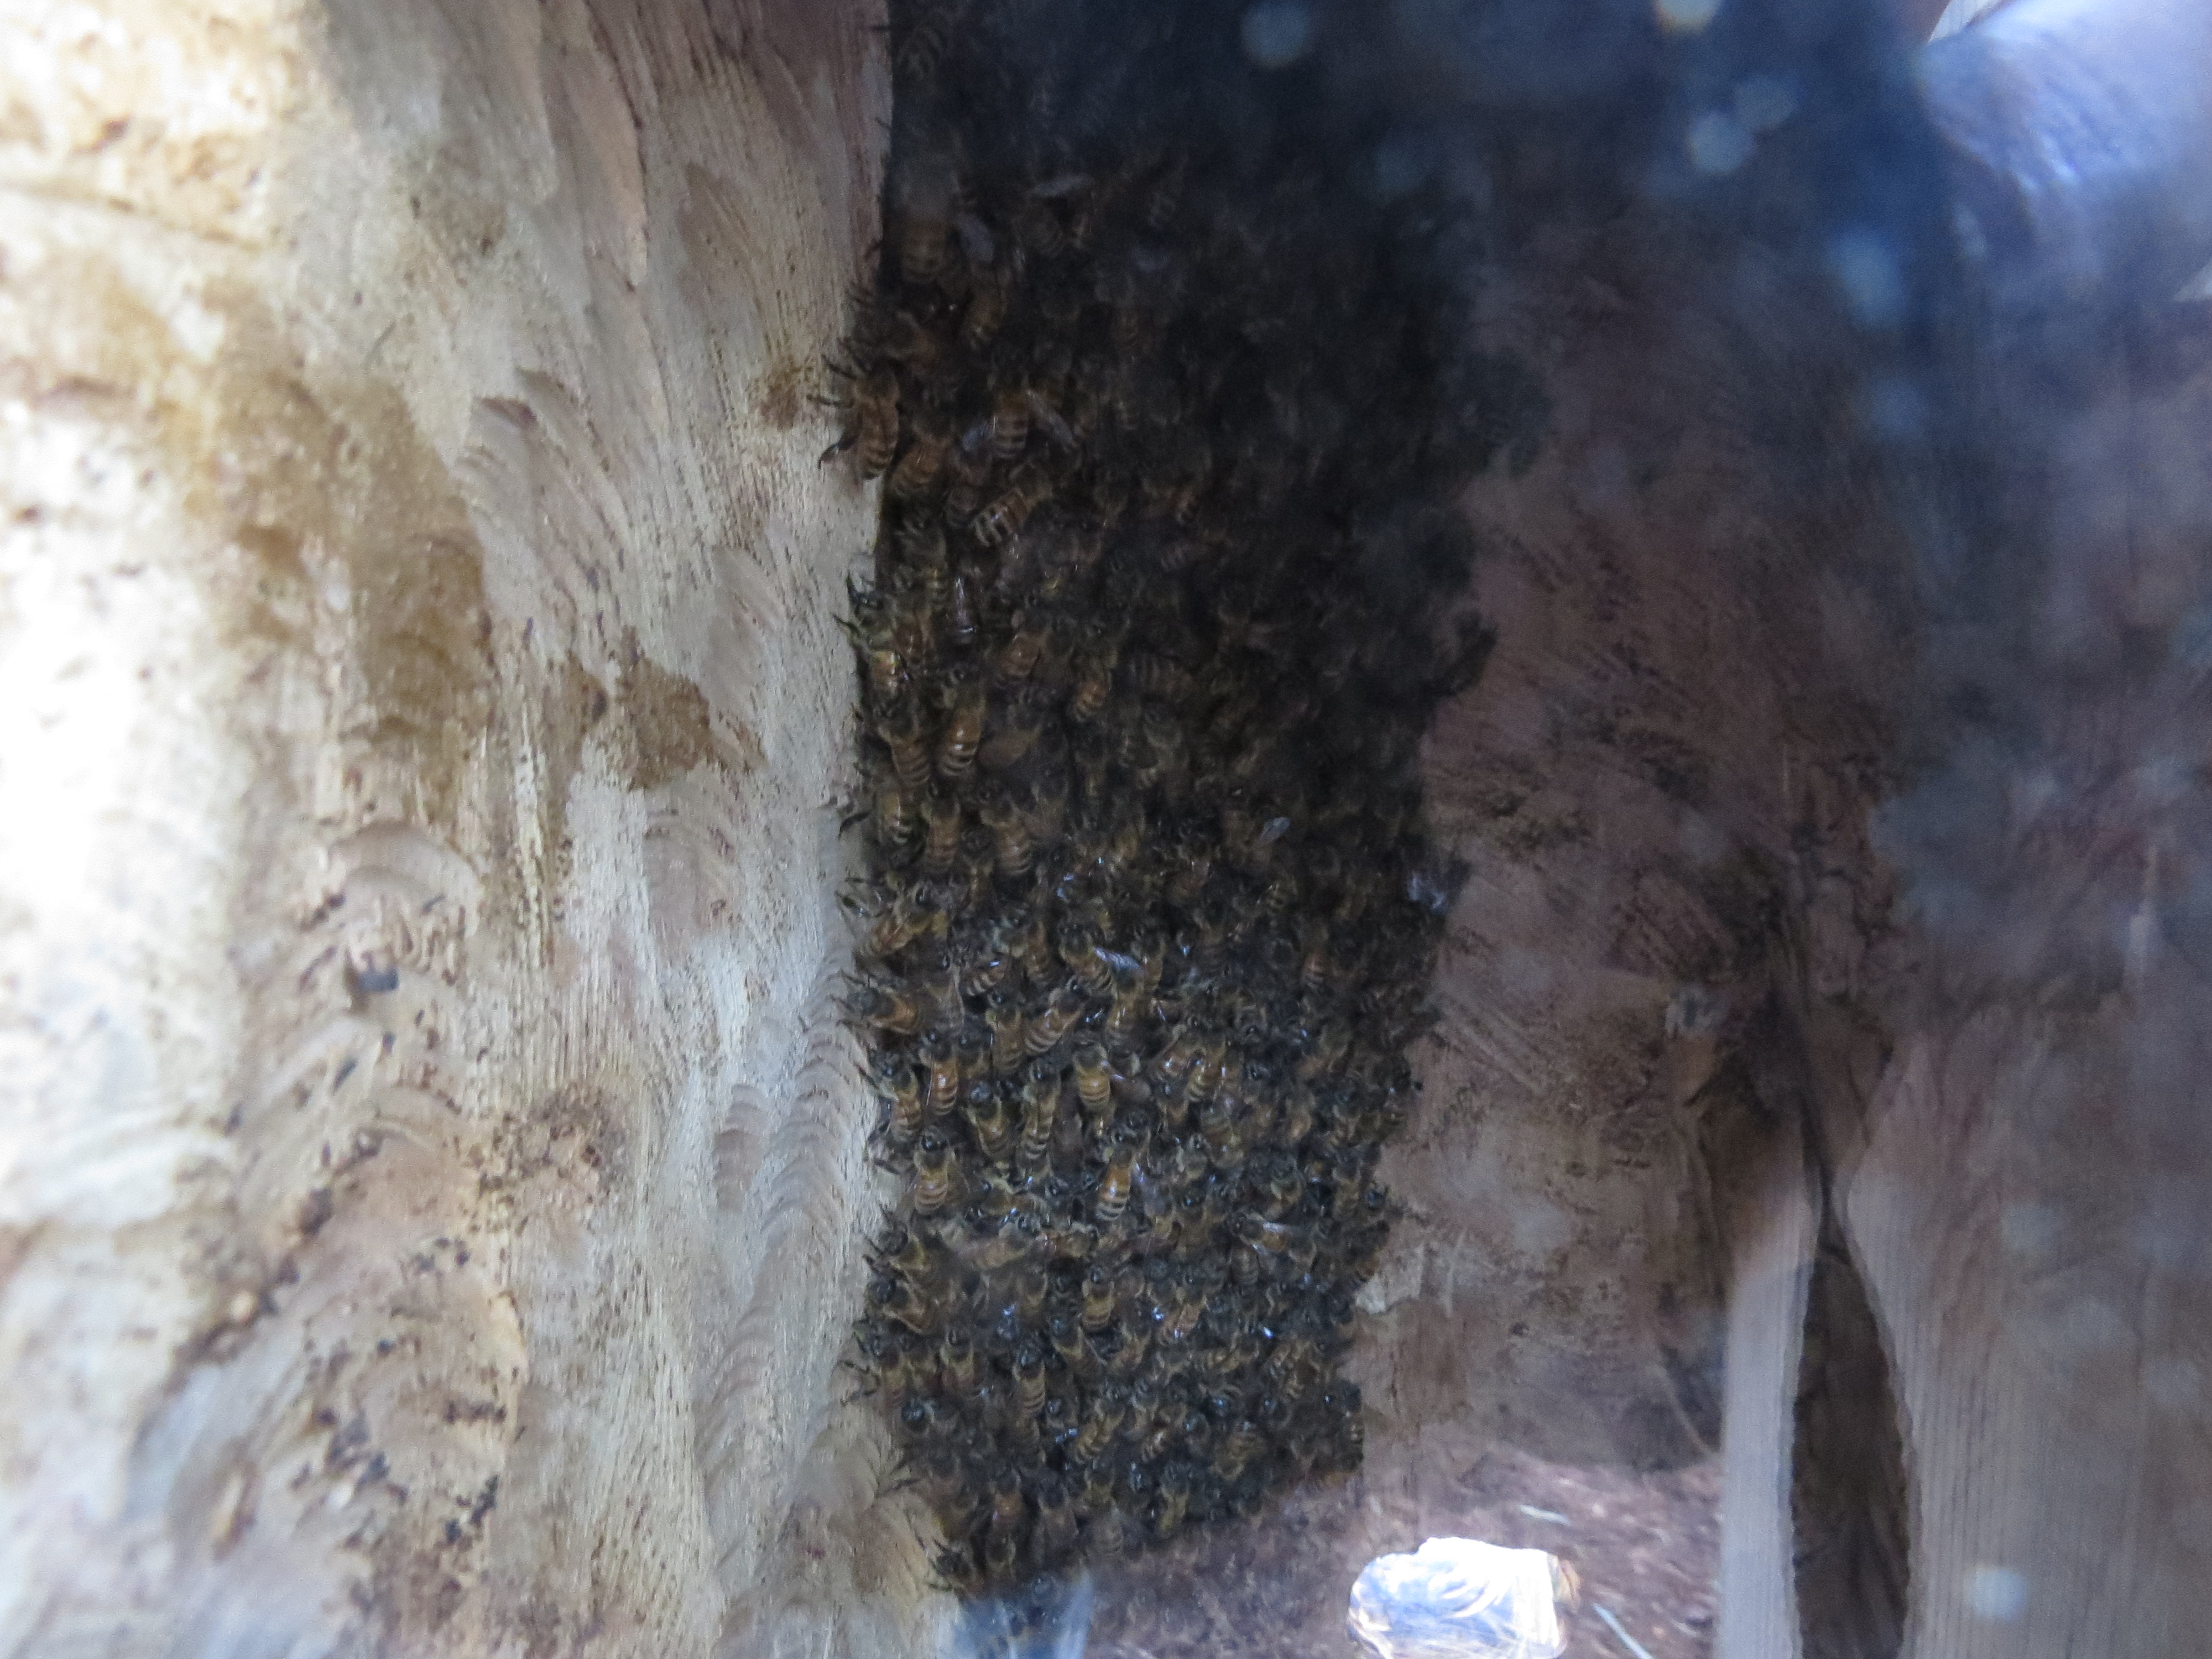
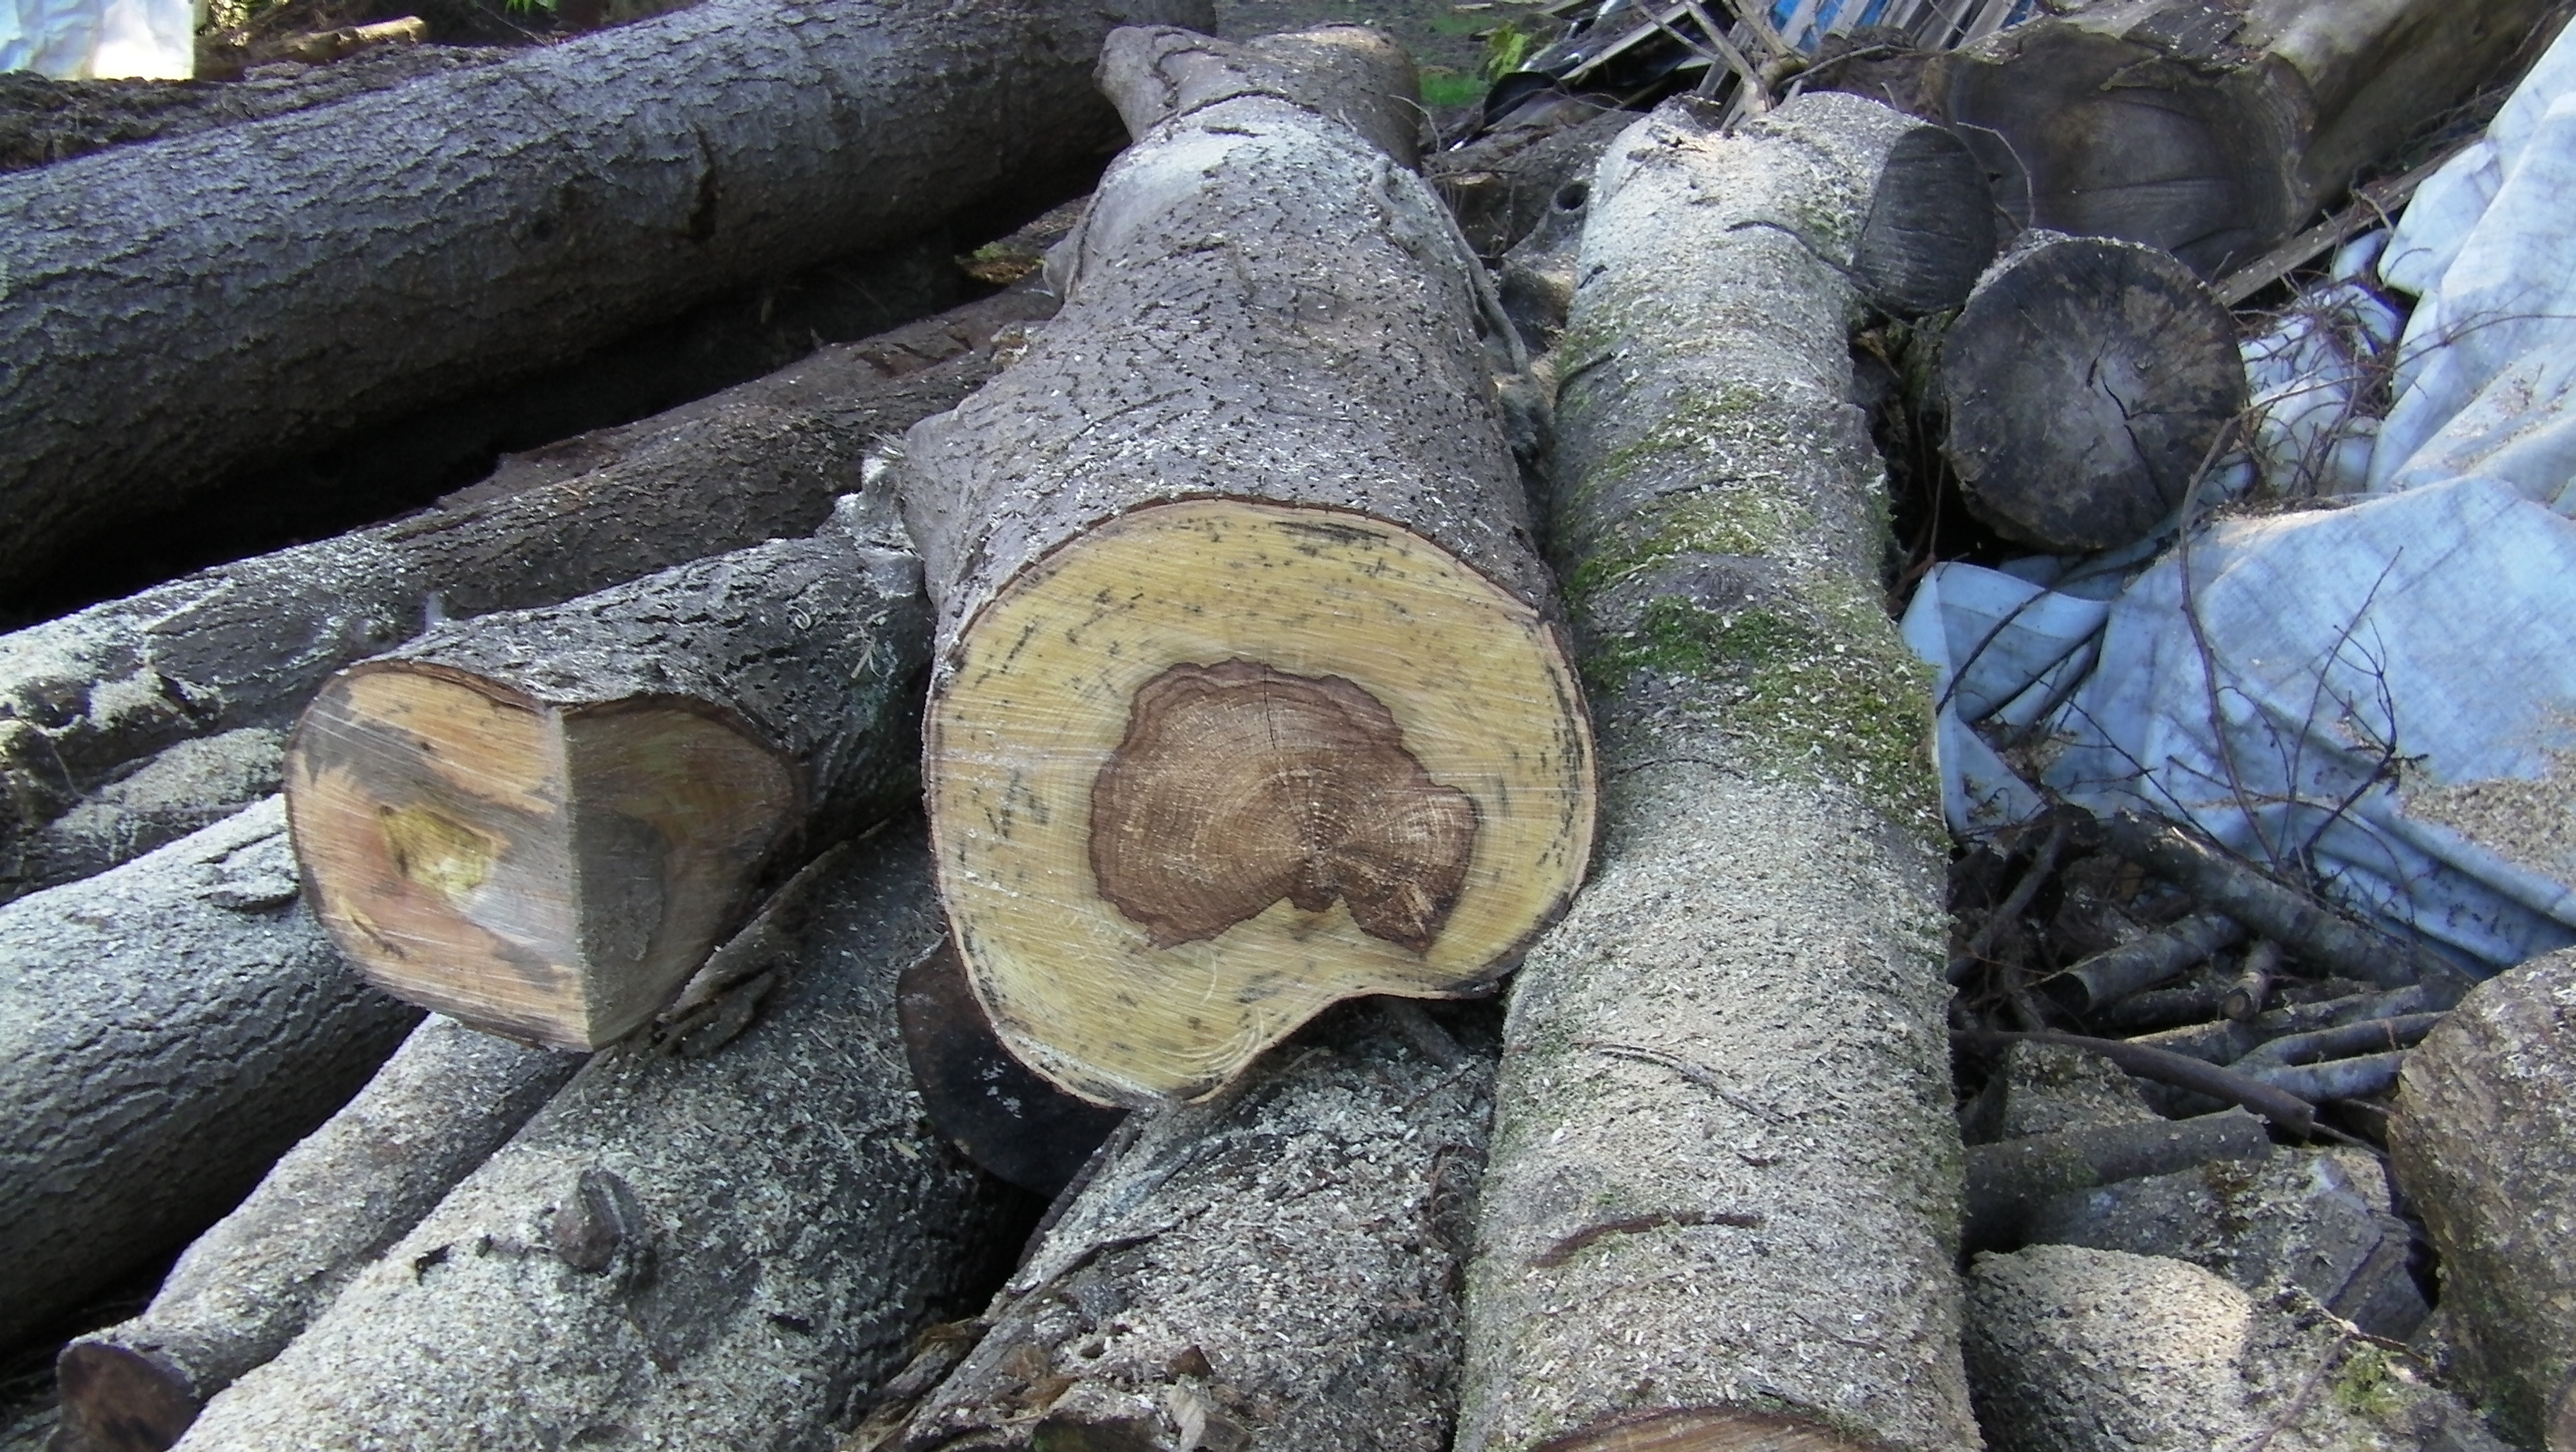
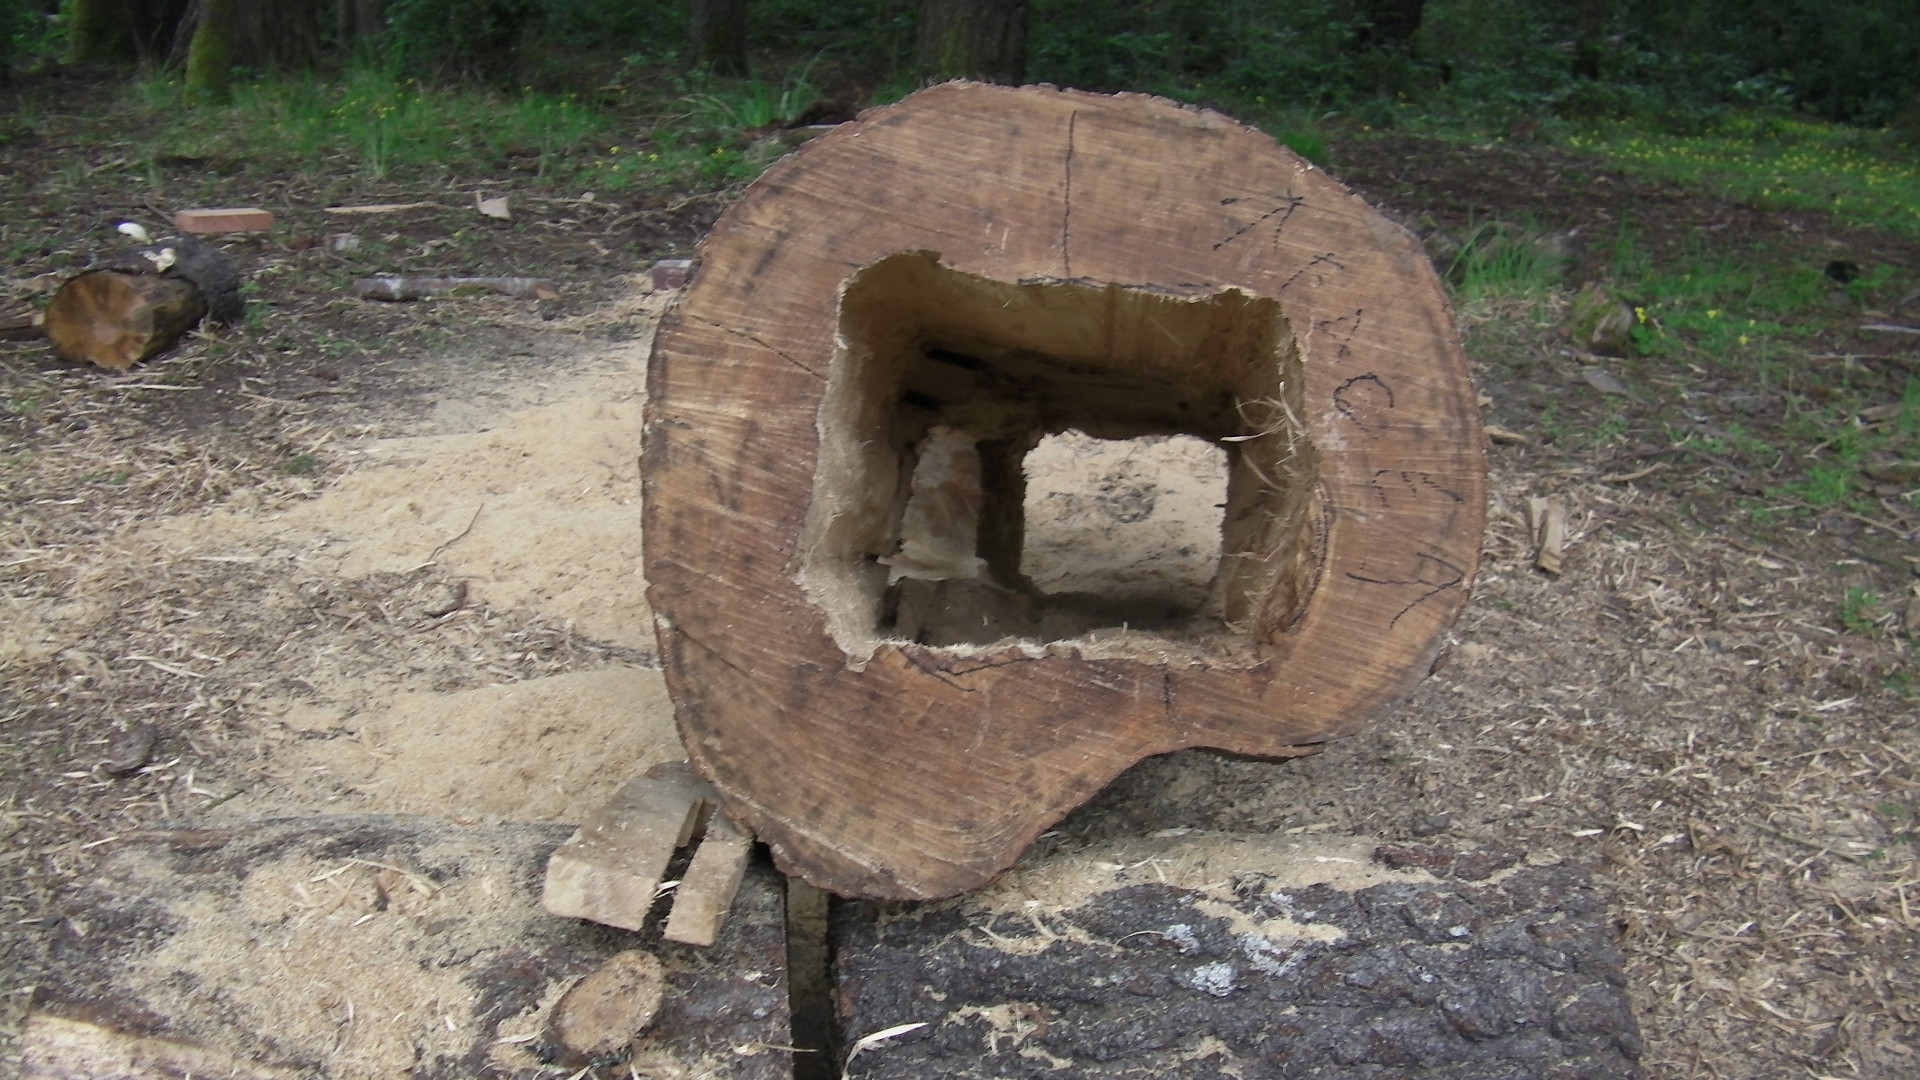
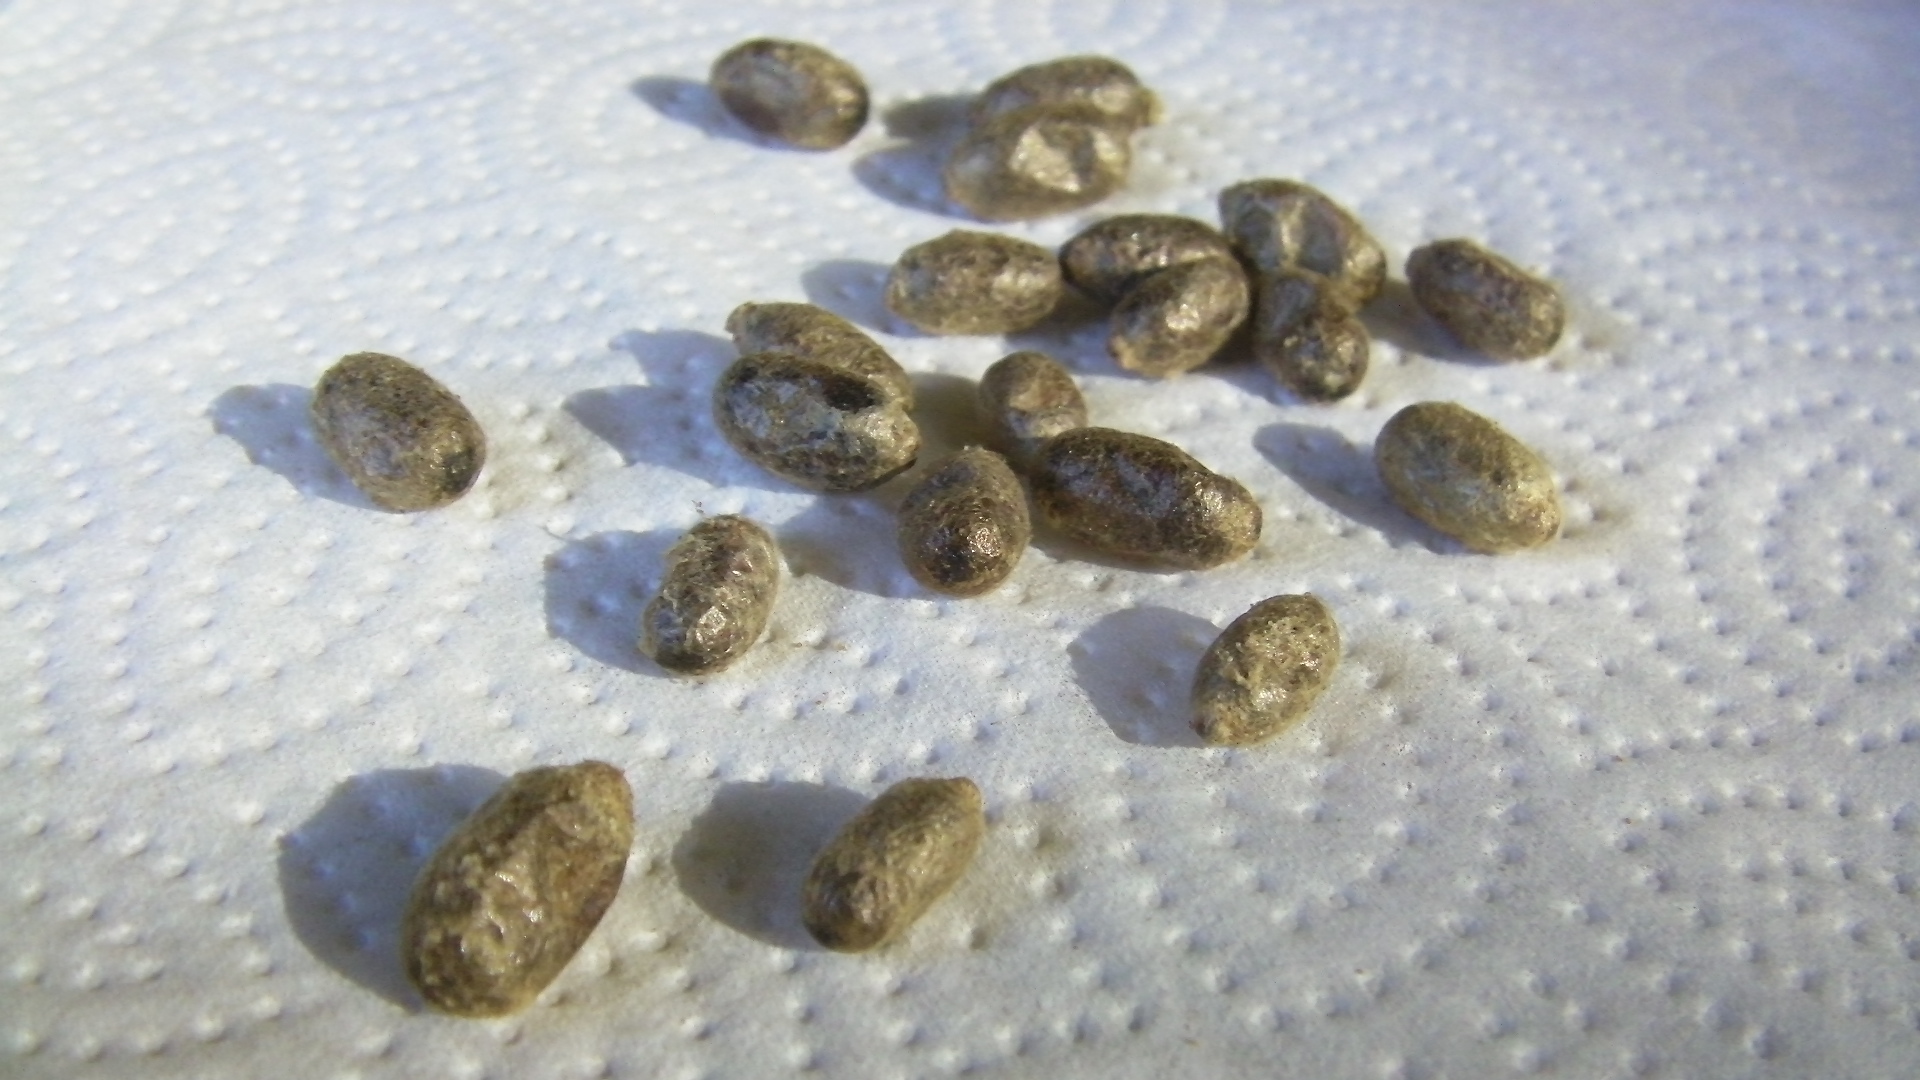
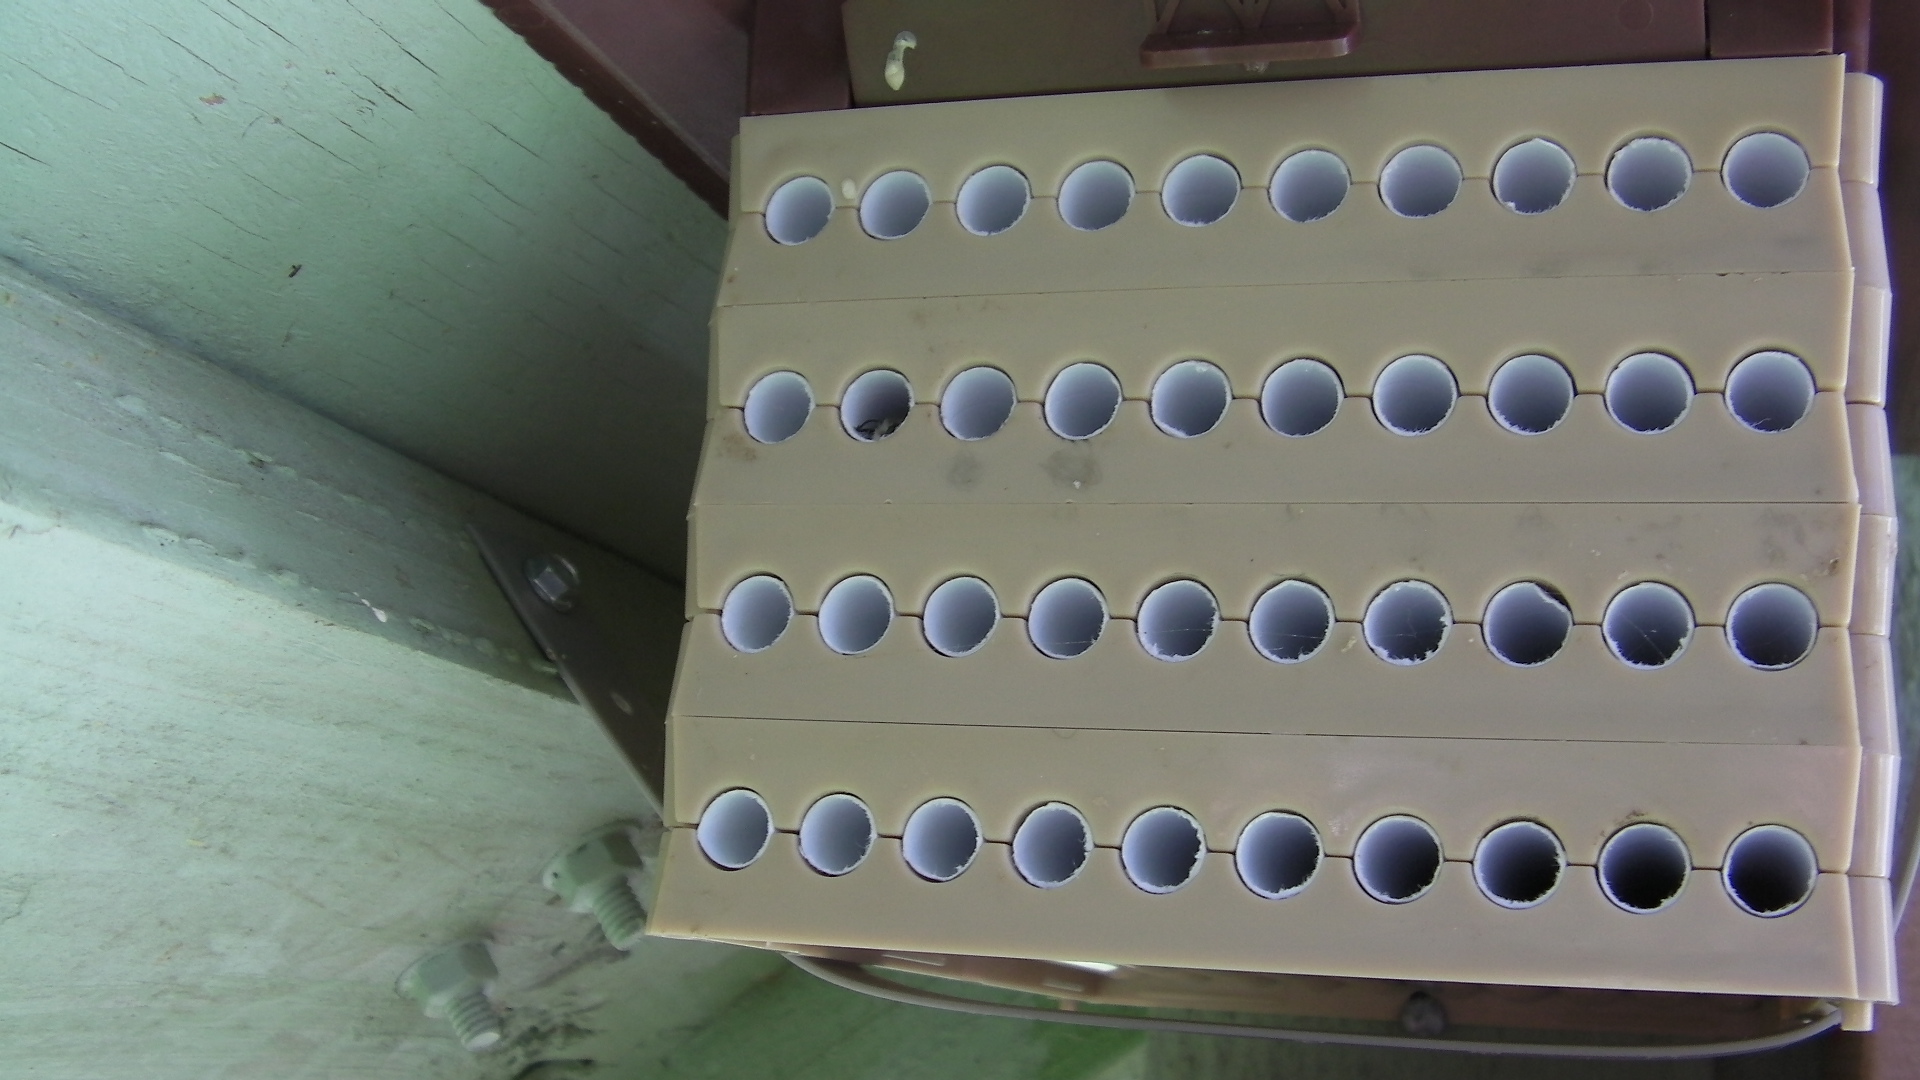
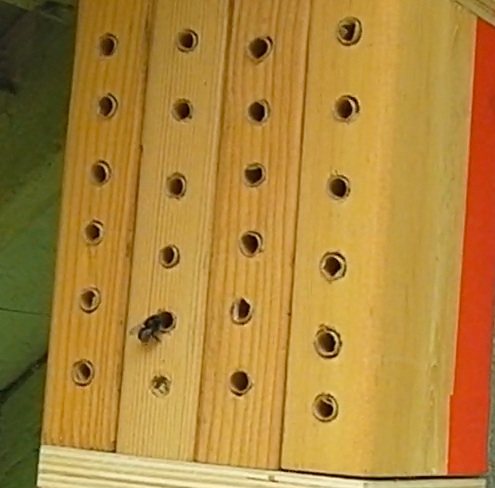
The bees first couple of nights were spent here in the corner of log.

I've always wanted to note the temperature of the hive.

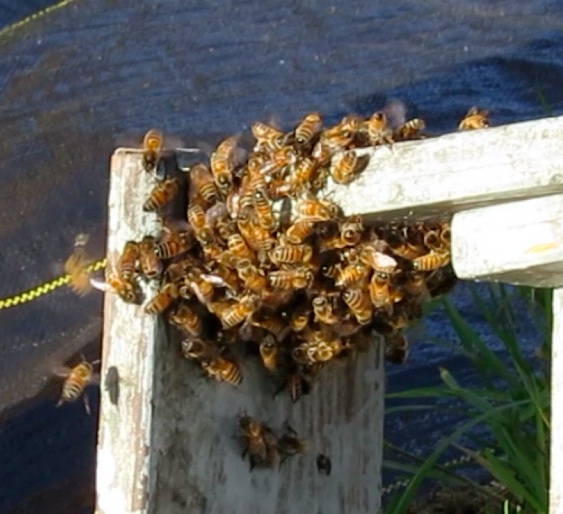
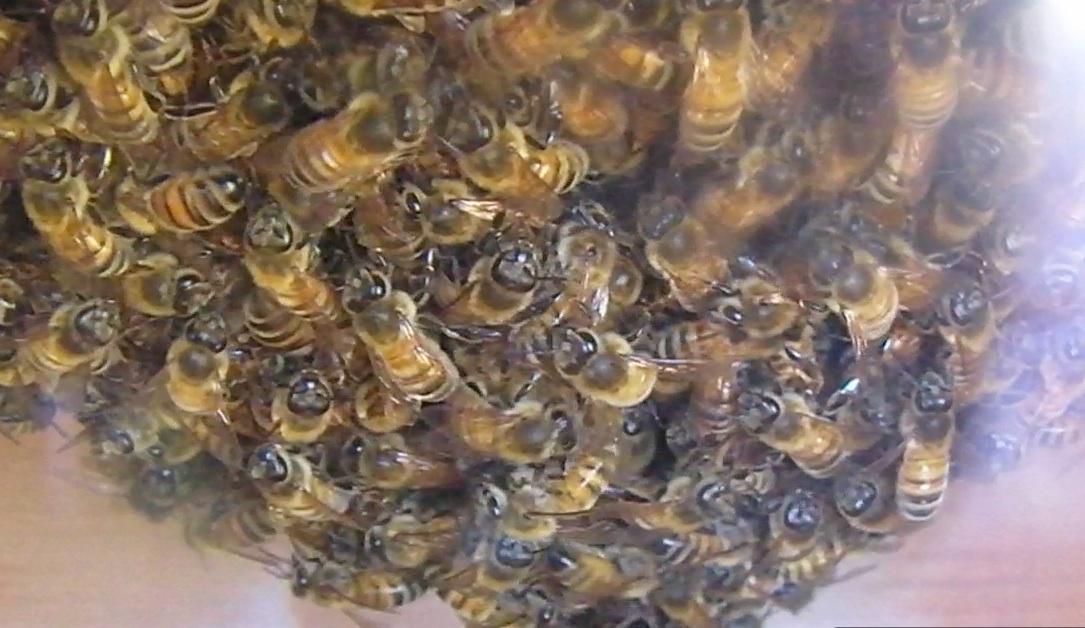
I’ve always wanted to note the temperature of the hive.

I'm surprised this is only 83 F (28 C)  I wish I could see inside better, but I'll have to wait until the combs are visible in the observation window.

I’m surprised the temp is only 83 F (28 C) I wish I could see inside better, but I’ll have to wait until the combs are visible in the observation window.

A short video show bees already bringing in pollen on Day 6

Bee-atrice gets a bonnet

The start of the project

Bee-atrice…the Carving

Preparing Bee-atrice Log Hive for Prime Time

Hal started it all

Read Full Post »

This tight #8 screen will hold the burlap.  The wood shavings and sawdust will fill it up.   No wasps allowed!

This tight #8 screen will hold the burlap. The wood shavings and sawdust will fill it up.

Quilt box with burlap

Quilt box with burlap

Filled with myrtlewood shavings and sawdust.

Filled with myrtlewood shavings and sawdust.

Scorching inside of hive cavity

Scorching inside of hive cavity…mouth entrance can be seen below

Myrtle leaves and sawdust for the bottom of the hive.

Myrtle leaves and sawdust are for the bottom of the hive.

Bees live in Myrtle Trees.  The wood smells good and the leaves are like bay leaves…you can use them in place of bay leaves, but in smaller quantities.   According to wikipedia, the leaf has been used as a cure for headache, toothache, and earache—though the volatile oils in the leaves may also cause headache.

I used cedar sawdust in the bottom of my first log hive.  Phil Chandler of biobees.com was  discussing the importance of hive ecosystem…“that it might be beneficial to have wood shavings and possibly dry leaves in the hope of stimulating an ecosystem similar to the natural environment where perhaps earwigs and woodlice etc. would live below the bees and maybe eat any falling varroa.”  Since my first log hive survived the winter intact, without me feeding or medicating them, I think I’ll try the sawdust option again.  This time I’ll add myrtle leaves to the mix.

I've been saving the last of the old comb in the freezer.  It's time has come.

I’ve been saving the last of the old comb in the freezer. It’s time has come.

The plan is to remove bars,  add a swarm when it becomes available, then replace bars

The plan is to remove the bars, drop the  swarm in, then replace bars

Fence post anchor

Fence post anchor…two were planned, but the swarm came first.

We left town to visit the grandkids.  It was just a day trip, but when we got back a little package was waiting for us…hanging from a tree.

Because of the angle the picture was taken, this swarm looks bigger than it is.  Tree hive in background.

Because of the angle the picture was taken, this swarm looks bigger than it is. Tree hive in background.

Thankfully I was prepared.   All that I had to do as it was getting dark was to snip the branch with a bucket under it and carry it to the log…remove the top bars and drop the swarm into the log.  This is swarm #5 from Bee Beard Log hive.  It probably does not have a mated queen, but the weather looks good for the next 7-10 days, so it should be a safe bet that the queen will be able to fly out.

Unfortunately this small swarm never quite made it.  It was slow to build up and just didn’t have the numbers to survive the week of freezing nights we had in December.  Good news though.  A prime swarm picked out Bee-atrice for their home on or about June 6, 2014.

Beginning of the log hive

Bee-atrice, the Carving

Meet Bee-atrice, A Female Companion for Bee Beard

Read Full Post »

Brian brought his own tent awning to use.

Brian brought his own tent awning to use.

When I talked about carving another face on a log hive, I wasn’t sure what I wanted.  I had looked at hundreds of google images, wood carvings, even some Northwest totems, but I didn’t see anything that ‘jumped out’ at me.  I told Brian and Zada Vorwaller they had done such a great job with Bee Beard that I wanted something along the same lines, but slightly different.  Brian suggested a female companion.  He said he’d been thinking about how he could accomplish it and was up to the task.  I thought for a minute how Bee Beard was one of a kind, but in that role, there was a certain loneliness.  It might be good to have a companion…and yes, a female one at that.  Little did I know what I was getting myself into.

Brian rolled into my driveway about 10:30 am on a windy, rainy day.  He’d brought a tent awning which he set up in the woods not seeming to mind the dead trees swaying above him.  We propped up the log and he started feeling out the wood.  I held my breath.

After about 15-20 minutes he says “I’m beginning to see her.”  I had given him a real challenge.  The big chainsaws had dug deep into the wood.

These deep grooves must be smoothed out.  Bees don't like sharp edges.
These deep grooves must be smoothed out. Bees don’t like sharp edges.

When I used my Sa-burr wood grinder to smooth out the chainsaw grooves, it became apparent the wood was ‘thin’ at some points.  So I was much relieved that he could visualize the image.  He starts to work.

Not being an artist myself, I can't see how anyone can visualize something by 'taking away' instead of adding to.

The lines are drawn…it has begun!

Not being an artist, it's hard for me to

Not being an artist, it’s hard for me to understand how a person can visualize an image and then make it appear by sawing parts away.

Slowly taking shape

Slowly taking shape

Carving mouth

Carving the mouth

Artist and subject, eye to eye

Artist and subject, eye to eye

Sanding the cheeks...give her good cheek bones, Brian!

Sanding the cheeks…give her good cheek bones, Brian!

Sanding the mouth

Sanding the mouth

For eight hours he works, taking a short lunch break, but mostly sawing and sanding, sanding and shaping.  A true artist absorbed in his work.  Gradually she comes to life, but still has a blank look on her face…

A blank look on her face

A blank look on her face

then he adds the eye brows and eye lashes and voila…she appears!

He's done!

The artist is done!

The Artist…

Brian Vorwaller of Artist Extreme, poses in front of his shark carving.  It was all carved from one chunk of wood.

Brian Vorwaller of Artist Extreme, poses in front of his shark carving. It was all carved from one chunk of wood.

The beginning of the log hive.

Preparing Bee-atrice for prime time

Meet Bee-atrice…A Female Companion for Bee Beard

Who is Bee Beard?

Read Full Post »

She was but a gleam in her father's eyes.

She was but a gleam in her father’s eyes.

When Shigeo found out I wanted to build another log hive, he offered me a myrtlewood log.  Myrtlewood is a hardwood that excels all other hardwoods in variety of color and beauty of grain.  I was excited by the prospect because bees live in myrtlewood trees.  In fact, my other log hive, Bee Beard,  is occupied by feral  bees from a Myrtlewood tree.

Off to a good start.  Log is carved out about 18" from both ends

Off to a good start. Log is carved out about 18″ from both ends

Shigeo brings his 'big dog' to help out

Shigeo brings his ‘big dog’ to help out

Shigeo gets to work on lengthening the cavity

Shigeo gets to work on lengthening the cavity

This is so familiar...when the chain saw cuts don't meet in the middle, we've got to do it the hard way.

This is so familiar…when the chain saw cuts don’t meet in the middle, we’ve got to do it the hard way.

Progress...Shigeo pulls out some wood.

Progress…Shigeo pulls out some wood.

Hollow all the way through, finally.

Hollow all the way through, finally.

Shigeo cuts the top to use as a possible quilt box

Cut the top to use as a possible quilt box

Starting the cut on the observation window

Starting the cut on the observation window

This was a lot of work.  I'm glad my son did most of it.

My son brought his Sawz-all to the task

Observation cut-out for window is completed.  This was a lot of work...I'm glad my son was able to do most of it.

Observation cut-out for window is completed. This was a lot of work…I’m glad my son was able to do most of it…I was able to visit with my grandson.

Good…I think we’re ready for Brian Vorwaller, the professional chainsaw artist who will be in town next week on April 4th.   I wonder what kind of face he will want to carve.

The carving…

Getting Bee-atrice ready for prime time

Meet Bee-atrice…a Female Companion for Bee Beard


Read Full Post »

Tree hive, and how it got here

Lucky number 7…I caught bees in this bait box last year, so it was a good choice to use.

Yesterday I caught a swarm from Bee Beard Log hive and put it into my back-up Warre.

I thought I had some time to finish my second log hive before another swarm would take place.  Not so.  On April 18 two more swarms came out.  These are cast swarms…more than likely the queen has not been mated yet.  What to do?  I had already used my back-up Warre and there were some work responsibilities staring me in the face…deadlines that couldn’t be put off any longer because “people are depending on you, Pat!”  Okay, I’ll get the deadlines done first and get the bees figured out in the morning…it rained all night.  My wife suggested I adapt a bait box.  Last year after reading McCartney Taylor’s book on swarm bait hives, I had built nine swarm bait boxes  and placed them in different spots hoping to attract a swarm.  I was successful in two of them.  One I gave away and lucky number 7 went into my new log hive.

After some initial resistance, I realized she had a good idea.  The box is already built.  I just need to add some Warre length top bars…it’s also a good size of 40 liters as recommended by Tom Seeley in his book “Honeybee Democracy.”

First job is to wax up some top bars…

Painted melted wax on top bars

Painted melted wax on top bars

Prewaxed top bars installed into former swarm bait box after scorching the inside.

Three waxed top bars installed into former swarm bait box after scorching the inside.

The above picture shows only three top bars.  I added a total of 12 because I wasn’t sure when I’d get another Warre and at the time I wanted to be able to add these bees to my next log hive if I ever get it done.  I also tapped some panel nails in to keep the bars from sliding when I tilt hive with bees into the tree.  The bars have a slot for the nails, so they will lift out easily.

I like the idea of a ‘quilt box,’ so I cut another bait hive down to make one.

Hardware cloth on the bottom keeps the burlap 'quilt' from getting glued to the bars.  That way the sawdust won't spill into the brood box.

Hardware cloth on the bottom keeps the burlap ‘quilt’ from getting glued to the bars. That way the sawdust won’t spill into the brood box.

I drilled several holes into the quilt box covering them with screen.  That way the hive can breathe and keep the hive scent.  I used myrtlewood sawdust for two reasons…feral bees live in myrtlewood trees and I had a lot of it left over from hollowing out my next log hive.  Actually some of my bees came from a feral hive in a myrtlewood tree last year.

I'm beginning to think bamboo is the ideal swarm catcher...this is the fourth swarm to land in bamboo.

I’m beginning to think bamboo is the ideal swarm catcher…this is the fourth swarm to land in it.

After bending branches and snipping them, we managed to get the majority of bees into the box.

"Hey everyone, the queen is over here in the box."  (The bees are fanning the pheramone.)

“Hey everyone, the queen is over here in the box.” (The bees are fanning the nasonov pheromone.)

Day 5, they're bringing back pollen already...a sign of a laying queen.

Day 5, they’re bringing back pollen already…a sign of a laying queen.

A short video of swarm activity.  The main video that shows us getting the swarm in the box has disappeared due to Pat’s incompetence.

Read Full Post »

This is what we were waiting for...Bee Beard's Prime Swarm, but it was waaay out of reach

This is what we were waiting for…Bee Beard’s Prime Swarm, but it was waaay out of reach

When we started keeping bees we read that a healthy hive will swarm, at least once every year.  Our goal was to get through the winter without feeding, medicating, or miticiding. The swarm would be our sign of success.  On a warm day March 30th, that’s what happened.  We heard the loud buzzing, came out to witness the bees heading up to the top of a nearby spruce tree.  I even tried ‘tanging,’ banging a spoon on a pan to create noise so they wouldn’t go far and would form near the ground.  I was wildly unsuccessful.  This would have been the swarm to get, but it was clearly out of reach.

Swarm #2 is within reach

Swarm #2, April 17 is within reach

Swarm number 2 is withing reach, but the 2nd log hive isn’t ready for it yet…I’ll have to stick it into the ‘back-up Warre.”

Let's try out this bamboo swarm catcher so I won't have to use a ladder

Let’s try out this bamboo swarm catcher so I won’t have to use a ladder

Well I ended up using a ladder to cut the bamboo and let the swarm drop into the white sail cloth basket.

My wife noticed some bees on the ladder...we brought it near the hive for them to crawl in, but looking closer, they were fanning.  The queen must be here.  We gathered them up and placed them into the hive.

My wife noticed some bees on the ladder…we brought it near the hive for them to crawl in, but looking closer, we noticed they were fanning. The queen must be here. We gathered them up and placed them into the hive.

After the bees were dropped in, we added the top bars with comb attached…hoping they would stay attached once I hung them in the hive.

Top bars with old comb melted on.  Quilt box in background

Top bars with old comb melted on. Quilt box in background

I had already built the sugar frame shown below.

Sugar for comb building pm a couple of sheets of blank newsprint.

1/2 inch hardware cloth will hold up sugar if using newsprint.

Premixed sugar recipe laying on a couple sheets of blank newsprint

Premixed sugar  laying on a couple sheets of blank newsprint for the Warre hive #2

We slid the sugar frame into place.

Sliding the sugar frame into place

Sliding the sugar frame into place

Next comes the quilt box.

Next comes the quilt box.

Top it off with the roof.  Matt Reed of beethinking.com, you made a nice hive kit.

Top it off with the roof. Matt Reed of beethinking.com, you made a nice hive kit.

Bees flying orientation flights.

Bees flying orientation flights.

Through the observation window we can see the bees working.  No new natural comb can be seen yet, but it won't be long.

April 23…through the observation window we can watch the bees working. No new natural comb can be seen yet, but it won’t be long.

April 26, Natural comb can be seen on Day 9.

April 26, Natural comb can be seen on Day 9.


Where this and other swarms are coming from…Bee Beard Log Hive.

Read Full Post »

Mason bee covered in yellow pollen, sticking out of nest block

Mason bee covered in yellow pollen, sticking out of nest block

I check the bees occasionally, but usually at this time of night, they are all tucked into their nest tubes, so it was surprising to me to see this pollen covered bee sticking out.  Does anyone know what’s going on?

I shot this short video so you could see what I’m talking about.

This year’s start…

Read Full Post »

A bee sipping nectar on Autumn Beauty sedum

A bee sipping nectar from the  Autumn Joy sedum

Last year I discovered a new bee-loving flower.  My wife and I were visiting with Hal and Patti when I spotted a bunch of bee activity on some reddish blossoms.  Patti said it was Sedum.  I had heard of it, but I’ve never paid much attention to it.  Now that I’m keeping bees, I’m all ears when it comes to flowers that attract bees.

So we bought some from our friendly nursery…bees started working it as my wife was carrying the potted plants out to the garden.

The plants will winter over, but protect them from the deer which will eat surely eat the blossoms as we found out.

This sedum has wintered over and is on it's way to flowering in September

This sedum has wintered over and is on it’s way to flowering in September.  This time I’ve got it inside a deer fence.

I shot some video of the bees working the sedum.  It’s a good time to plant some now hint, hint…:-)

Read Full Post »

Outstretched front legs to grab bee

Hey you, get out of there…

I was shooting video on the bees pollinating our flowering cherry tree when to my surprise I saw a bee actually pull another bee off a blossom.

You're going down...

You’re going down…

The bully bee then flew off, not even partaking of the nectar.  So why did she pull the first one off?

Here’s a video capturing the play-by-play…

Here’s another example of bees interacting on a blossom

…and a bee brushing a different insect off the side of a crocus.

Read Full Post »

Mason Bee Cocoons

Mason Bee Cocoons

Last year my wife opened the refrigerator to discover the Mason bees were starting to hatch…this year we were determined to hang the nests before that happened.  We ordered the cocoons from Knox Cellars in Western Washington.   They provided this little ‘launch box.’

Ready to place cocoons into box

Ready to place cocoons into box

I saw some great plans on Dave’s Bees on how to build the nests so I got started yesterday.

Saw off 1/2" (1 cm) off 2x6

Saw off 1/2″ (1 cm) off 2x6x8″

Entrance holes drilled more or less in a straight line.

Drill 3/8″ (9.5 mm) holes more or less in a straight line about 3/4″ apart

Exit holes...I need a drill press!

I hope the bees don’t have a measuring tape…someone can’t drill straight!

I didn't want to buy a longer bit, so I started with the top one and ended with the blade bit.  Don't start with the blade type...it'll take a long time.

I didn’t want to buy a longer bit, so I started with the top one and ended with the blade bit. Don’t start with the blade type…it’ll take forever to drill.

Assembly on kitchen table.  My wife is knitting a bee hive hat...how appropriate.

Assembly on kitchen table. My wife is knitting a
bee hive hat…how appropriate.

The rolled up parchment paper liners are sticking out.  They will be bent flat when the 1/2″ piece of sawed-off wood is fastened back on to seal it off.  See Dave’s Bees excellent video.

Mason Bee Nests in place

March 23…Mason Bee Nests in place with launch box taped securely

Grass trimmed under nests

Grass trimmed under nests to make bees more visible if they fall below.  The drones (males) will emerge first and wait for the females.  Sometimes the females will emerge and fall to the ground.

After about a week of waiting we start to see some activity…

One shy bee showing

One shy bee showing in 2nd row 2nd from left

Mason bee entering straw tube in wood block

March 30…Mason bee entering straw tube in wood block

Keeping mason bees is one of the easiest method of beekeeping.  Some interesting facts…200 mason bees will outpollinate 2000 honey bees.  Mason bees rarely sting.

A female Orchard Mason Bee visits more than 1,600 blossoms per day for about 45 days!    Will fly in temperatures as low as 50 F. (10 C), and is not bothered by rain.

In orchards with non-Apis bees, the foraging behaviour of honey bees changed and the pollination effectiveness of a single honey bee visit was greater than in orchards where non-Apis bees were absent

Mason Mud tray.  Since the Masons use mud to close up their tubes, it's recommended that you provide a nearby source of mud.

Mason Mud tray. Since the Masons use mud to close up their tubes, it’s recommended that you provide a nearby source of mud.

Six tubes filled already.

Six tubes filled already.

Mason bee update…looking for mites.

Mason bee launch, 2014

Read Full Post »